
Hoop Earrings
Hoops are timeless classics, and this simple design is easy to make but so versatile. You can create small, medium, large or even extra-large size hoop earrings with this guide.

Tools
- Tape measure or ruler, and a Sharpie
- Flush cutters
- Nylon pliers, half round pliers, and needle nose pliers
- Ring holder or other clamp
- Sandpaper and binding wire
Materials: Small/Medium/Large Earrings
Ear Wire (x2, 20 ga. round): 6cm / 8cm / 10cm
Square Sides (x4, square): 5cm 22ga. / 7cm 22ga. / 9cm 20ga.
Rib (x2, 1/2 round): 6cm + a smidge 20 ga / 7cm + a smidge 20ga. / 9cm + a smidge 18 ga. or 16 ga.
Rib Sides (x4, 1/2 round): 6cm 22 ga. / 7cm 22 ga. / 9cm 20 ga.
Wrap (x2, 1/2 round): 16” 22 ga. / 20” 22 ga. / 24” 20 ga.
Number of Wrap Patterns: 6 / 8 / 8*
*Add 2” to the wrap wire length and 1/2 cm to all other measurements for each extra wrap pattern you wish to add to create larger hoops.
Making the Earrings
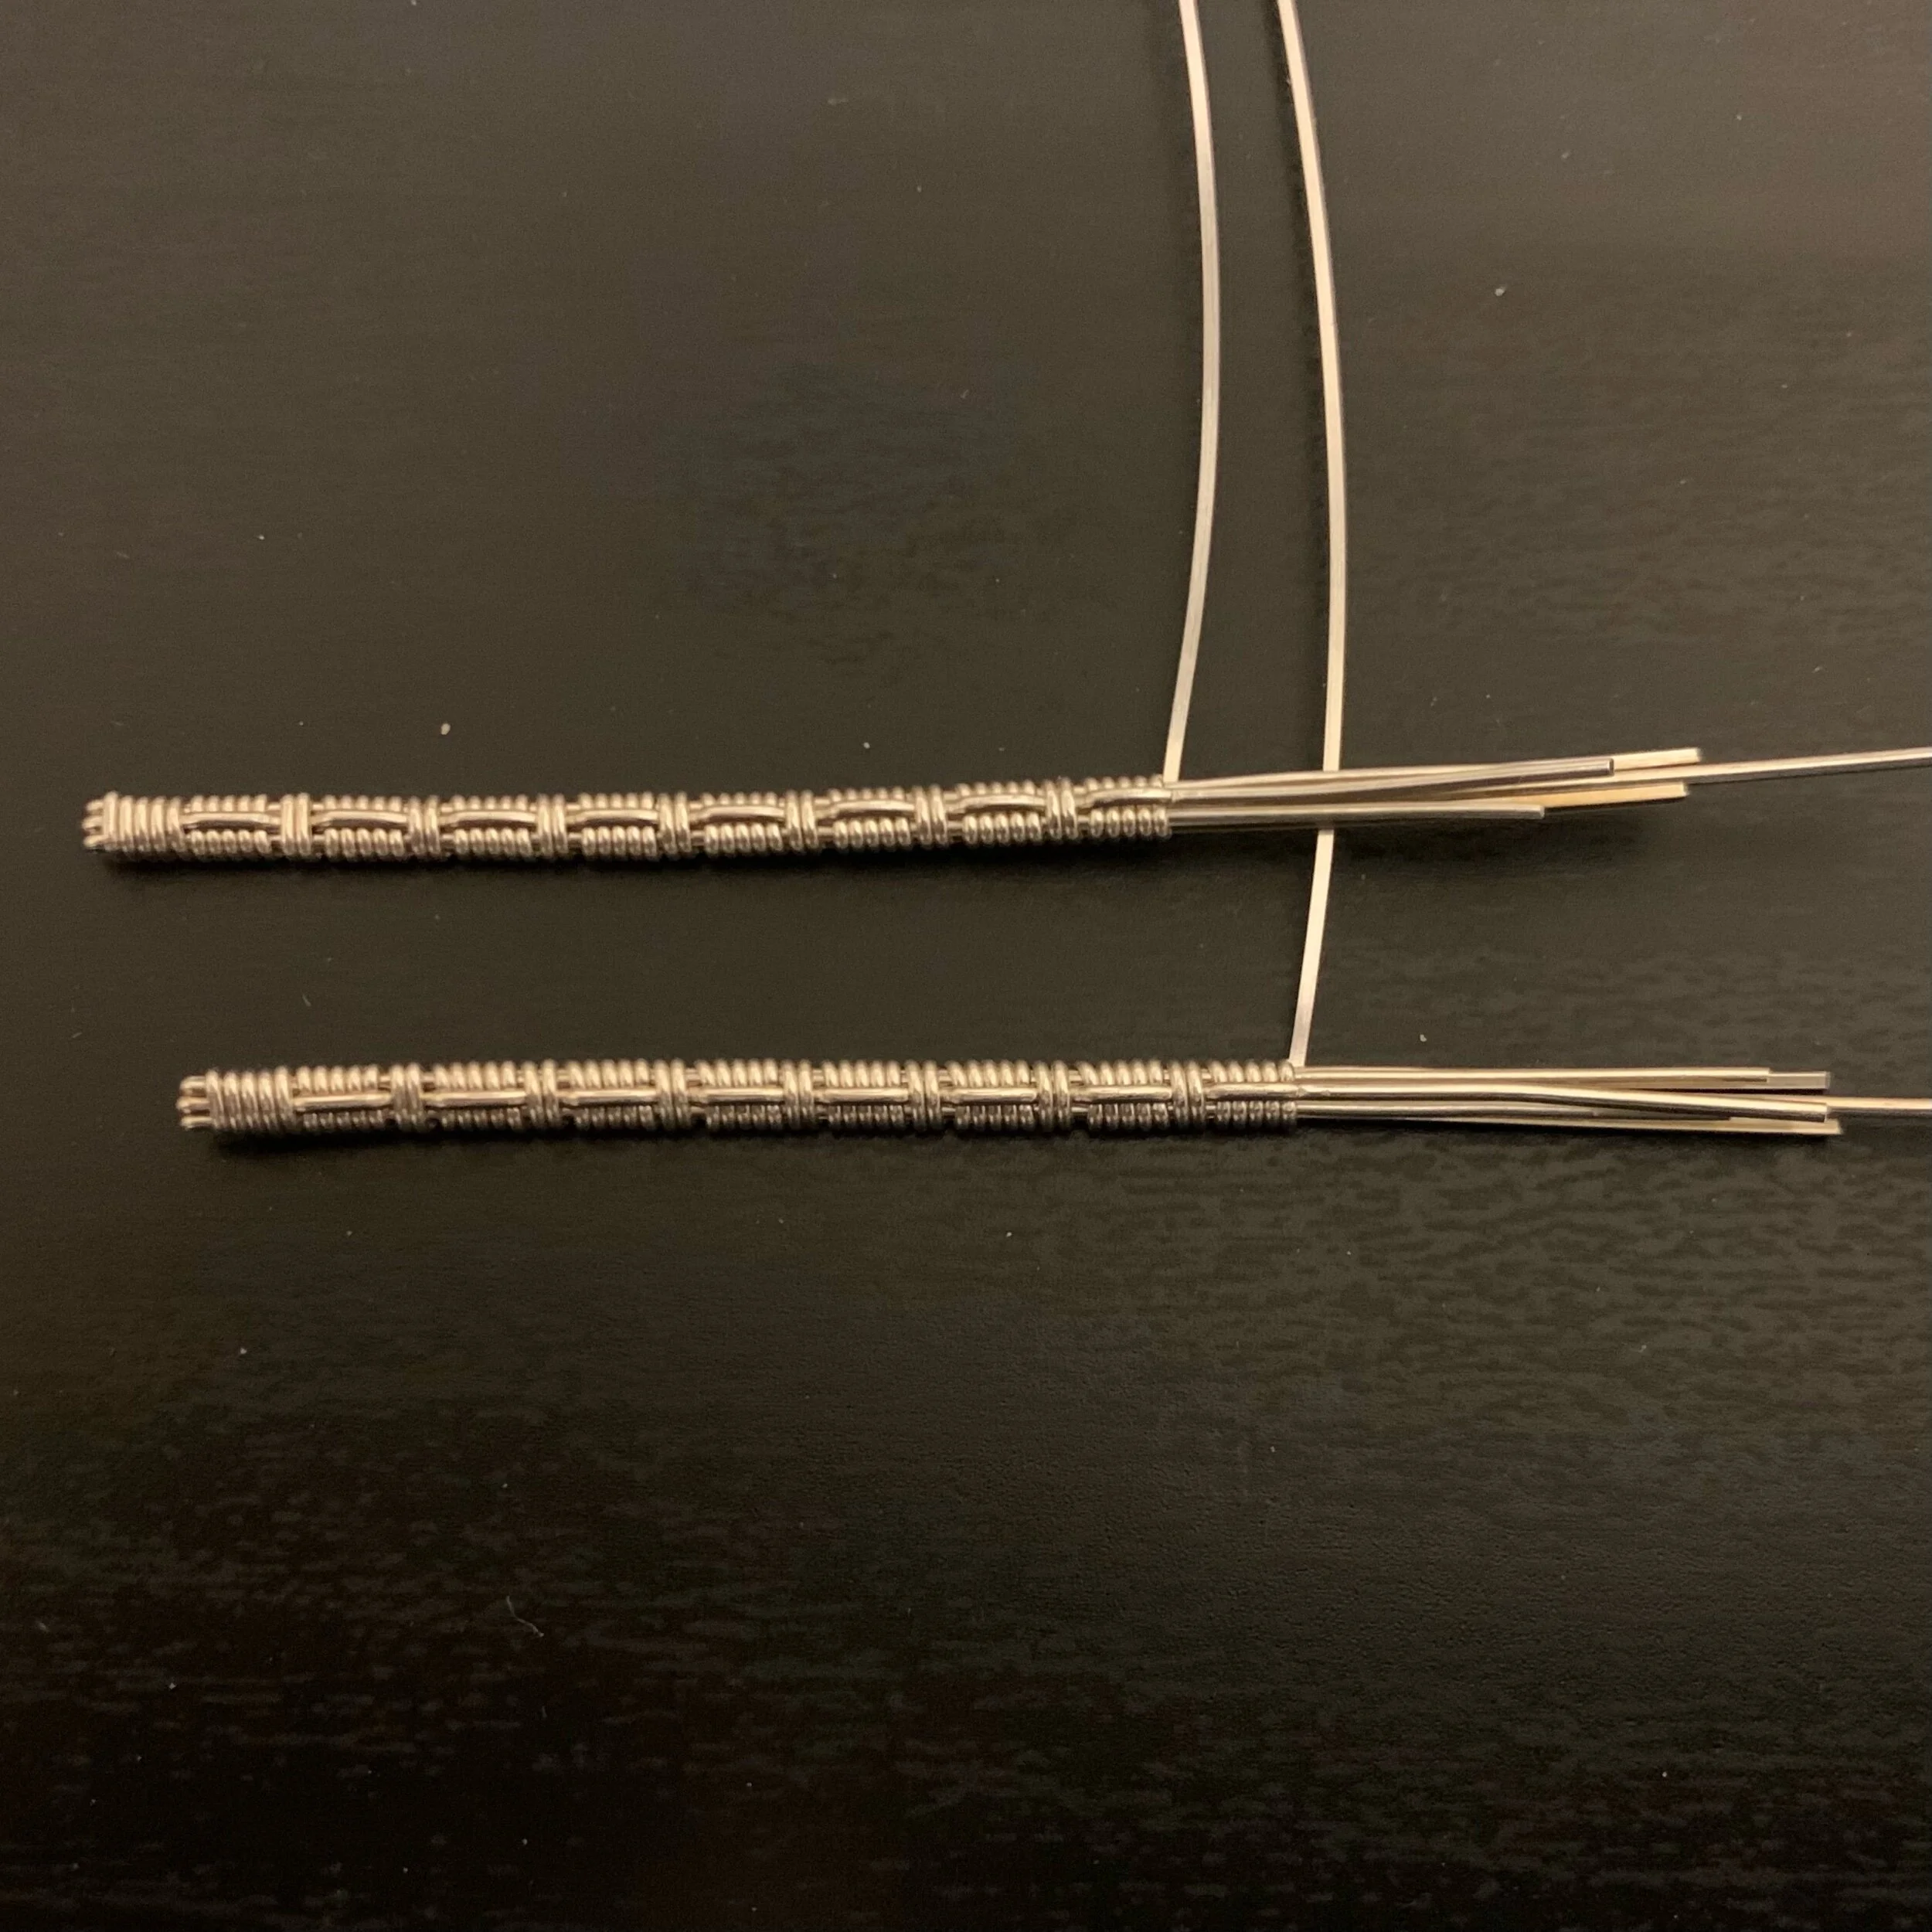
Bind the Ear Wire between two Square Side wires to form the base of the earring. The ear wire is longer than the square sides, and the entire extra length should stick out one end, leaving the three wires even at one end of the bundle.
Make a mark about 12mm from the even end of the bundle.
Next, arrange 3 half-round wires, a Rib in the middle and two Rib Sides on either side, and place them on top of the base wires with some overhang off the end.
Clamp all six wires together at the 12mm mark.
With about 4” of tail, wrap the wrap wire 3 times around all 6 wires to start the wrap.


6. Lift the rib wire up 90 degrees from the base and wrap 5 more times. Bend it down and wrap twice. Continue the pattern until you have n-1 wrap patterns (so 5 for a small hoop earring or 7 for medium and large. 7 for medium pictured in this tutorial). End with 5 wraps under the rib.
7. Now you’ll finish the bottom of the hoop, which is the end that was originally clamped. If you still have three wraps at the bottom, unwrap once to ensure you’re continuing the 5x2 pattern. Lift the rib wire up 90 degrees.
8. Wrap 5x under the rib wire, continuing the pattern.
9. Press the rib wire down. Don’t wrap twice over top yet.
10. Flip the piece over to measure and mark 4mm past the end of the last wrap.
11. Trim the three base wires at your mark.
12. Fold your three half-round wires over the trimmed end and press them down with pliers.
13. Trim the three half-rounds. The ends should not extend past the last wrap that is already in place.
14. Wrap five times around all wires.
15. Trim the wrap wire at the back of the piece and press down.
16. Repeat for both earrings.


17. Starting at the bottom (finished end) of the earring and working your way up, use half-round pliers to form the hoop shape. Do this slowly. Do both earrings at this point and ensure that their shapes match each other. Shaping the earring at this point in the process allows the wires to shift into place before you finish the top of the earrings. Be careful to keep the design square during bending. Don’t let the decorative rib wire slide to one side or the other; try to keep it right in the middle.
18. Now you’ll finish the top of the earring. From the underside of the earring, measure and mark 3mm from the last wrap.
19. Trim only the two square side wires at that marked location.
20. Bend the two rib sides over the trimmed square wires.
21. Flatten and trim the rib sides.
22. On the front side of the earring, flatten the rib wire down.
23. Trim the rib wire to just shorter than the folded-over rib sides.
24. Wrap 3-4 times around all wires. Just make sure it’s the same number of wraps on both earrings.
25. Trim the wrap wire on the underside of the earring and flatten. Repeat for both earrings. They should look mostly like earrings by now.


26. Now measure 1.5-2cm for the ear wire.
27. Trim to length.
28. Sand the ends so that they are rounded and comfortable going into someone’s ears.
29. Shape the ear wire with your half-round pliers. Alternatively, you may prefer to cut the ear wire shorter and leave it straight. I prefer to curve my ear wires for comfort.
30. Your earrings are finished! I tumble my finished earrings in a rock tumbler with steel shot to harden and polish the piece.


