Seamless elements in wire wrapping add a sophistication to your work that stands out. Learn to make a faux bezel setting for cabochons that is versatile and sleek.
North Star Pendant Frame

North Star Frame
This design allows for a decorative edge, with clean wire attachments at the back of the piece. It can be scaled up or down for infinite uses.
Materials
3x 5” 20 gauge square wire
1x 9mm 20 gauge square wire with flush cut ends
1x 35” 24 gauge 1/2 round wire
6x 6” 30 gauge round wire, braided together
1x 12” 22 gauge 1/2 round wire
1x 4” 22 gauge 1/2 round wire
Tools
Flush cutters
Stepped bail-making pliers
Needle-nose pliers
Flat-nose pliers
Half-round pliers
Nylon-tipped pliers
(optional) Round mandrel
Small file
Watch the Complete Process
Detailed Steps
1) If applicable: braid the 30ga to 2.5-3”. This step is not shown in the video.
2) Mark the center of the 3 lengths of 20 gauge square wire. Also mark 9/16” to the left of the center mark.
Video timestamp: 3:15 - Mark frame wires
3) Pull the middle 20 gauge wire out to the right, so the 9/16” mark on that wire lines up with the center marks on the other two wires.
Video timestamp: 4:15 - Line up frame wires for wrapping
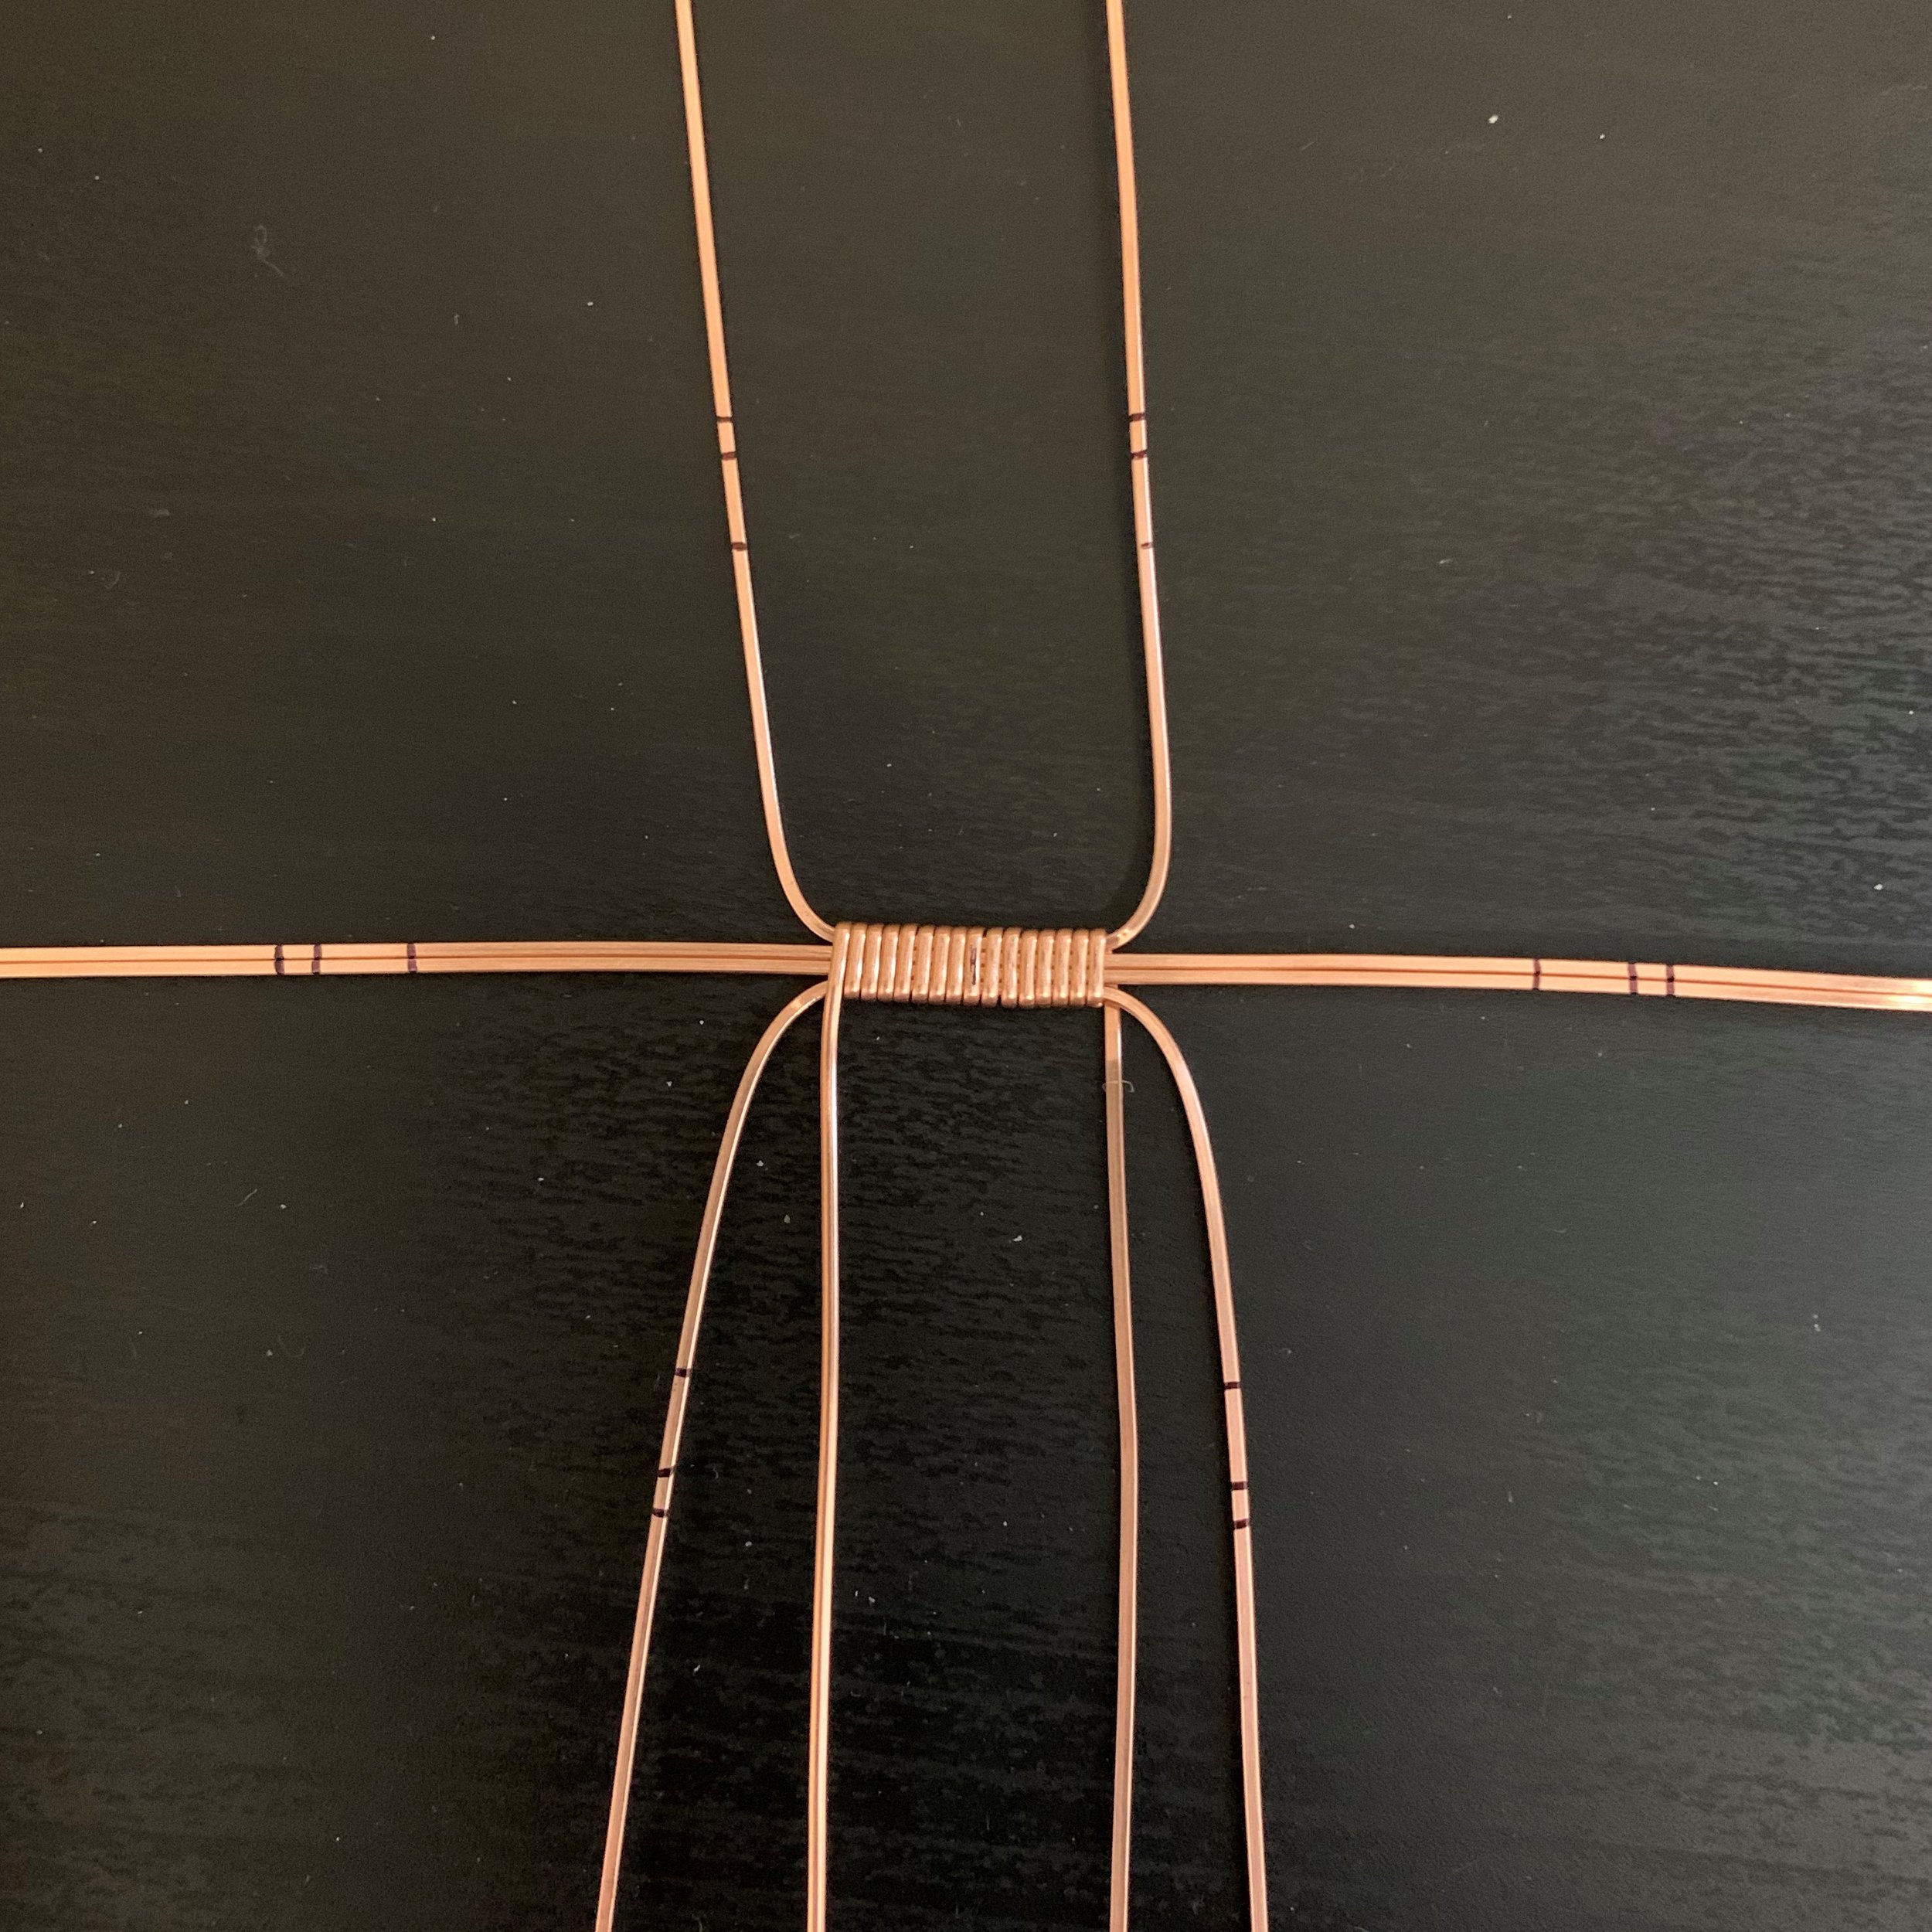
4) Use the 24 gauge 1/2 round, bent in third with the flat side of the wire toward the inside of the curve, with 12” to the left side of the bend and 23” to the right side. Start wrapping around the 20 gauge square wires, starting at the 9/16” mark left of center. Wrap 6 times around.
Video timestamp: 4:50 - Start the wrap
5) Place the braided 30 gauge element over the six wraps of 24 gauge 1/2 round.
Video timestamp: 5:35 - Place the braided element
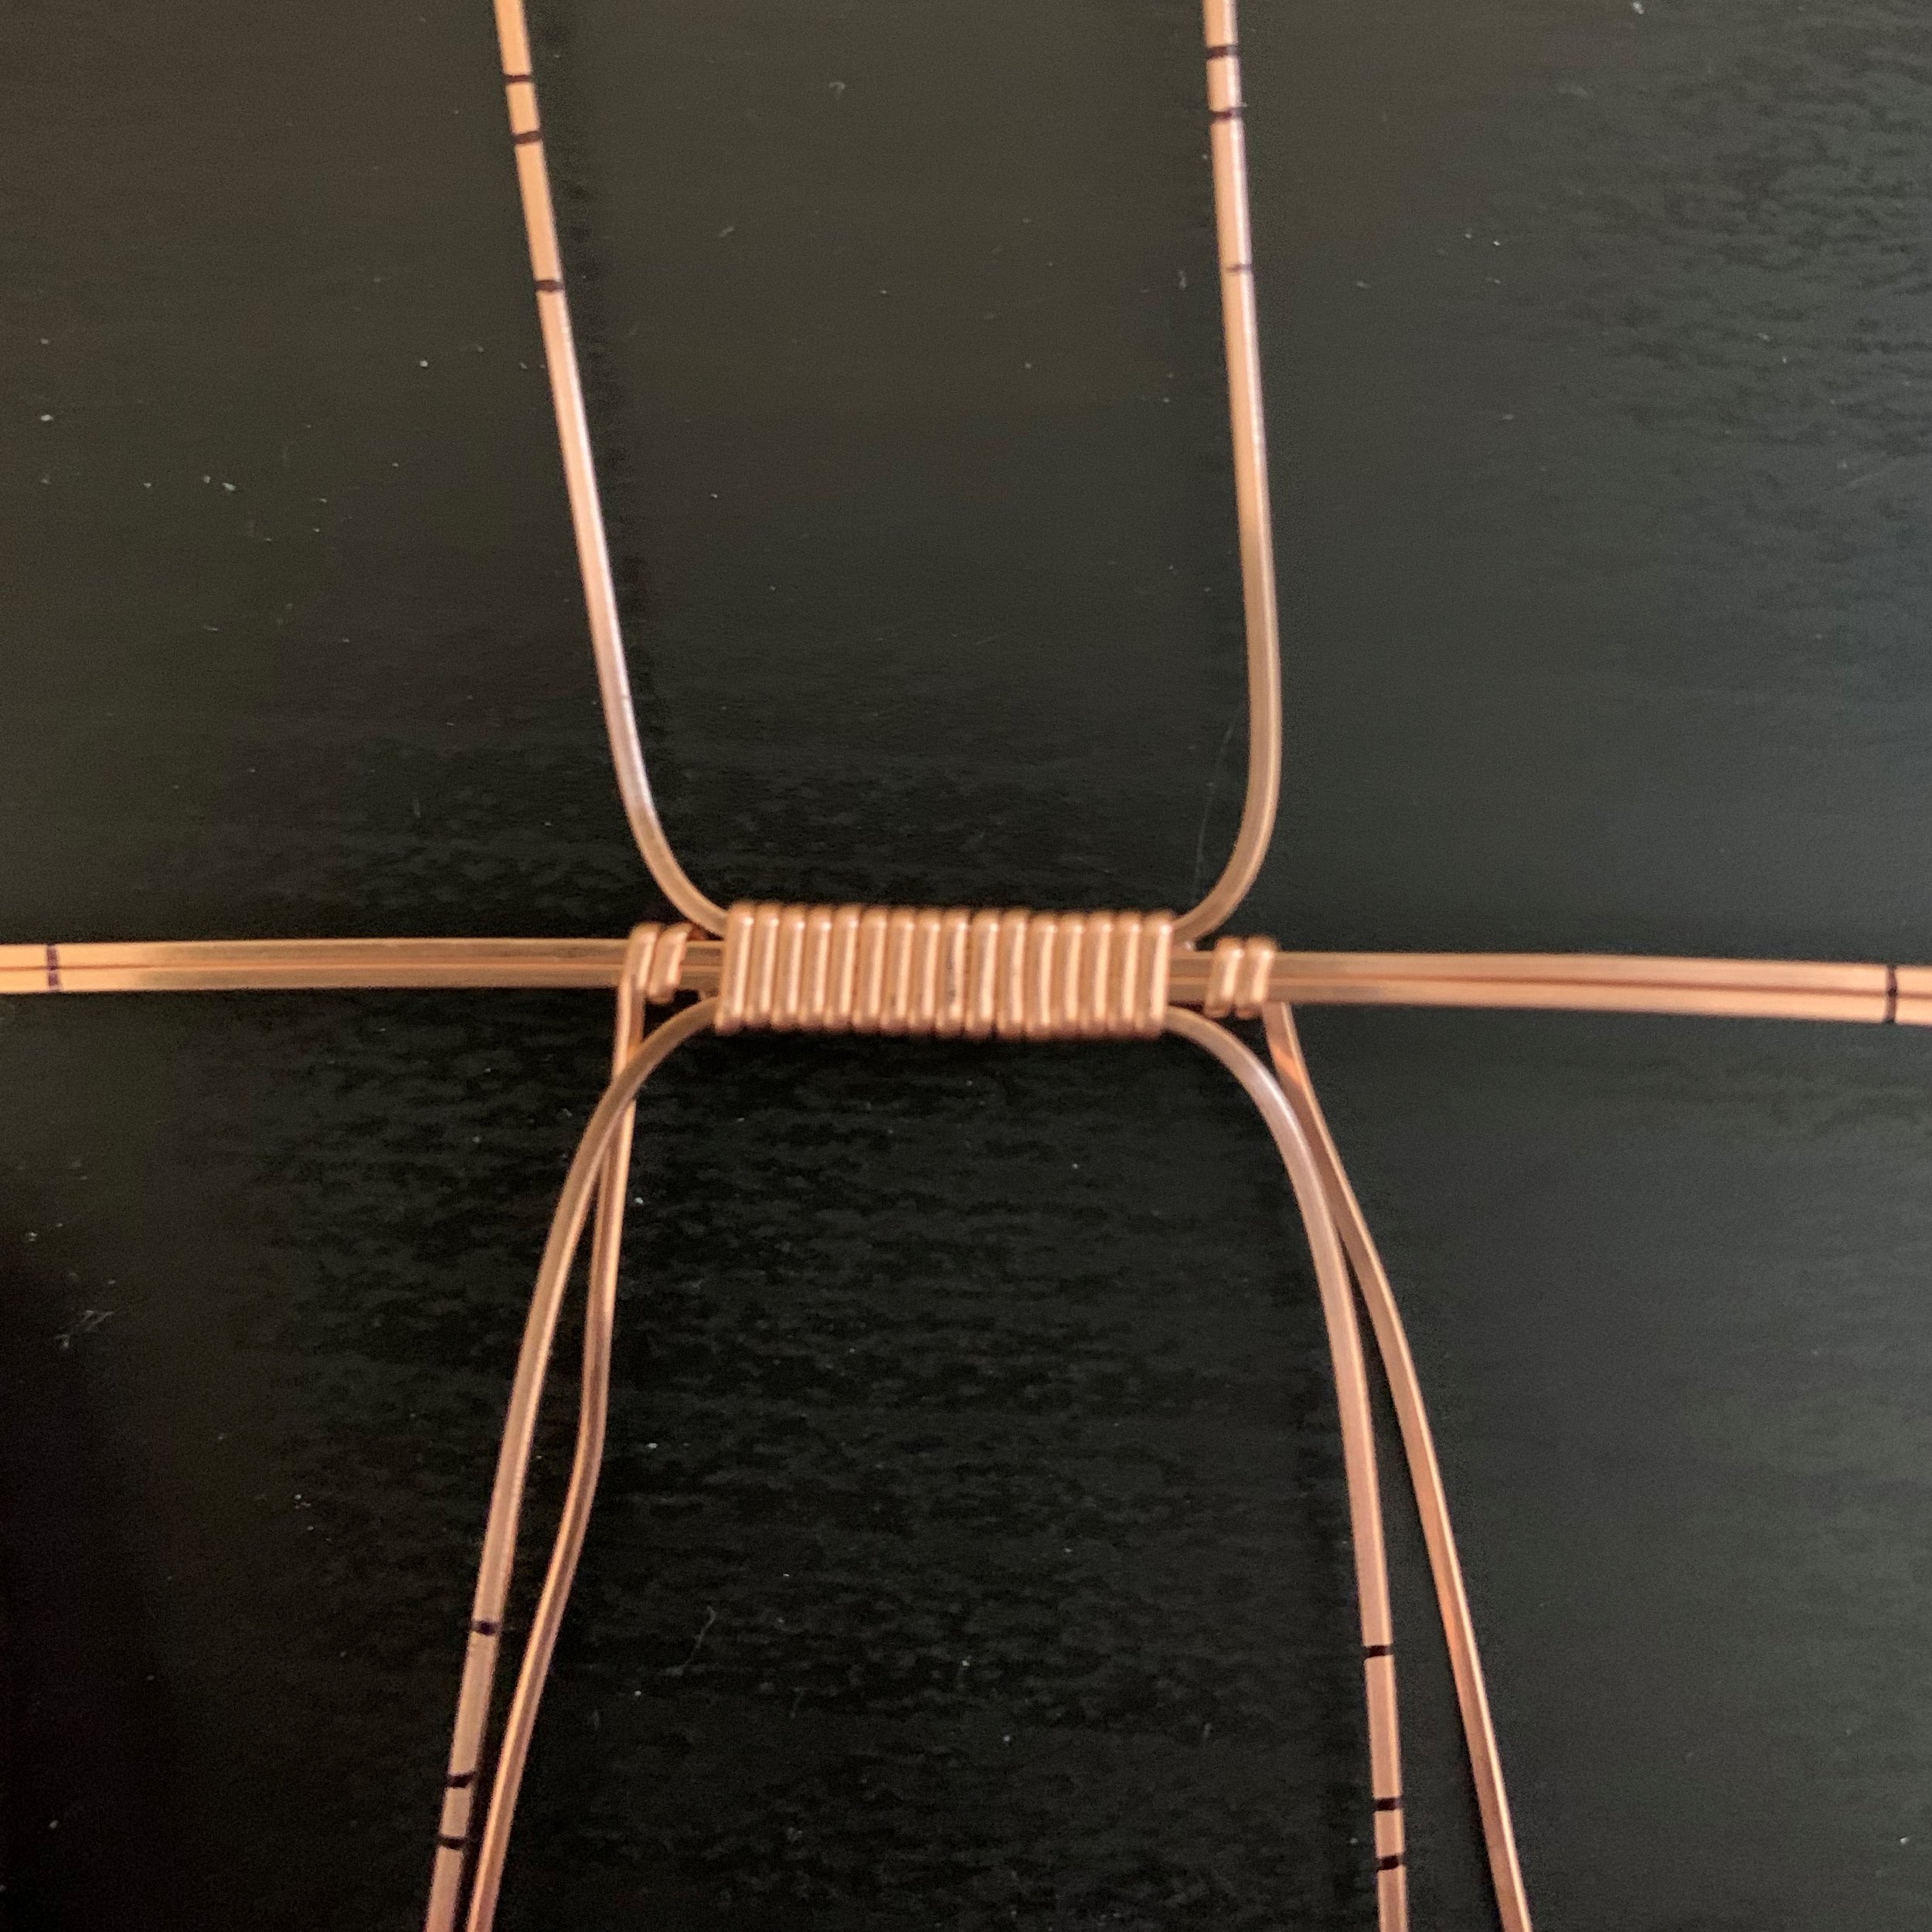
a) Wrap Left: 2x over, 6x under, 2x over
b) Wrap Right: 2x over, 6x under, 2x over
Video timestamp: 6:40 - Wrap to the left and right
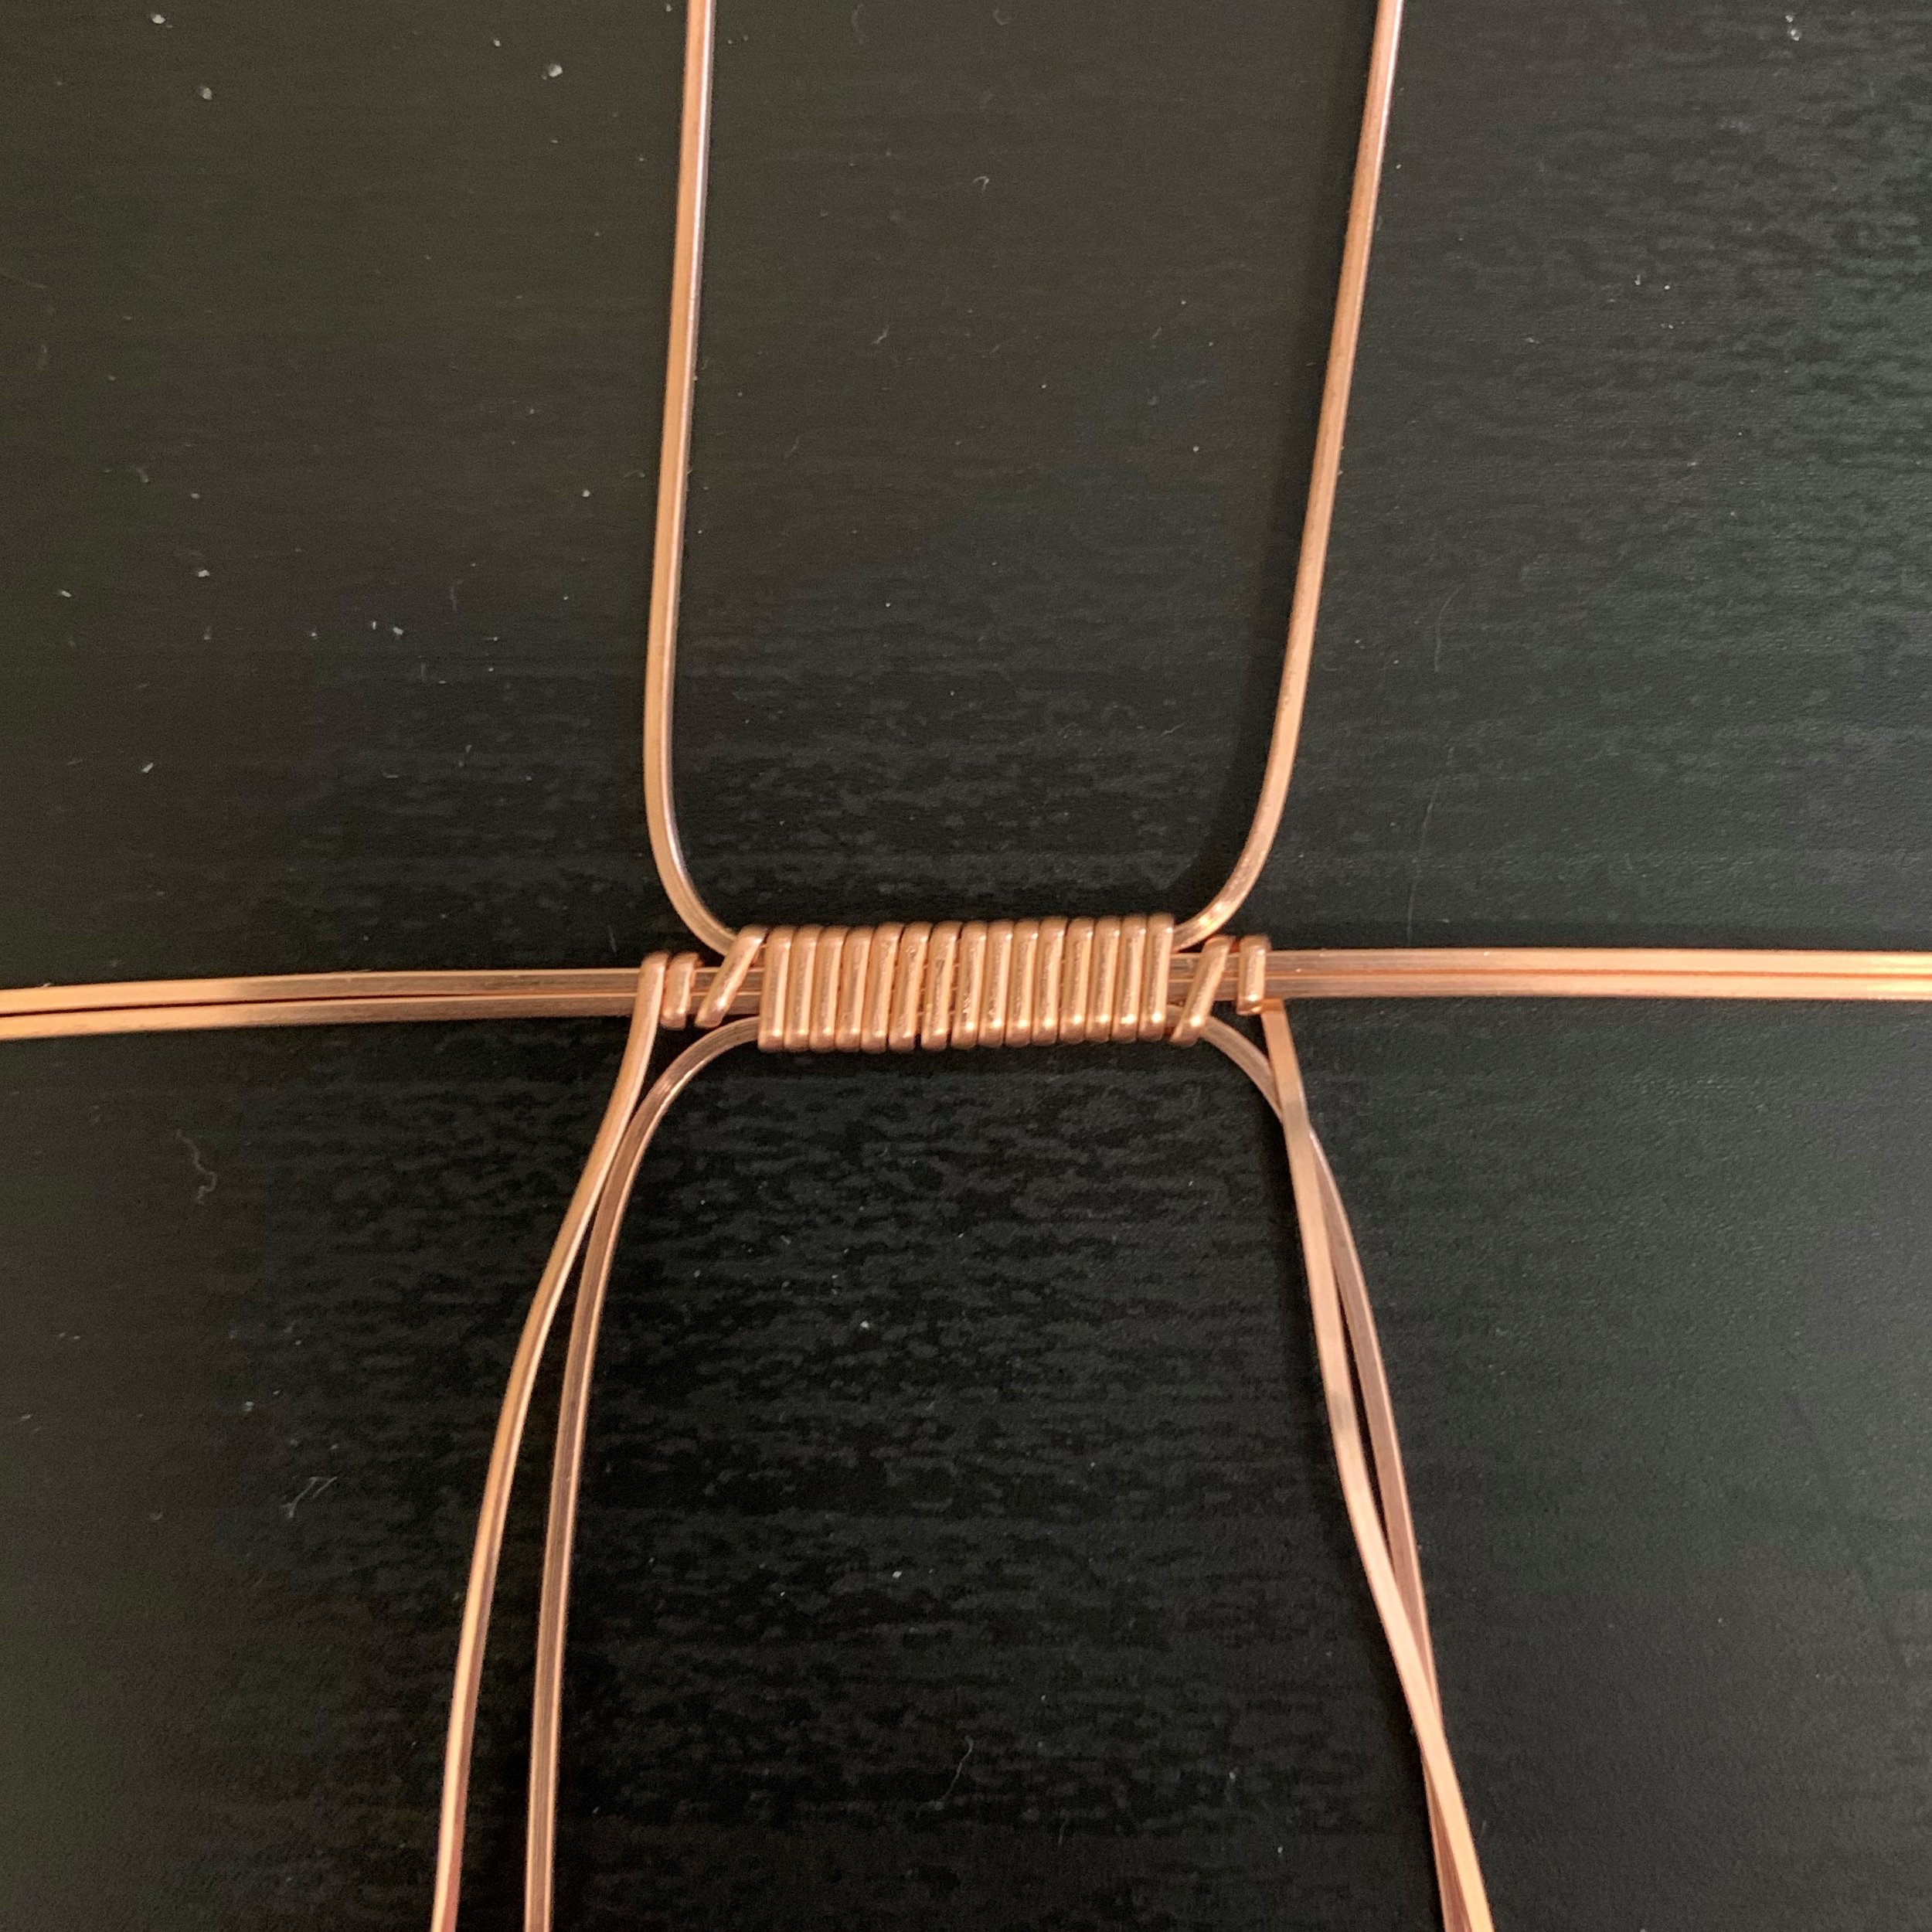
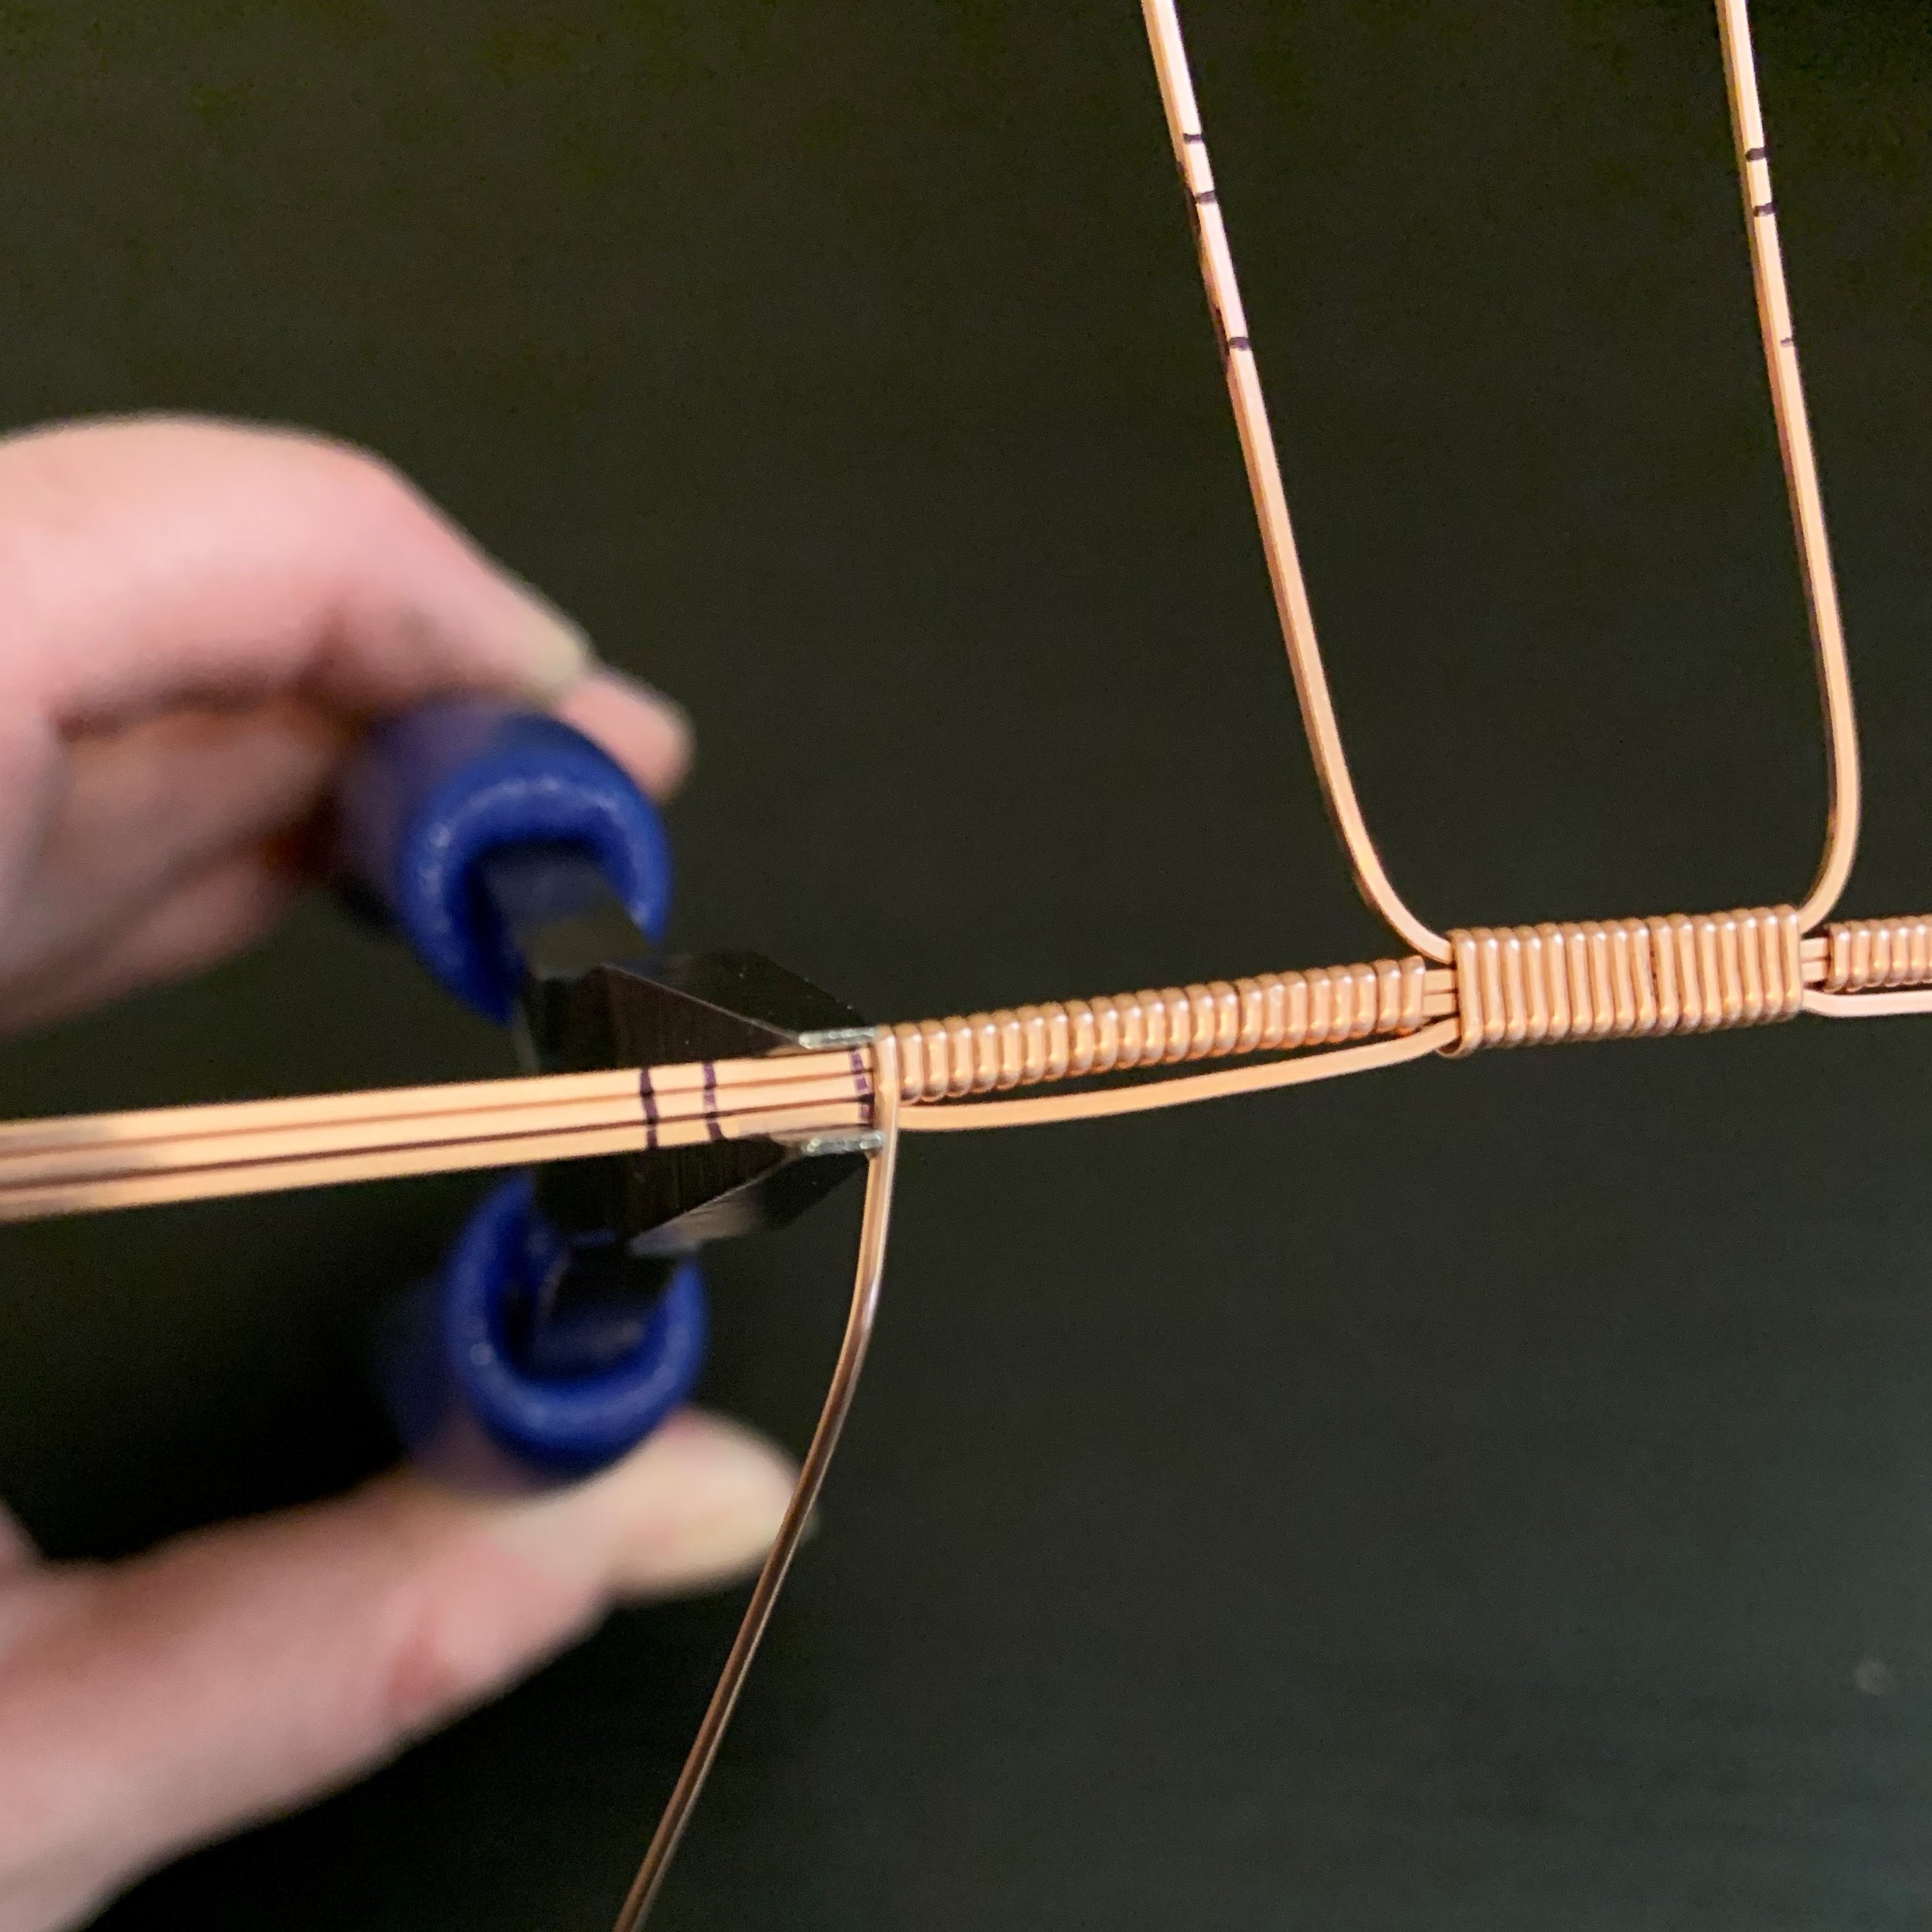
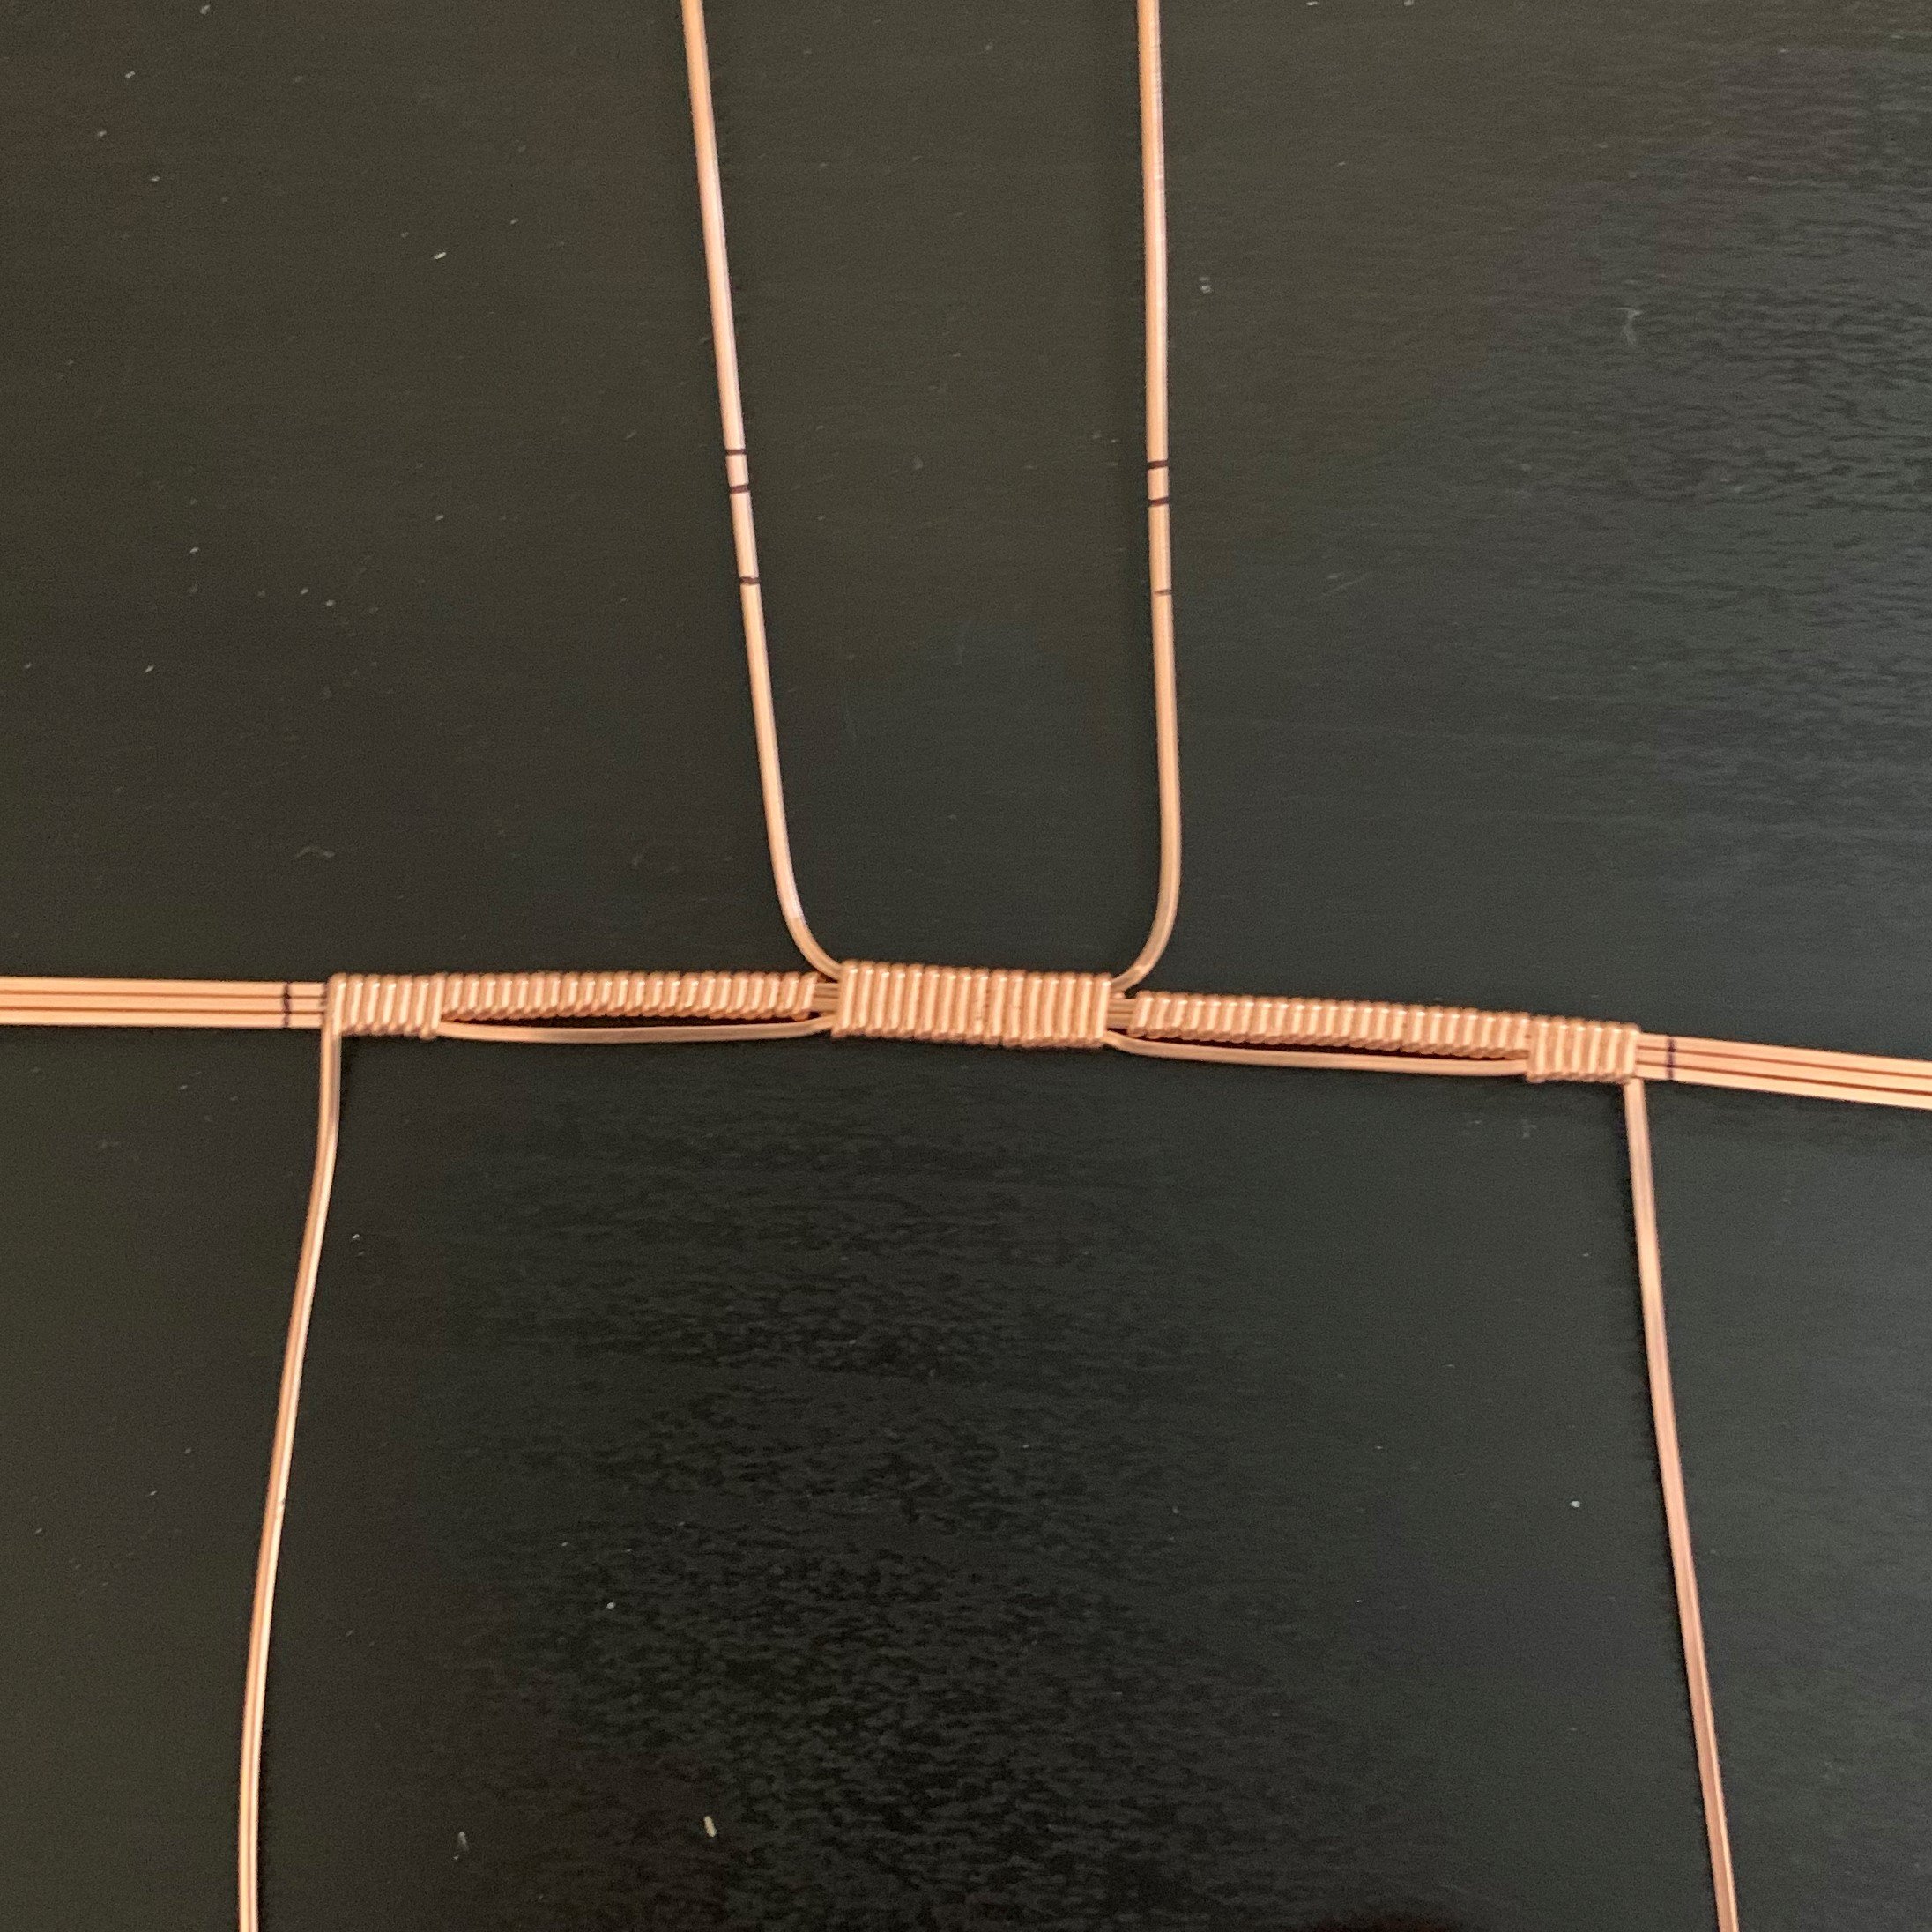
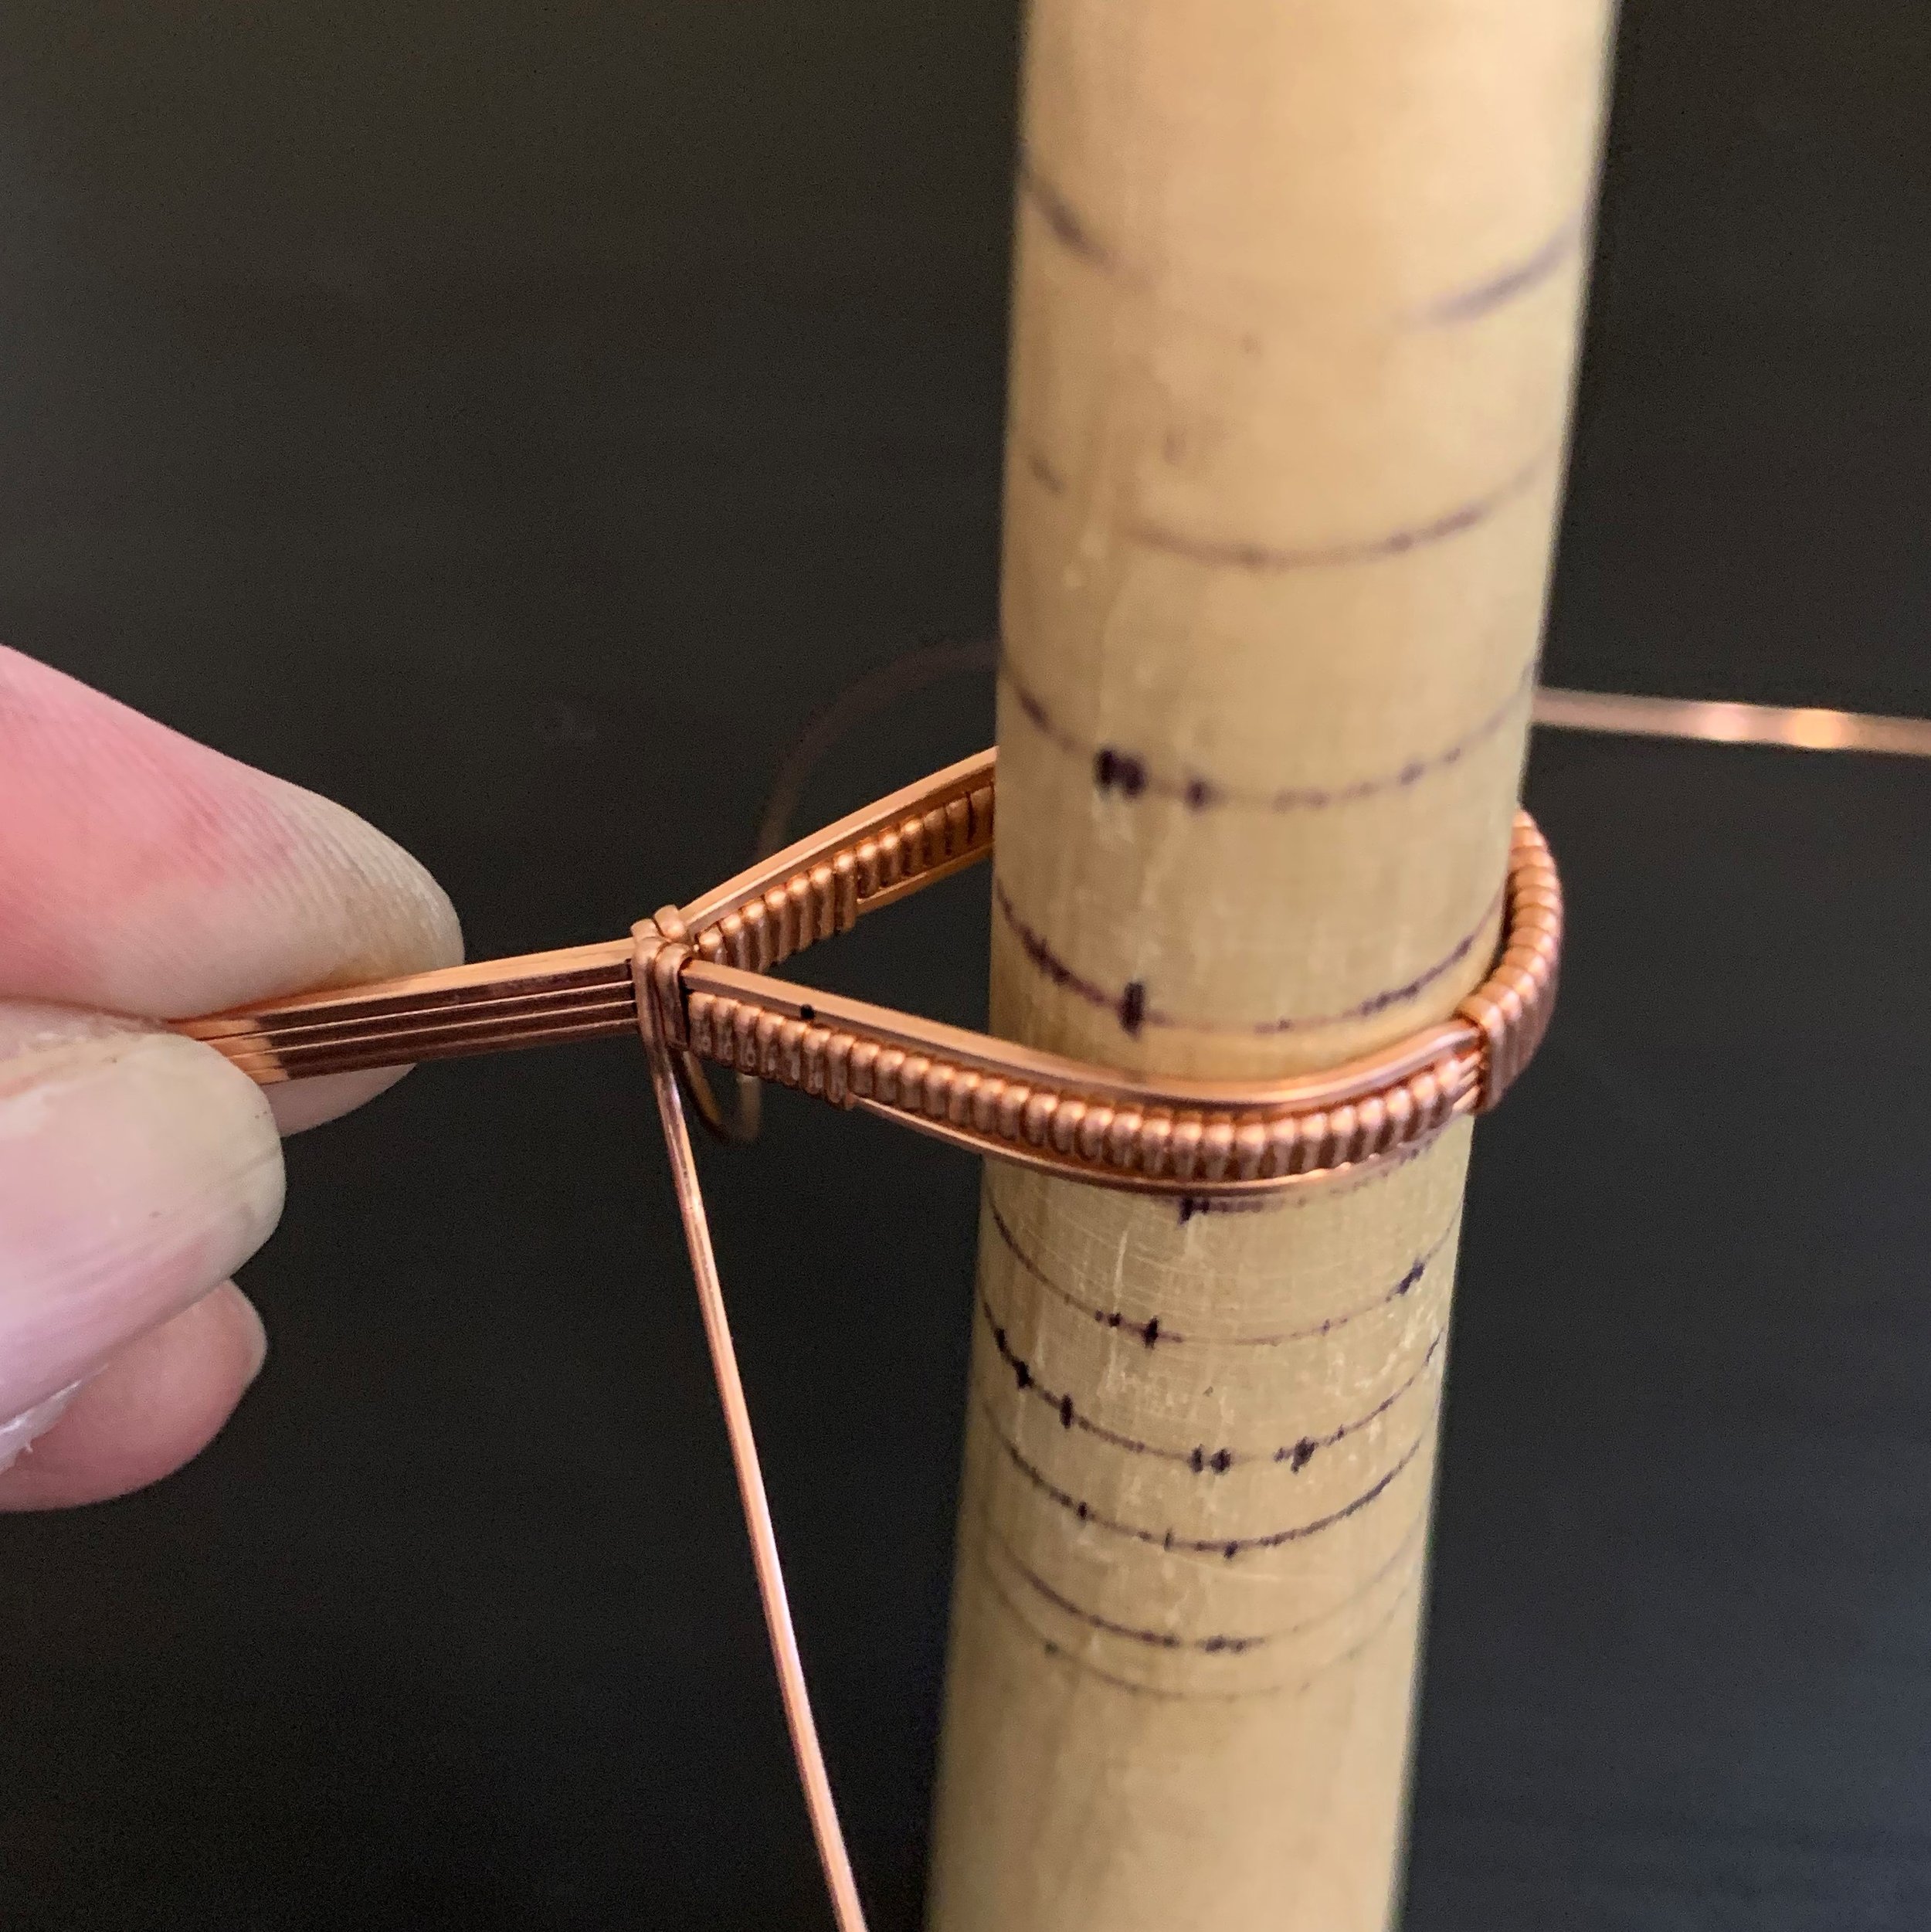
6) Bend the middle 20 gauge wire perpendicular to the inside of the frame. Insert the 9mm 20 gauge to replace it. Hot tip: use a bit of tape to make the tiny piece of wire easier to maneuver and hold in place.
a) Wrap 7x under, 2x over, 7x under
Video timestamp: 9:20 - Make the frame brace
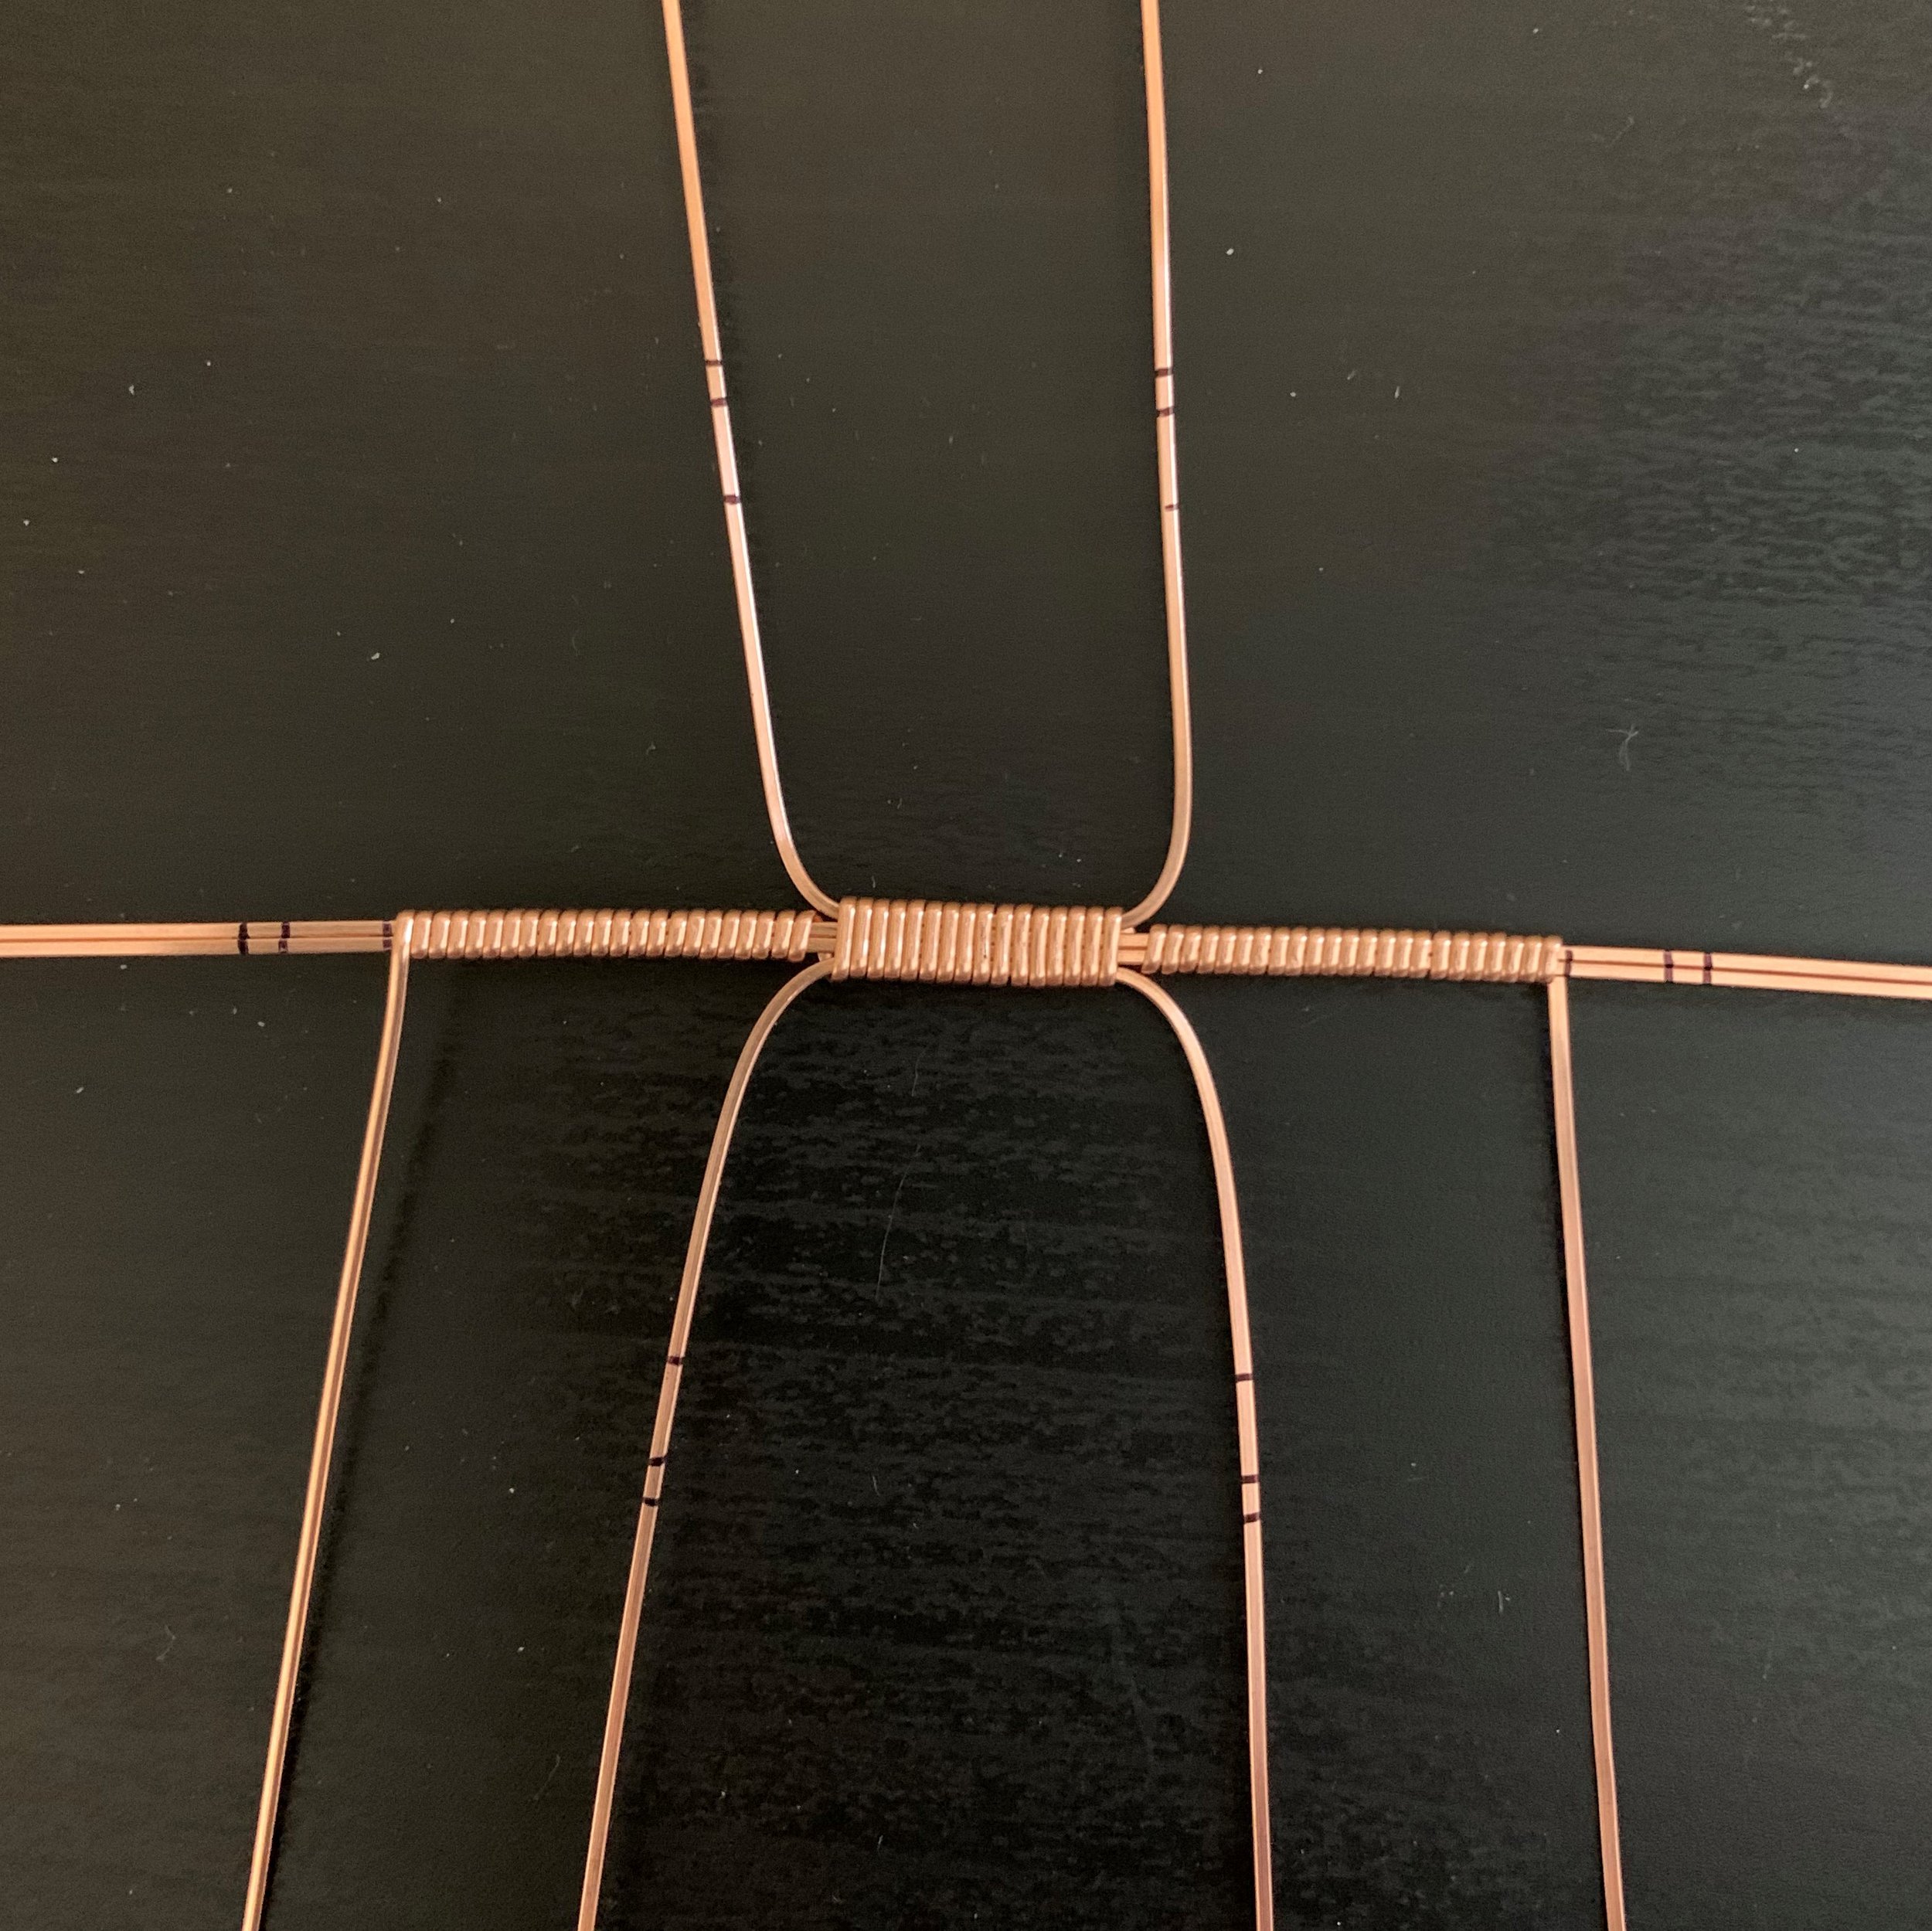
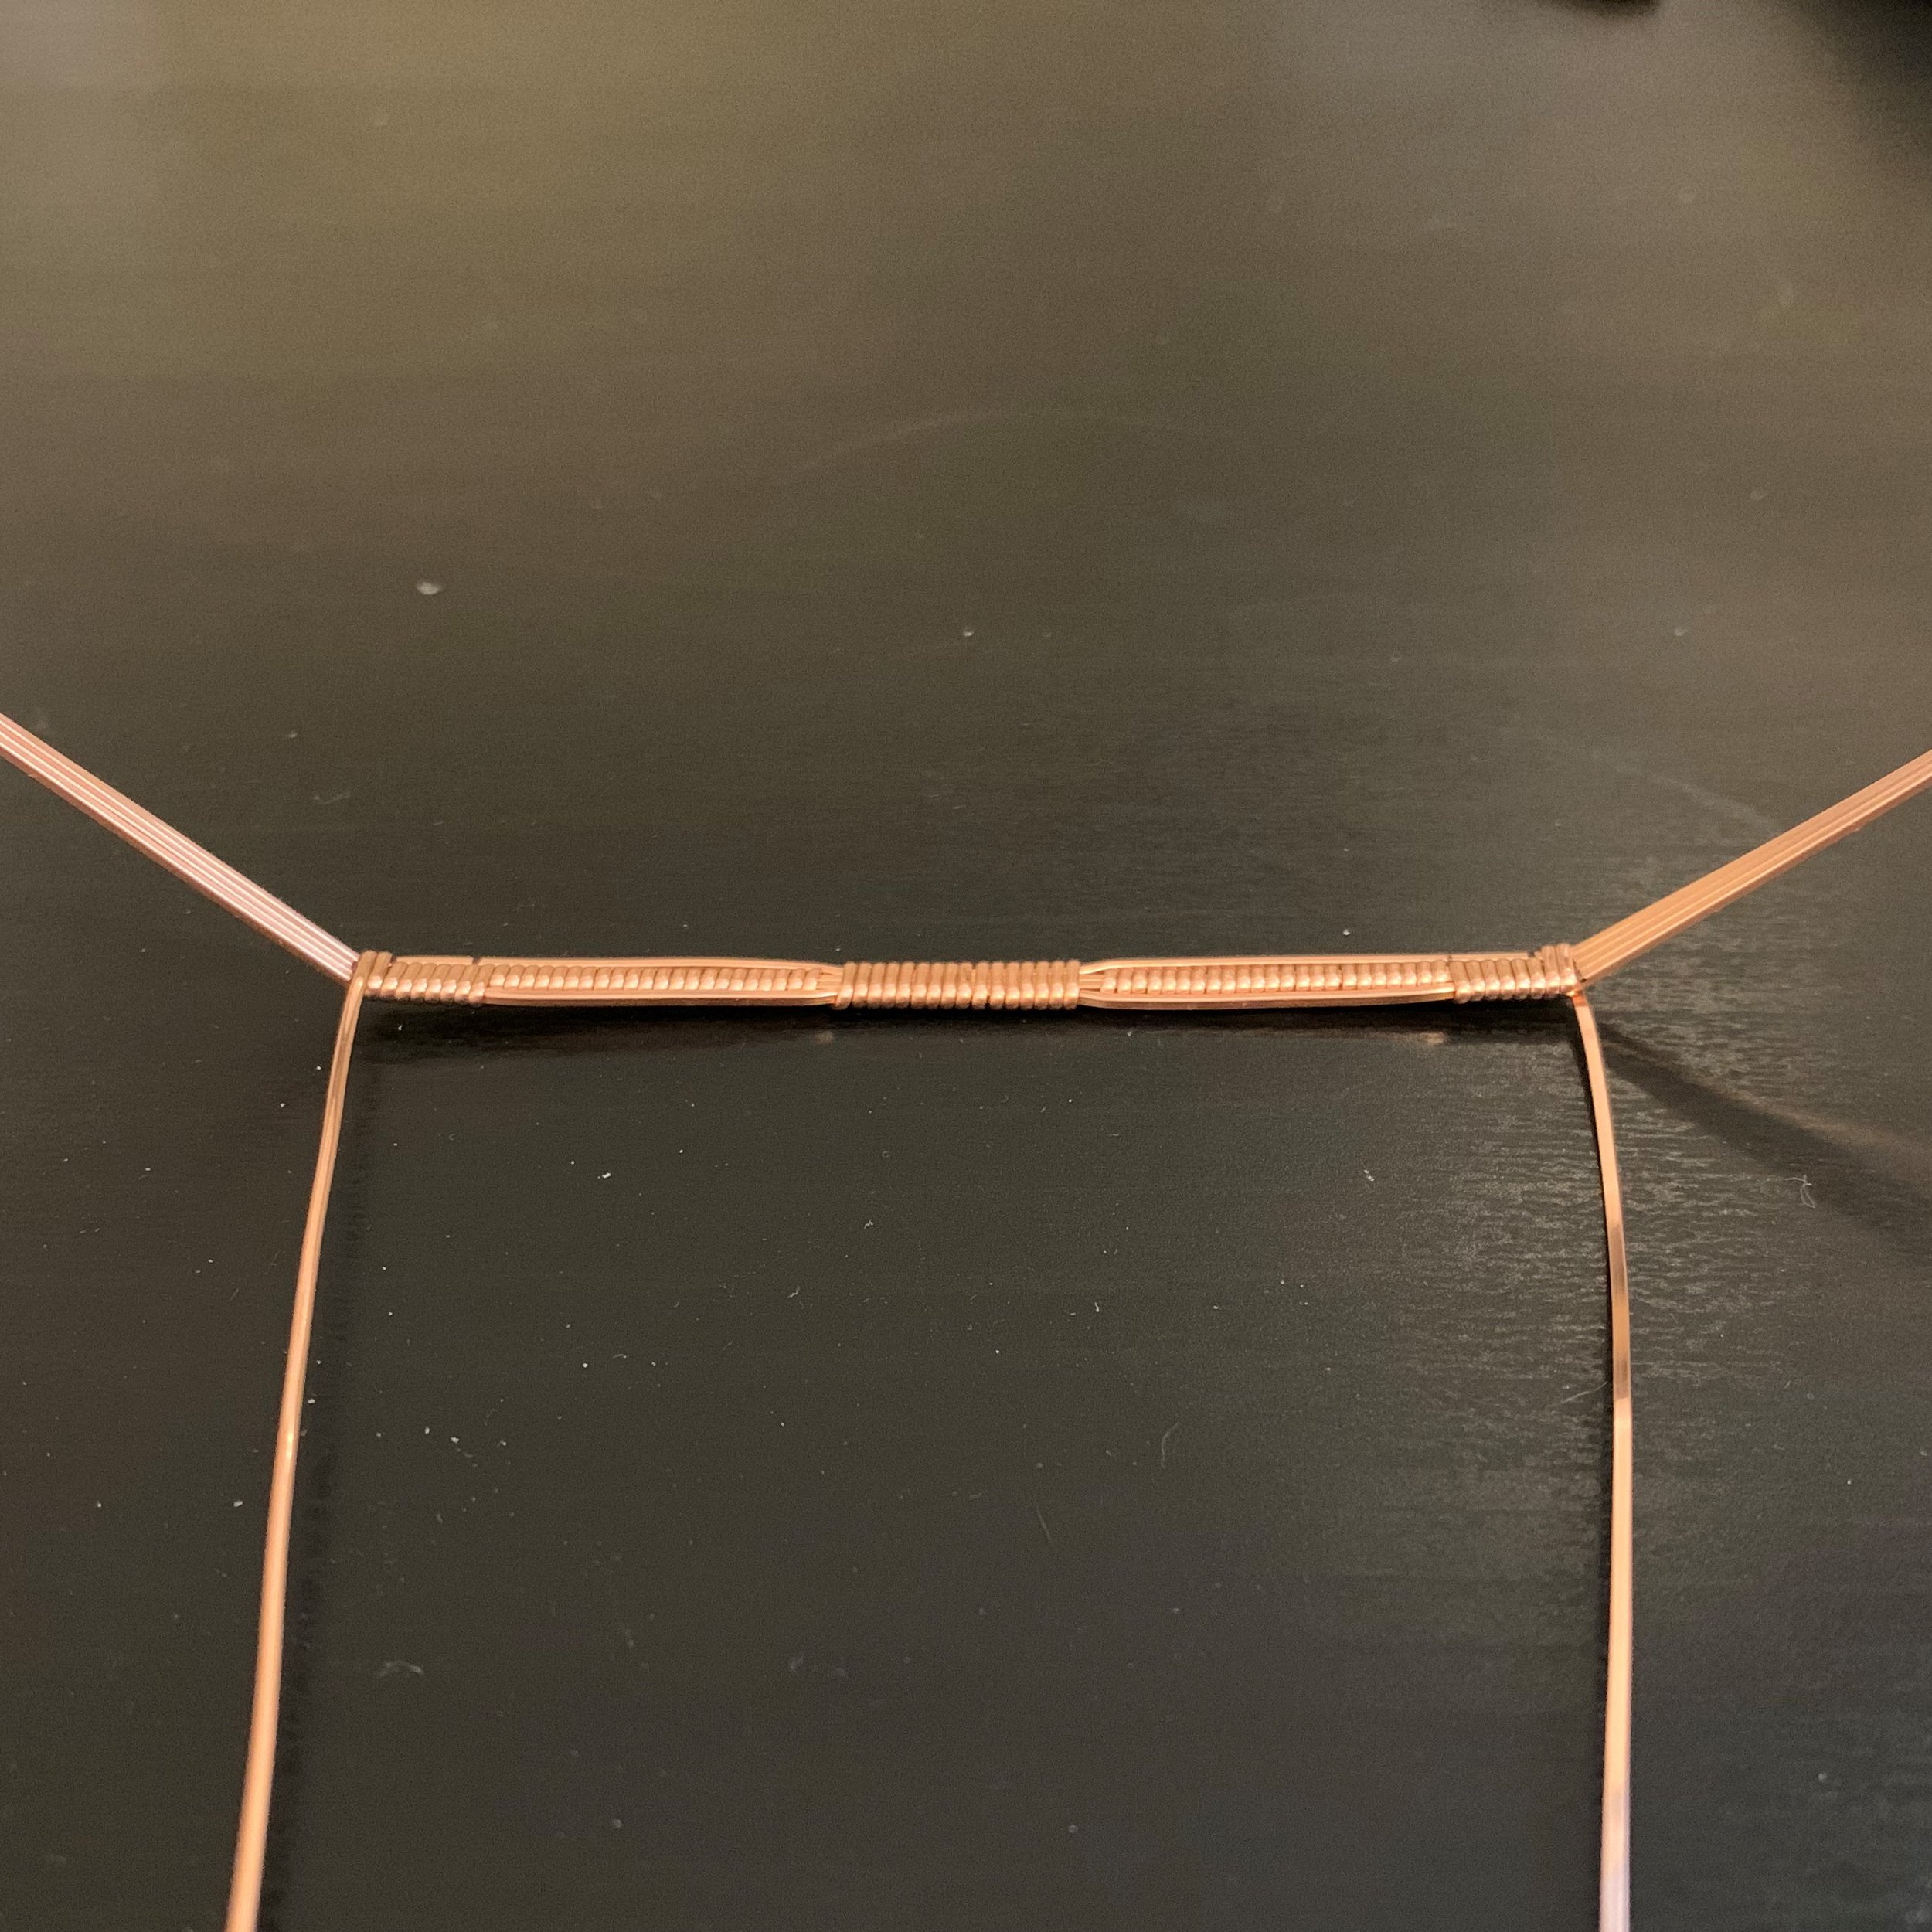
7) Bend the frame in half, bringing the center wire back in.
Video timestamp: 12:20 - Make the bottom frame bend
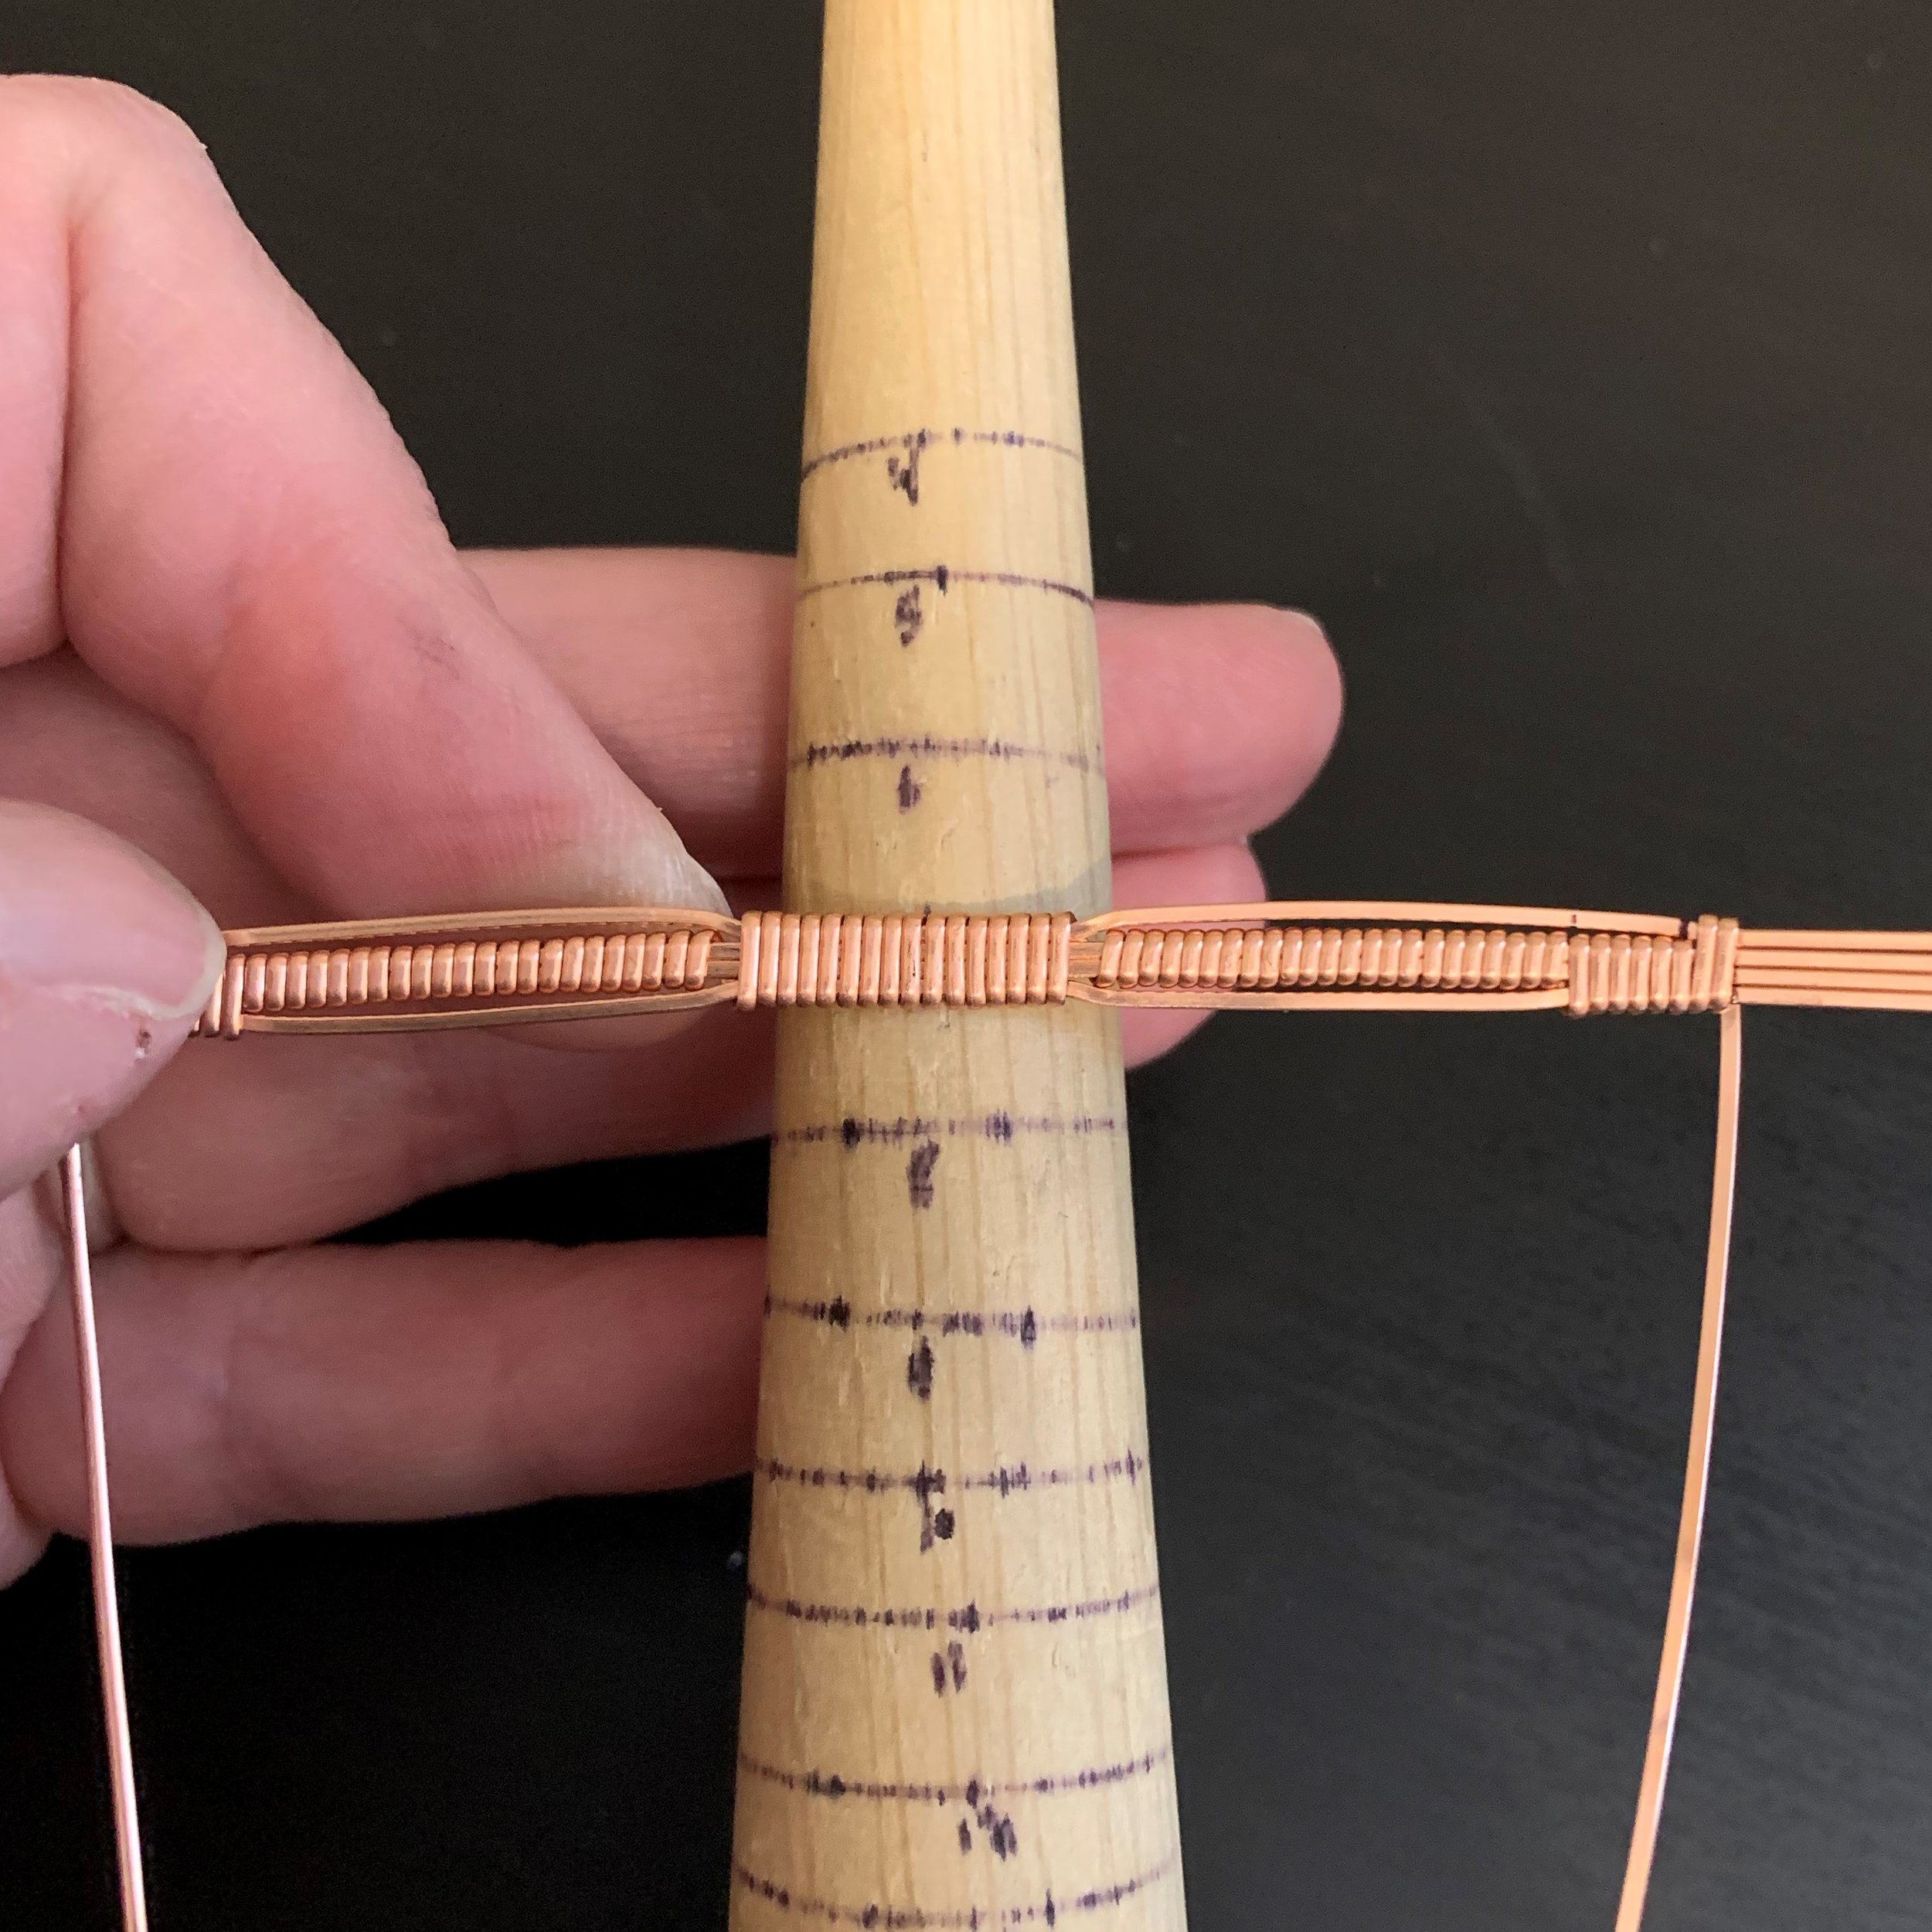
8) Wrap 2x over, 6x under, and repeat 3 times, then another 2x over, making the right side of the frame match the left side.
Video timestamp: 14:55 - Finish wrapping the frame
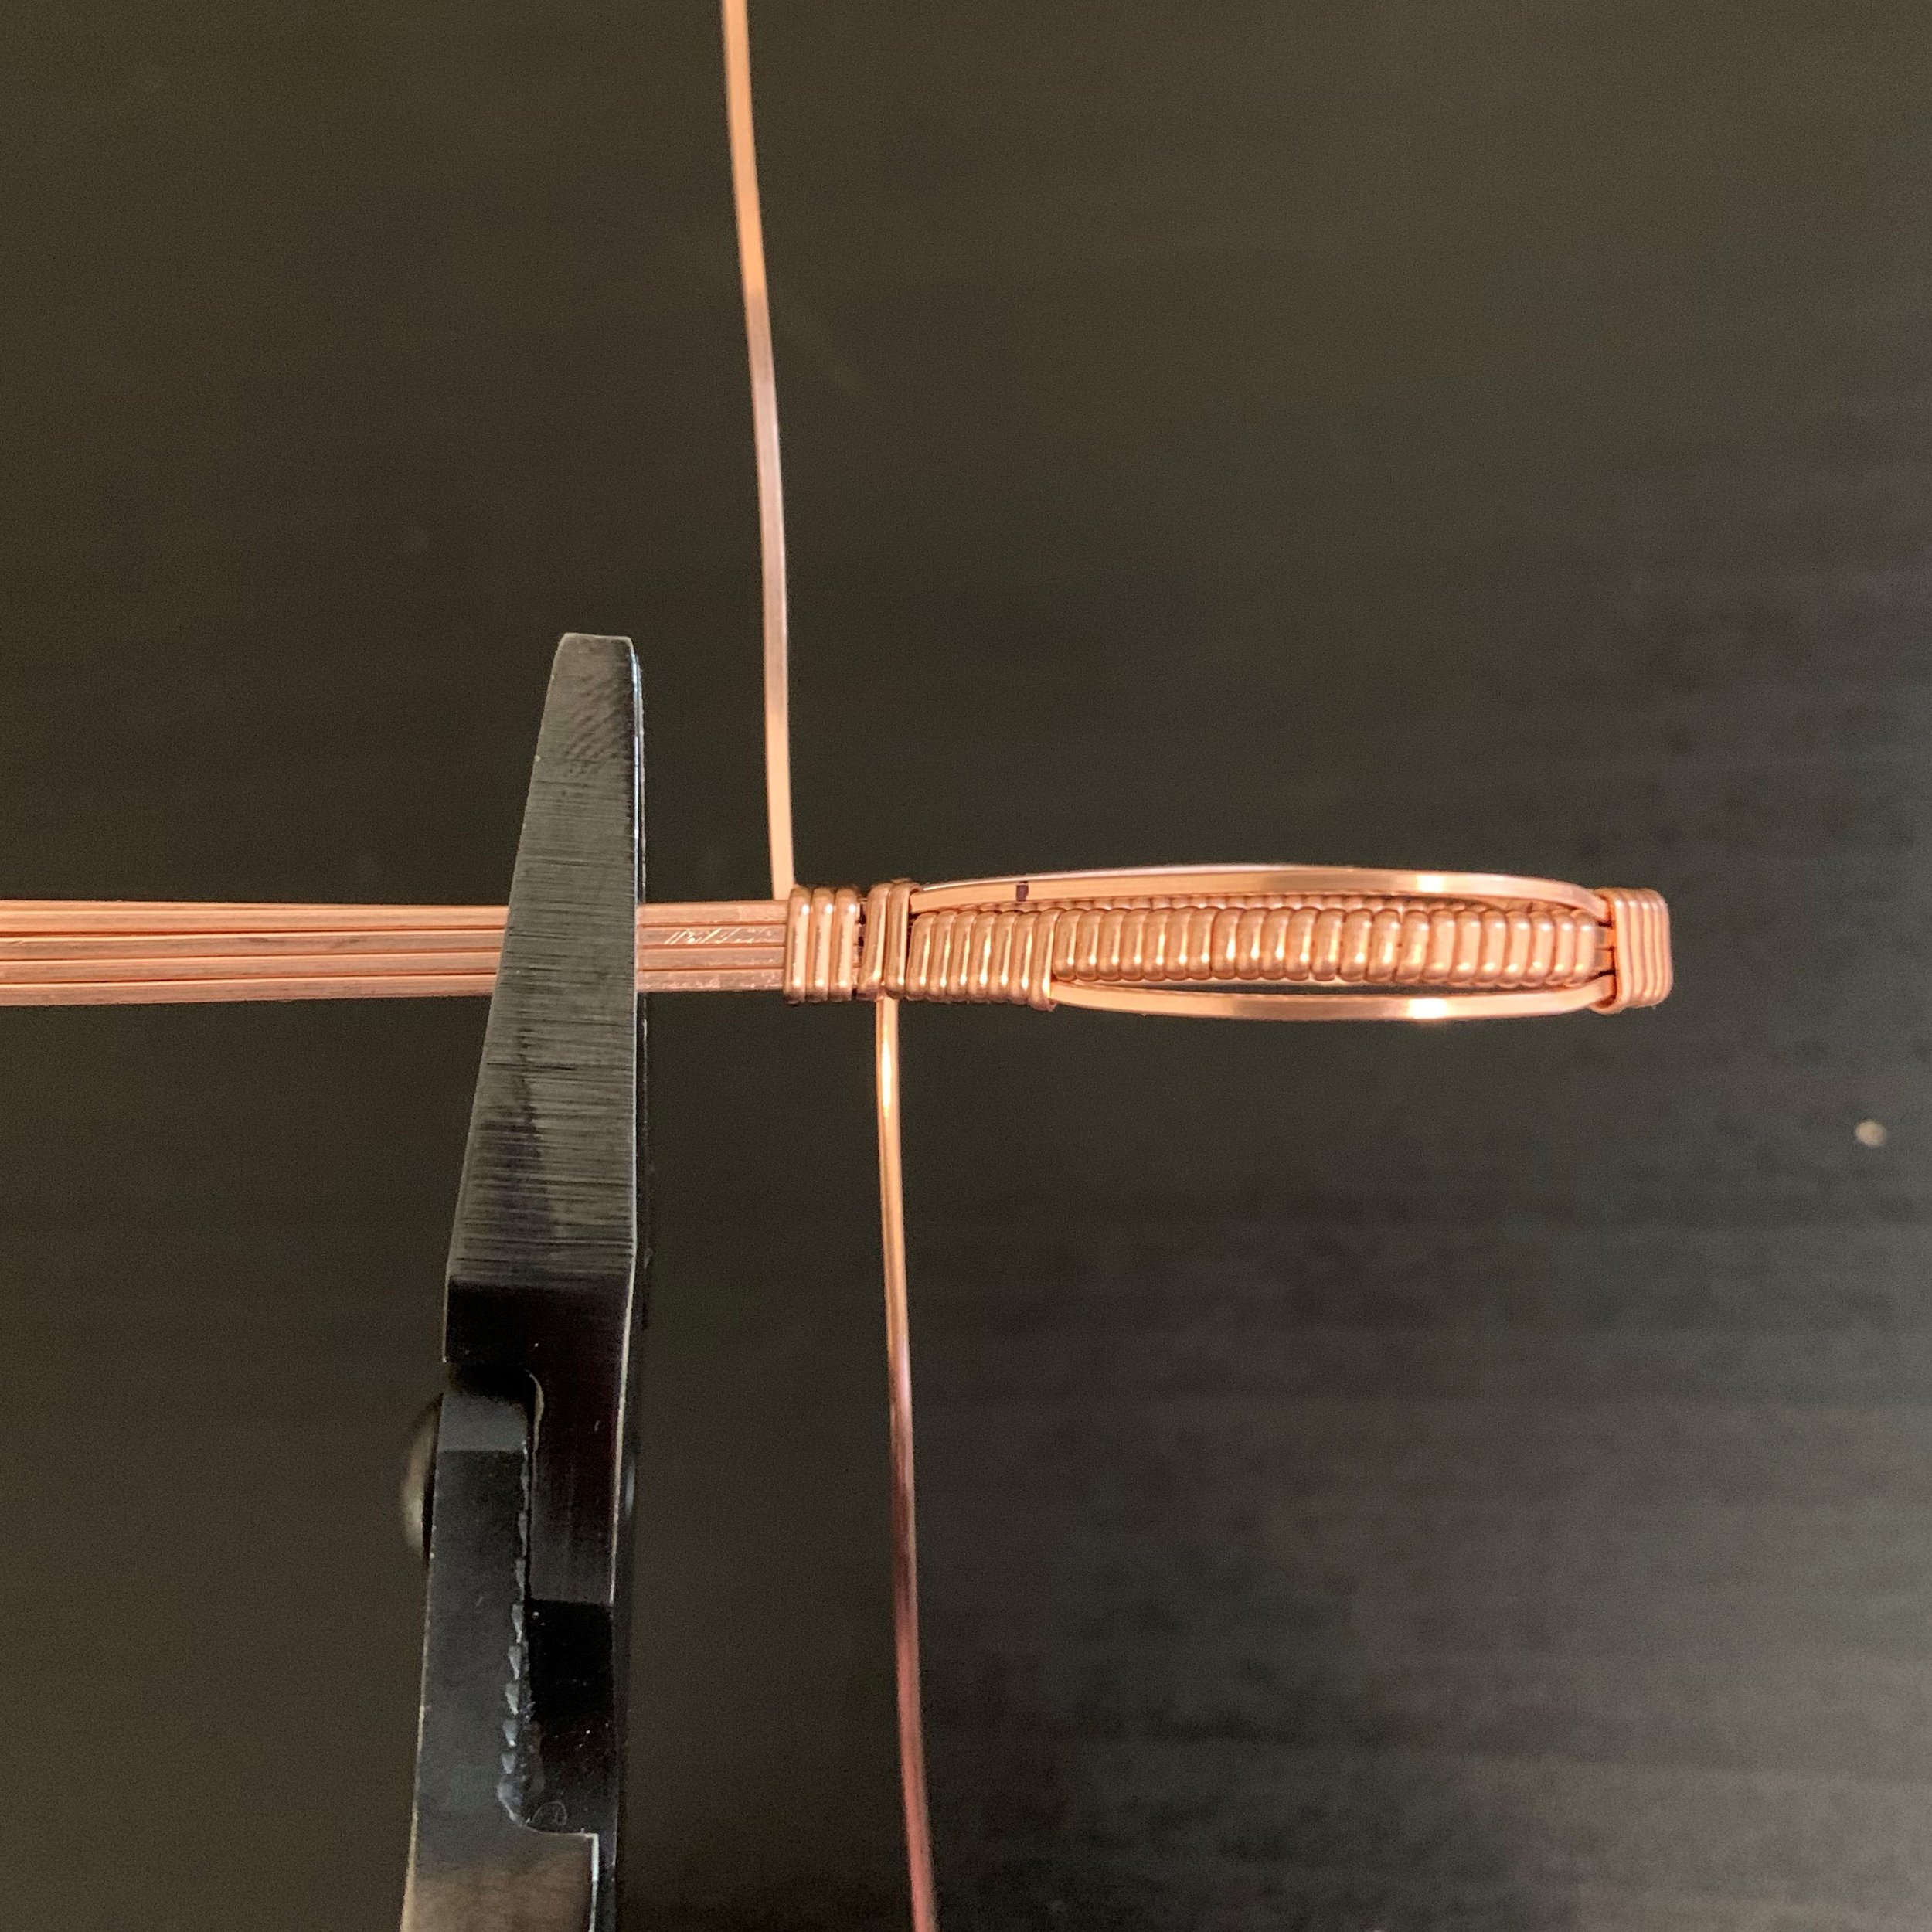
9) Bend the side weaving element(s) out and clip them off as close to the frame as possible. Press the remaining tiny ends down and wrap the 24 gauge 1/2 round around one more time to cover them.
Video timestamp: 16:55 - Trim the braided element
10) Bend the bottom frame wire down, the middle right frame wire in and up, and the middle left frame wire should be clipped flush. Leave the two top frame wires straight for now.
Video timestamp: 19:00 - Position the three frame wire ends
11) Wrap the 24ga 1/2 round wire 3 times around just the top (straight) 20 gauge wires.
Video timestamp: 20:50 - Wrap 3x around single frame wire
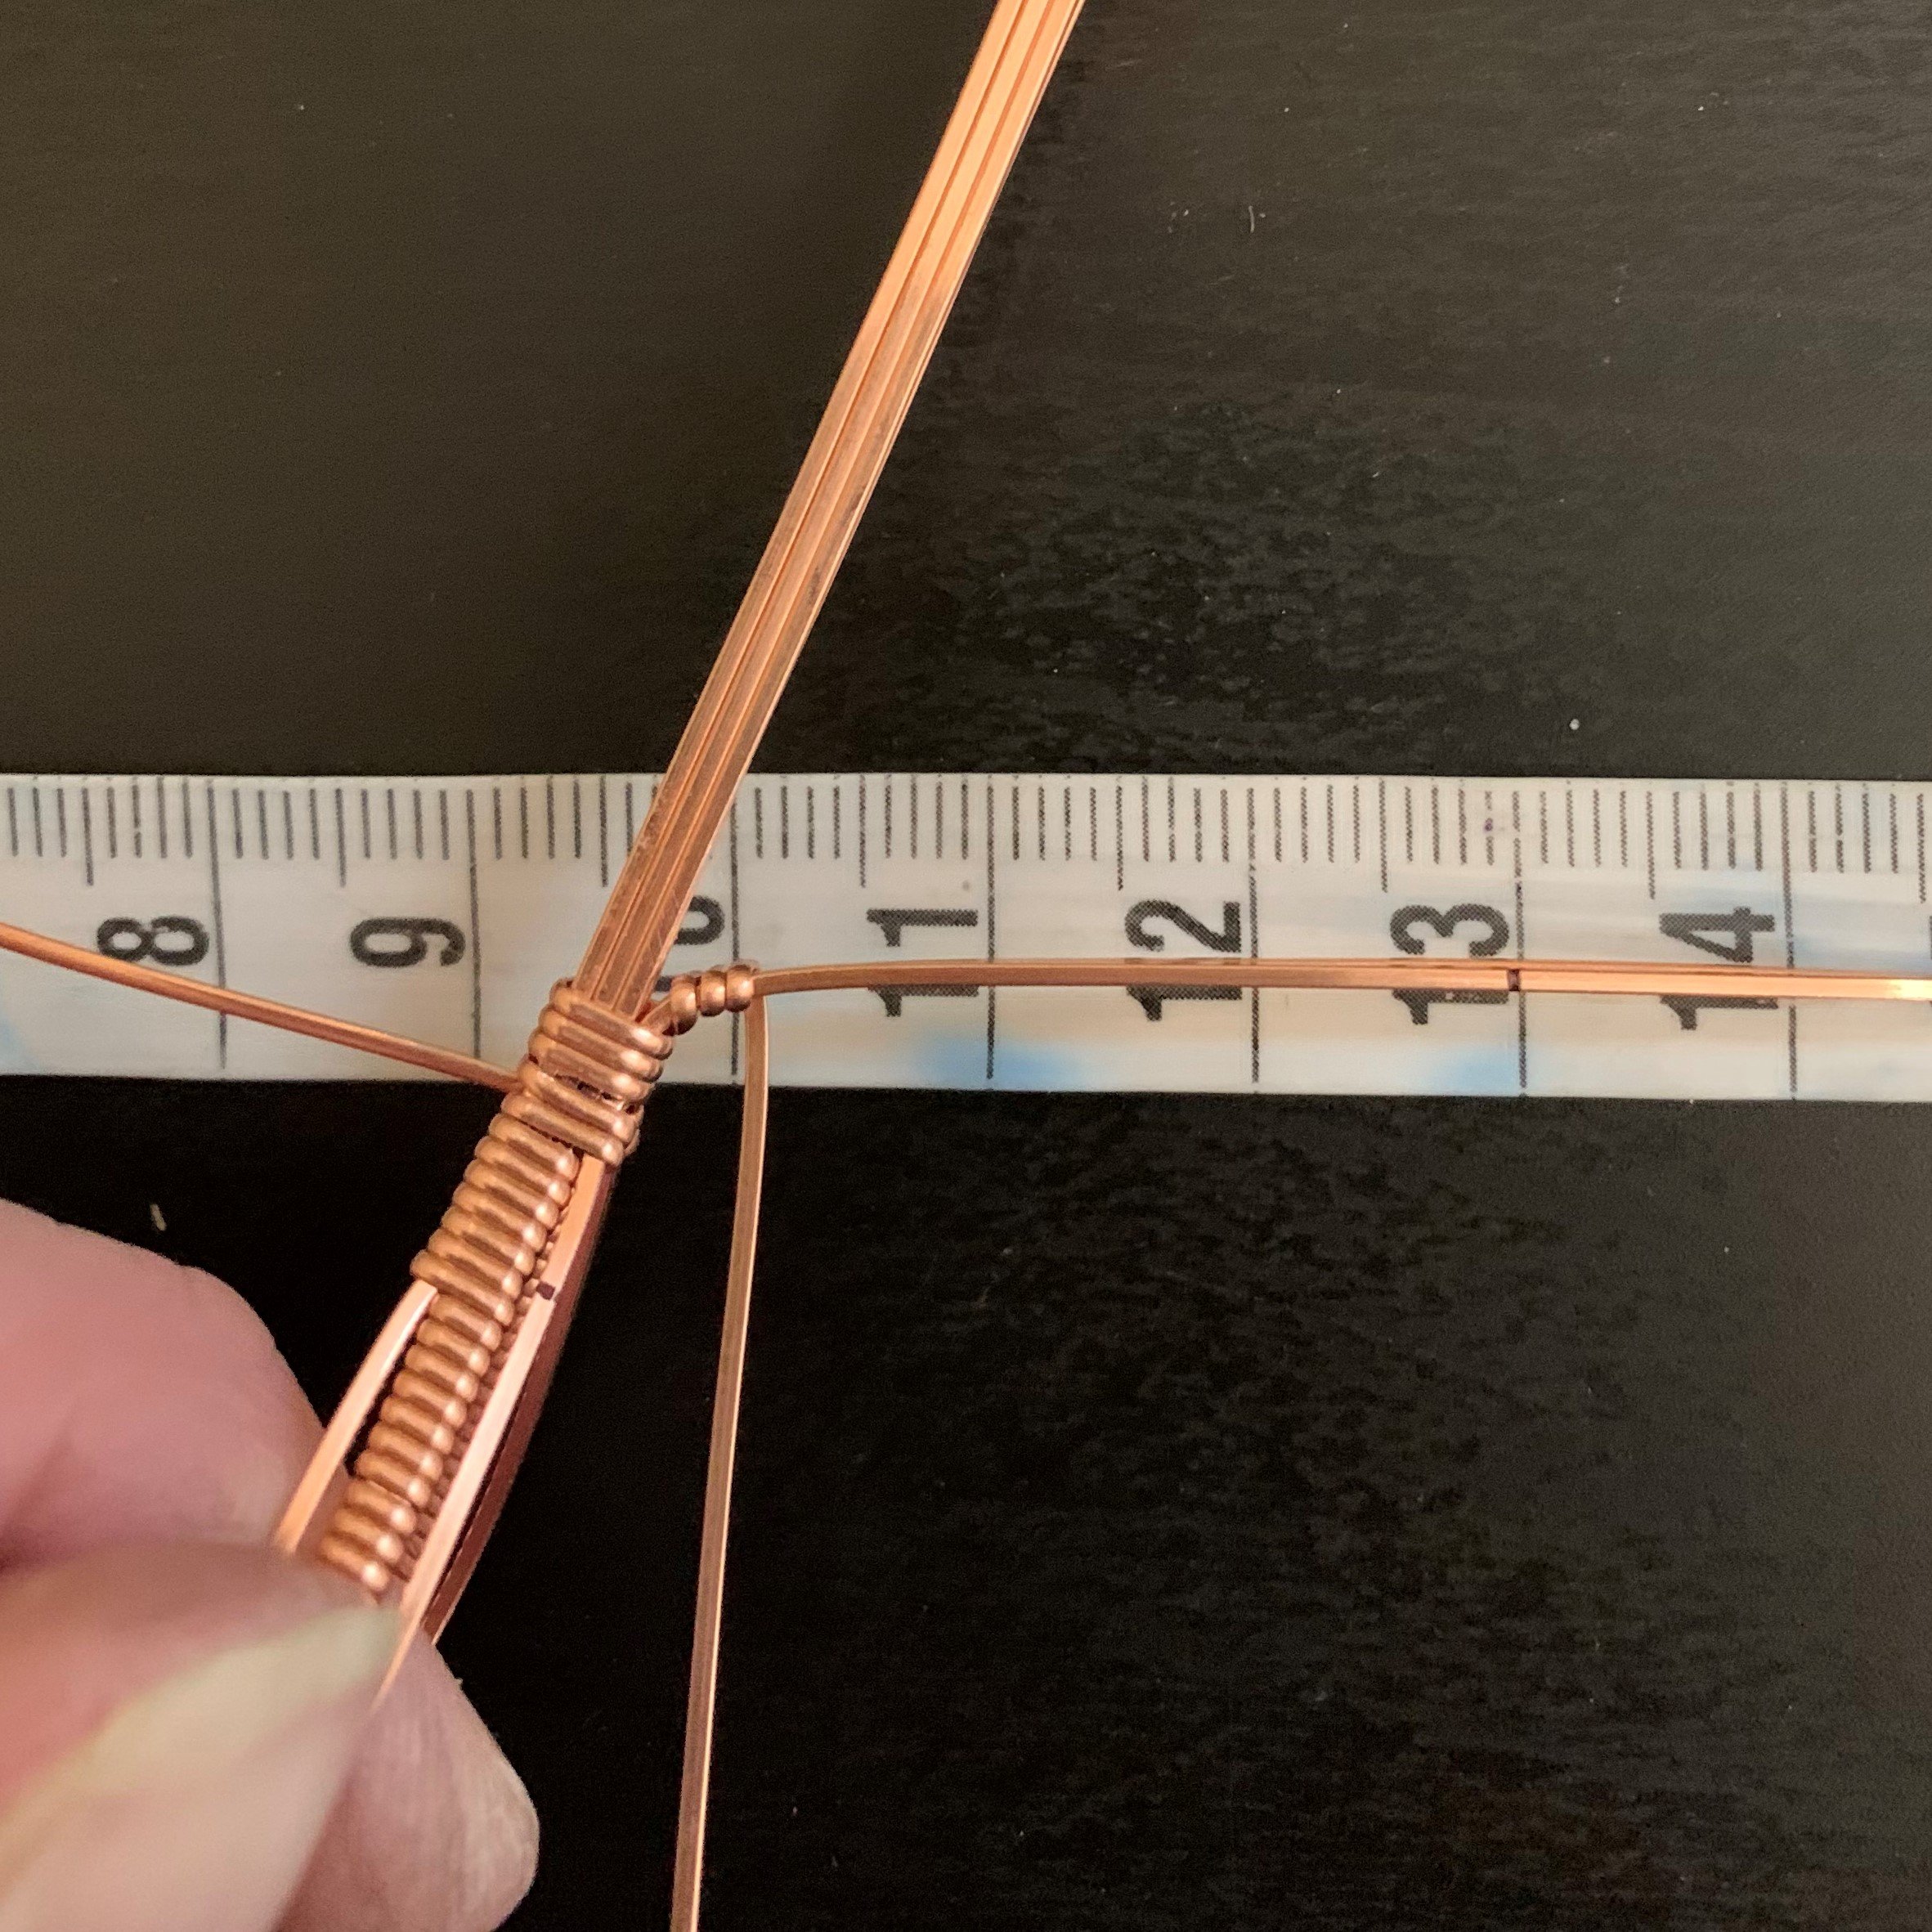
12) Wrap the 12” 22 gauge 1/2 round around the up-facing 20 gauge square wire, to about 1.5”.
Video timestamp: 23:50 - Wrap the decorative top wire
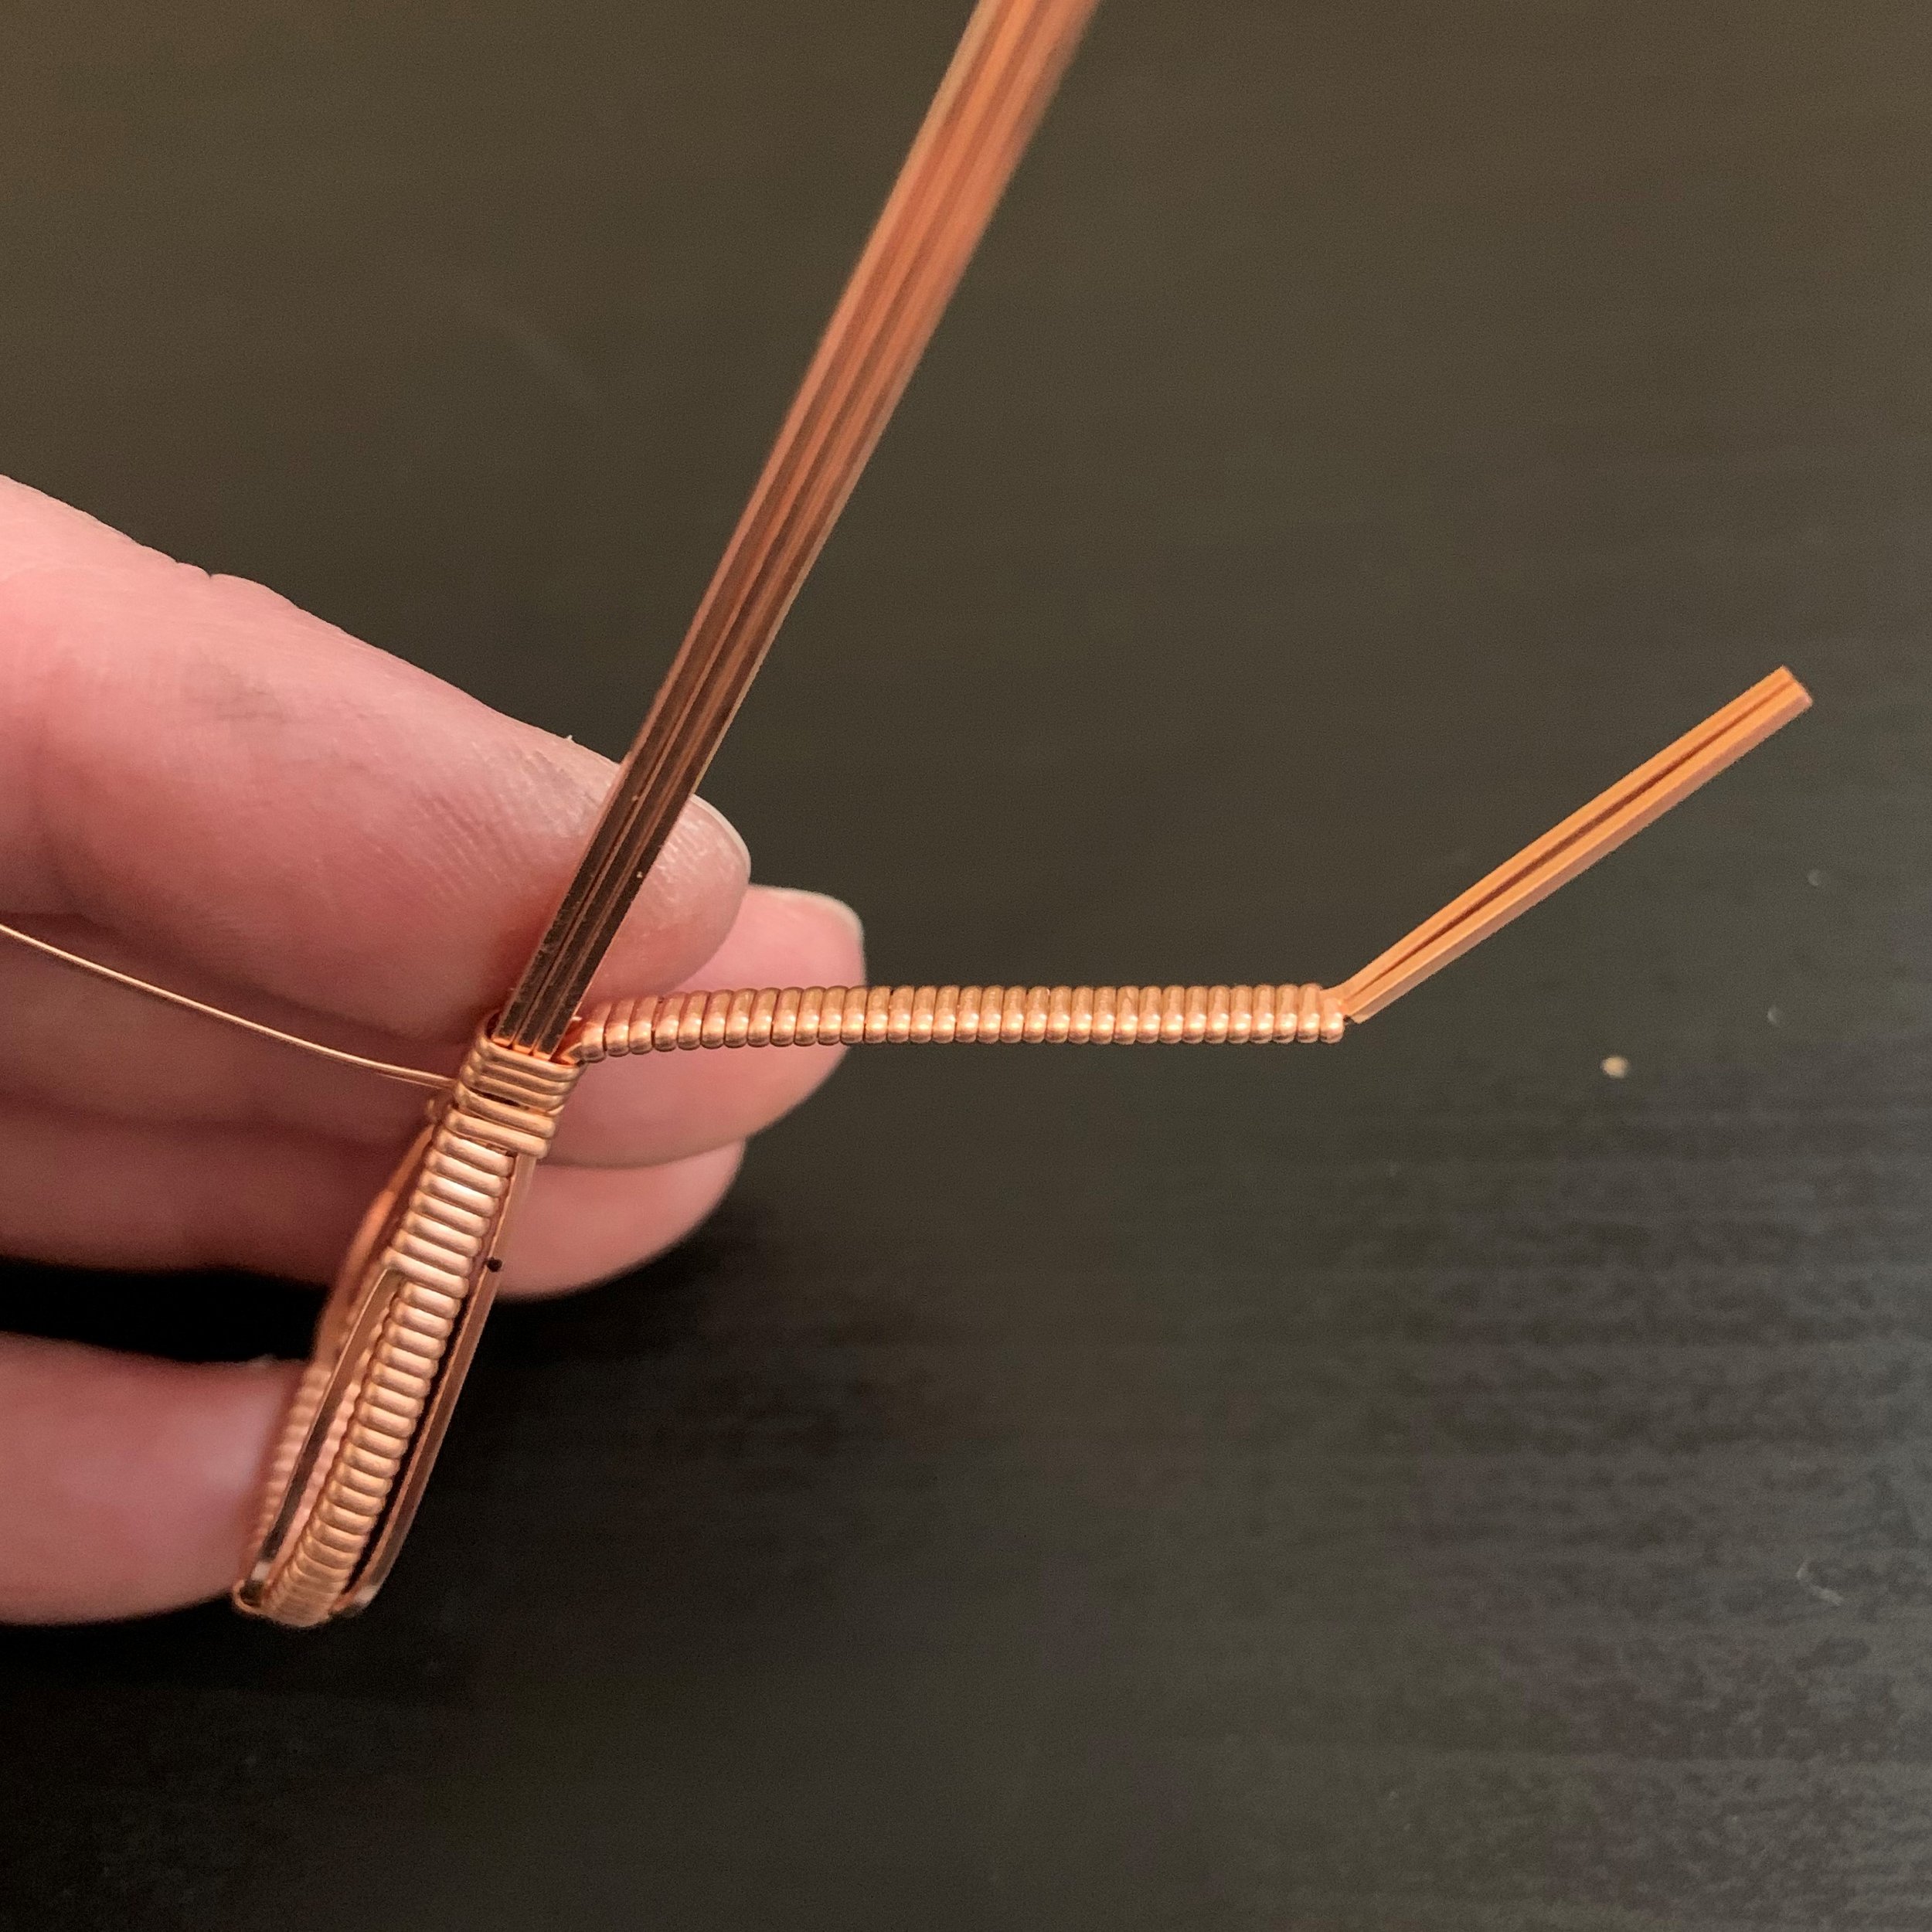
13) Bend the top (straight) wires out 45 degrees and shape the frame, either around a round mandrel or into a diamond shape.
Video timestamp: 21:45 - Prep frame wires and shape the frame
14) Wrap the top 2 wires to 1 cm, including the second wrapping wire (24 gauge 1/2 round) end.
Video timestamp: 26:15 - Wrap bail wires together
15) Split the top two 20 gauge wires into a Y shape and wrap them separately to 8mm each, using the two 24 gauge 1/2 round wires. Once done, clip the 24 gauge 1/2 round wires and flatten the ends against the piece.
Video timestamp: 29:05 - Wrap the Y in the bail
16) Affix the bottom frame wires to the lower horizontal bar.
Video timestamp: 30:30 - Create the frame struts
17) Bend the bail wires and affix them to the middle of the frame struts.
Video timestamp: 37:55 - Finish the bail
18) Set whatever component you have prepared for the middle of the frame.
Video timestamp: 43:00 - Set the center element
19) Finish the decorative edge by flattening the wrapped 20 gauge square wire onto the frame’s inside edge.
Video timestamp: 44:55 - Start placing the decorative top wire
20) Bend the decorative wire accurately following the inside edge of the frame.
Video timestamp: 45:55 - Finish placing the decorative top wire
21) End the decorative wire by sticking it into the small hold at the top of the piece. The end should extend straight out the back, so it can be cut short and crimped once behind the bail.
Video timestamp: 47:40 - Secure the top of the decorative wire
22) Use the 4” of 22 gauge 1/2 round to secure the bottom point of the decorative wire.
Video timestamp: 52:15 - Secure the bottom of the decorative wire
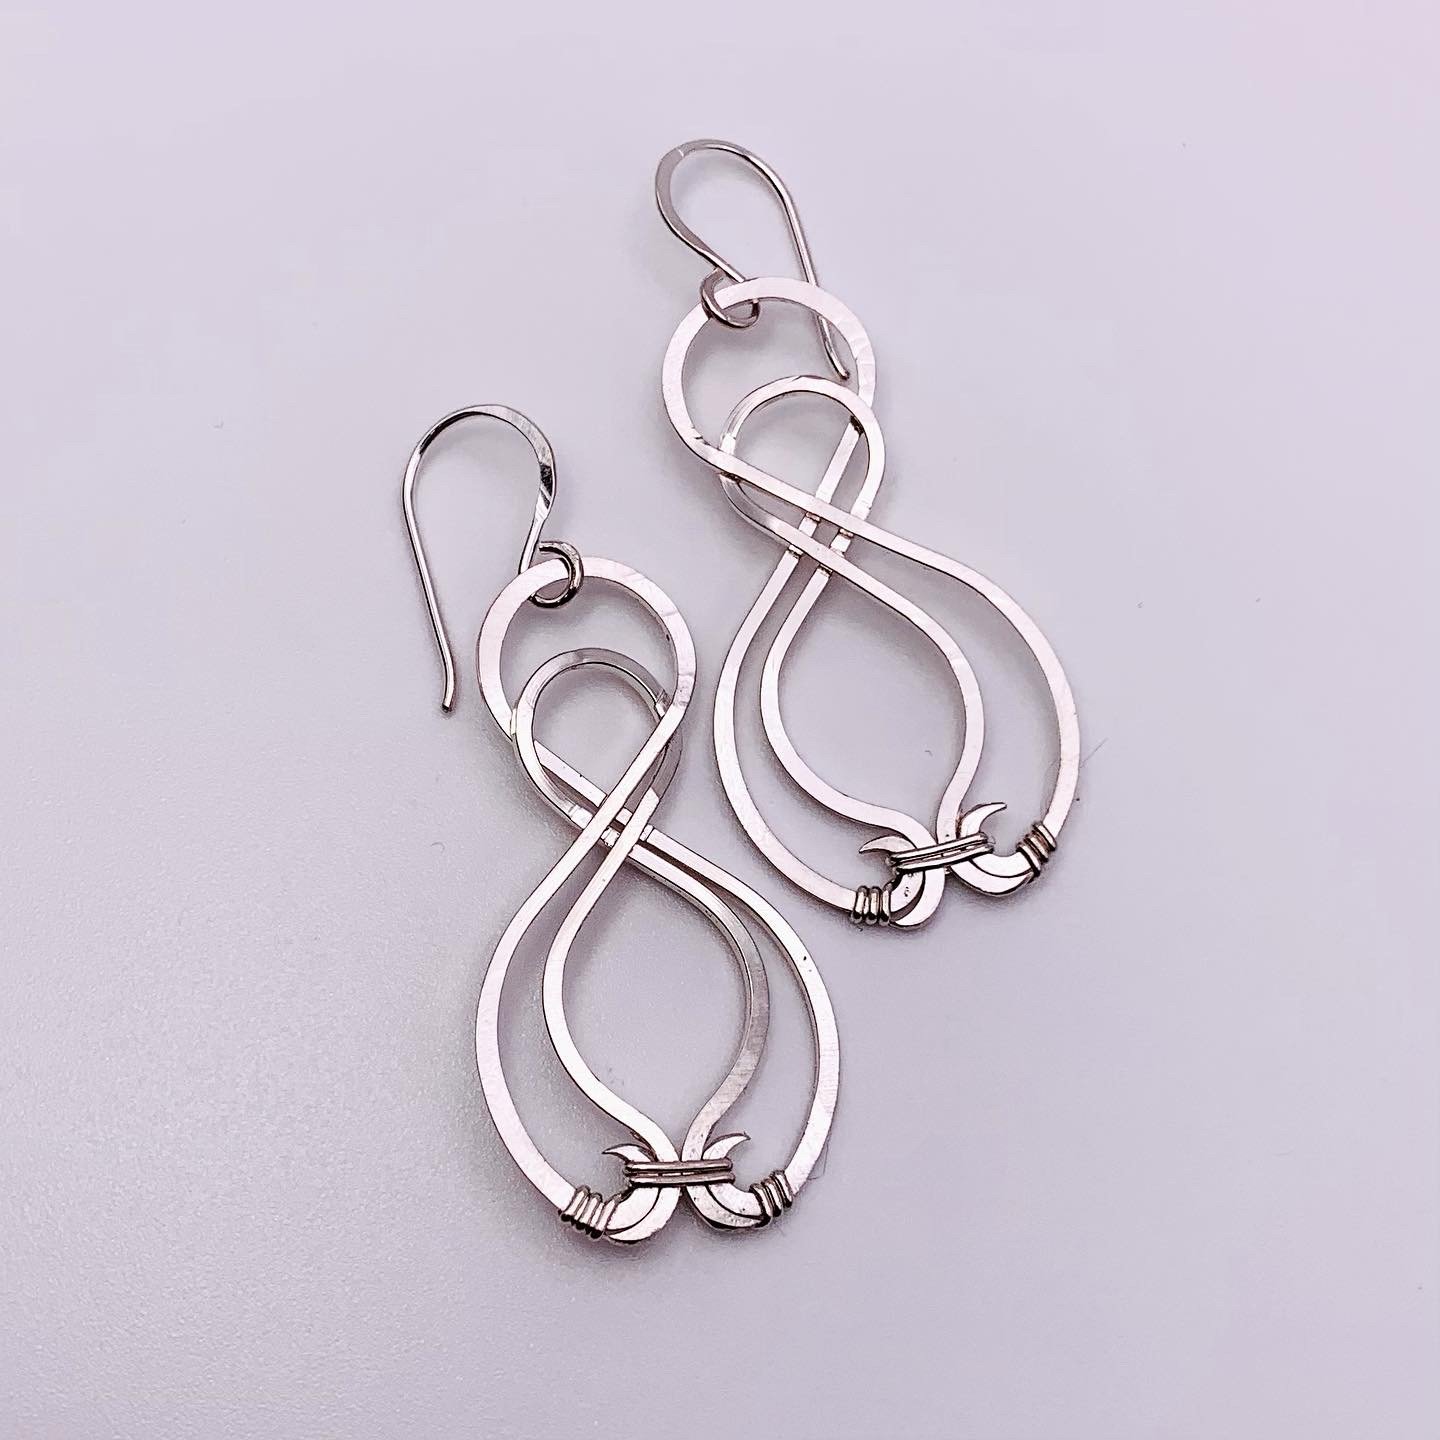
Making Infinity Earrings

Infinity Earrings
These elegant, sophisticated earrings are magic in copper or silver. Elevate the design by hanging a faceted gem from the bottom. See the faceted gem earrings tutorial for a prong setting that is endlessly adaptable.

Tools & Materials
18 ga square wire, dead soft: 2 lengths 5.5”, 2 lengths 4”
22 ga half-round wire, dead soft: 2 lengths 4”
20 ga round wire, dead soft: 2 lengths 4cm
Measuring tape & fine-point Sharpie
Steel block with ball peen or planishing hammer & rawhide or nylon hammer
Pliers: flush cutters, flat-nosed pliers, and stepped bail-making pliers with 2mm, 5mm, 7mm, and 9mm steps.
File, sandpaper, and polishing cloth
Ring mandrel
Video Tutorial
A full-length video tutorial is linked below, along with written steps and photos of each stage of the project. Time stamps to the appropriate location in the YouTube video are included in each step below, so if you get stuck on one step, you can quickly jump to the video explanation.
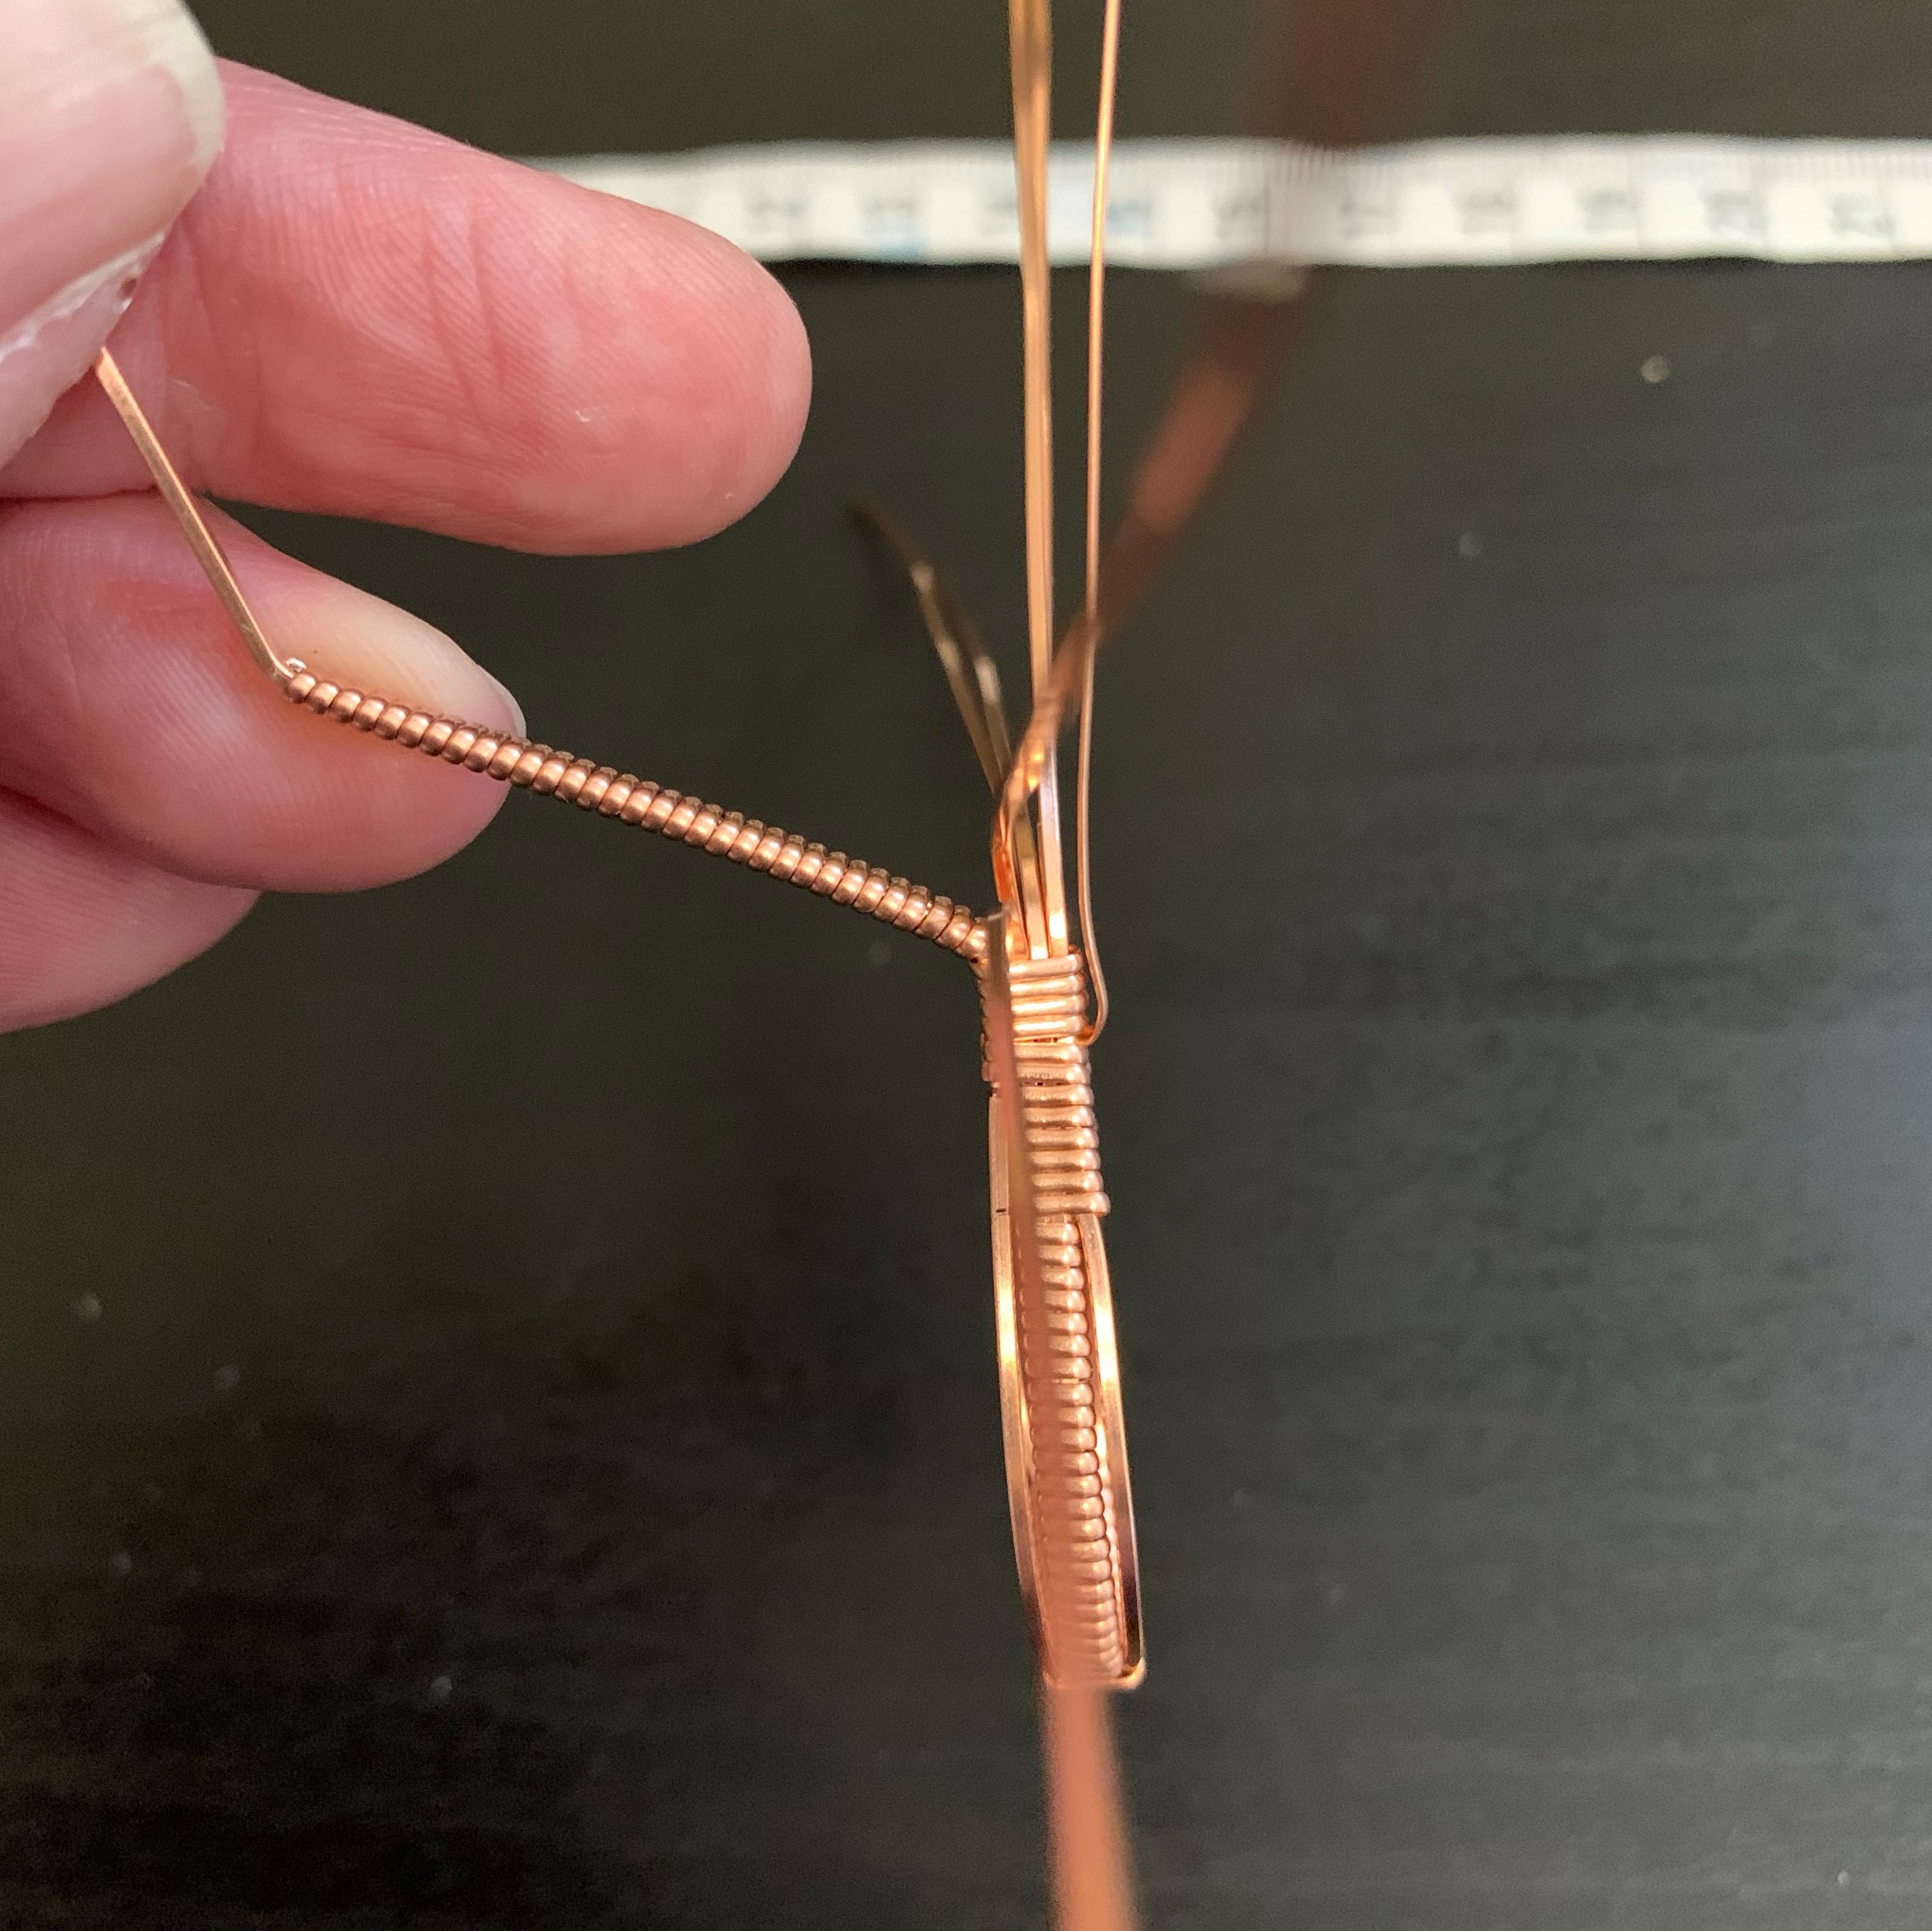
Step One: Form the Outer Elements


Click here to go to this step in the YouTube video.
Measure and mark the middle of all four 18-gauge square wires.
Start forming the first outer element by placing the mid-mark of a 5.5” length in your stepped bail-making pliers. Use your flat-nosed pliers to pull each wire end around the 9mm step, creating a 90-degree cross.
Do the same for both 5.5” lengths. For the second element, cross the opposite side over top as you did the first. This will ensure that your earrings are mirror images of each other.
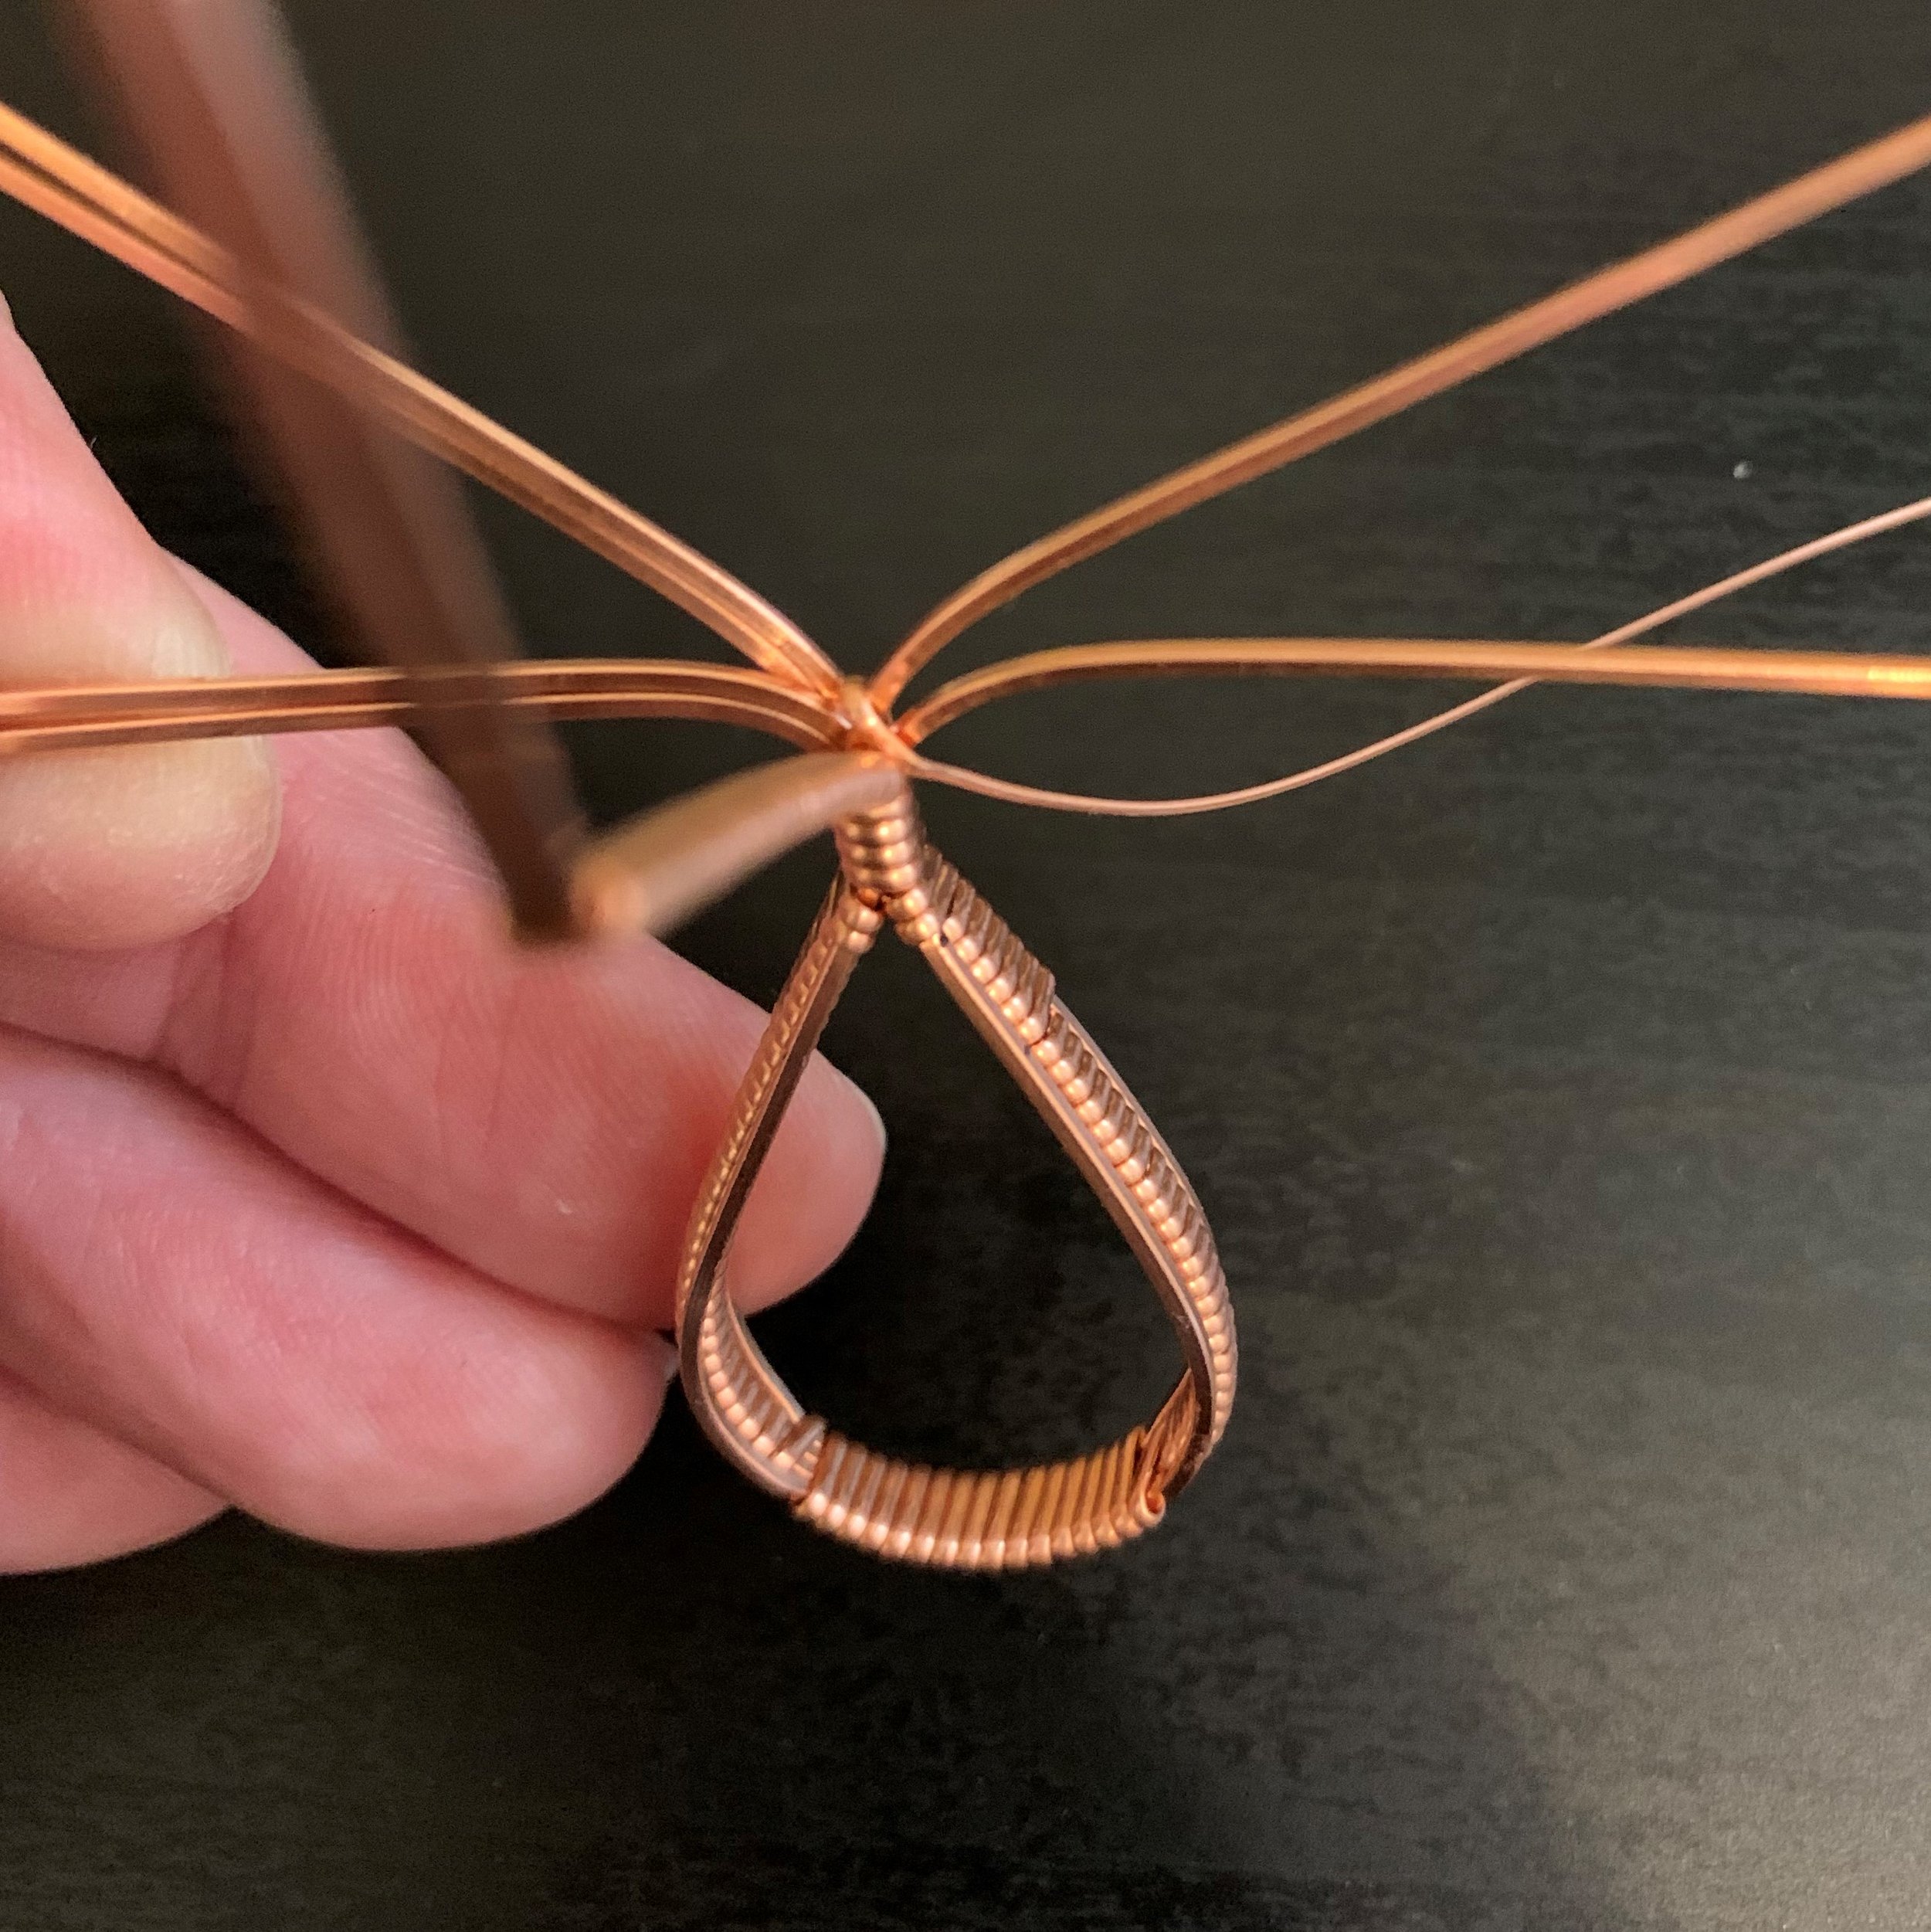
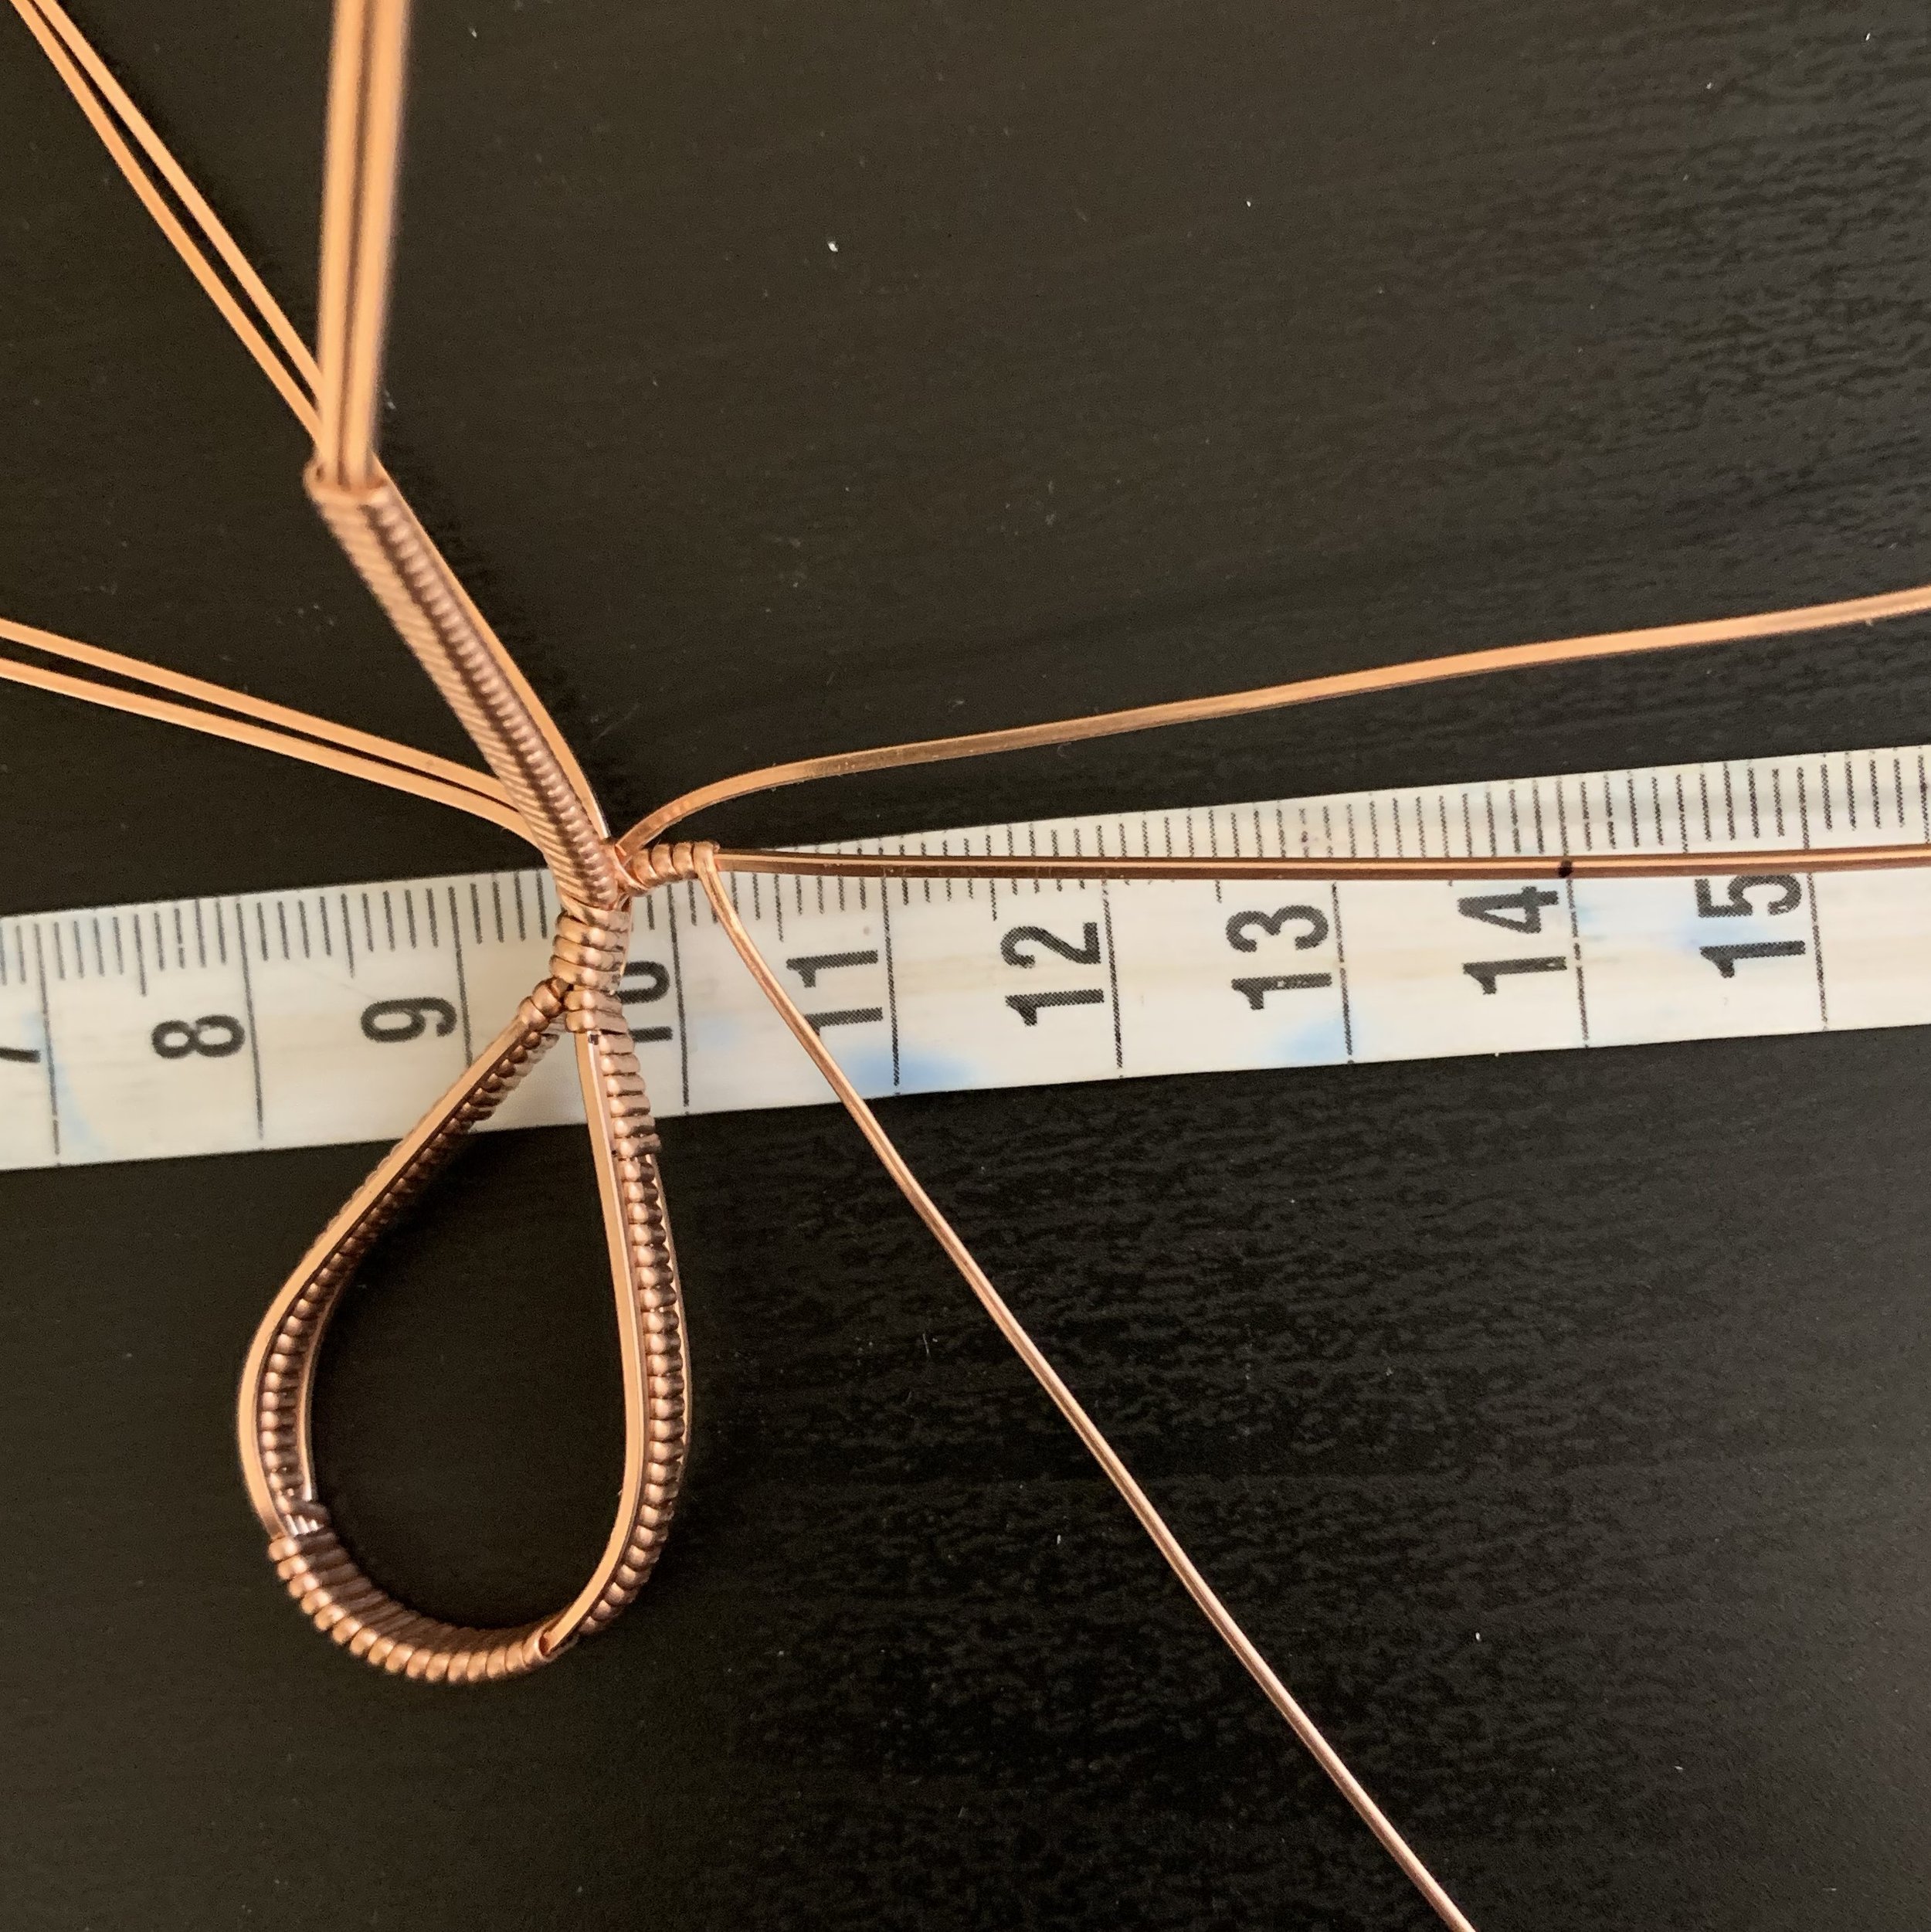
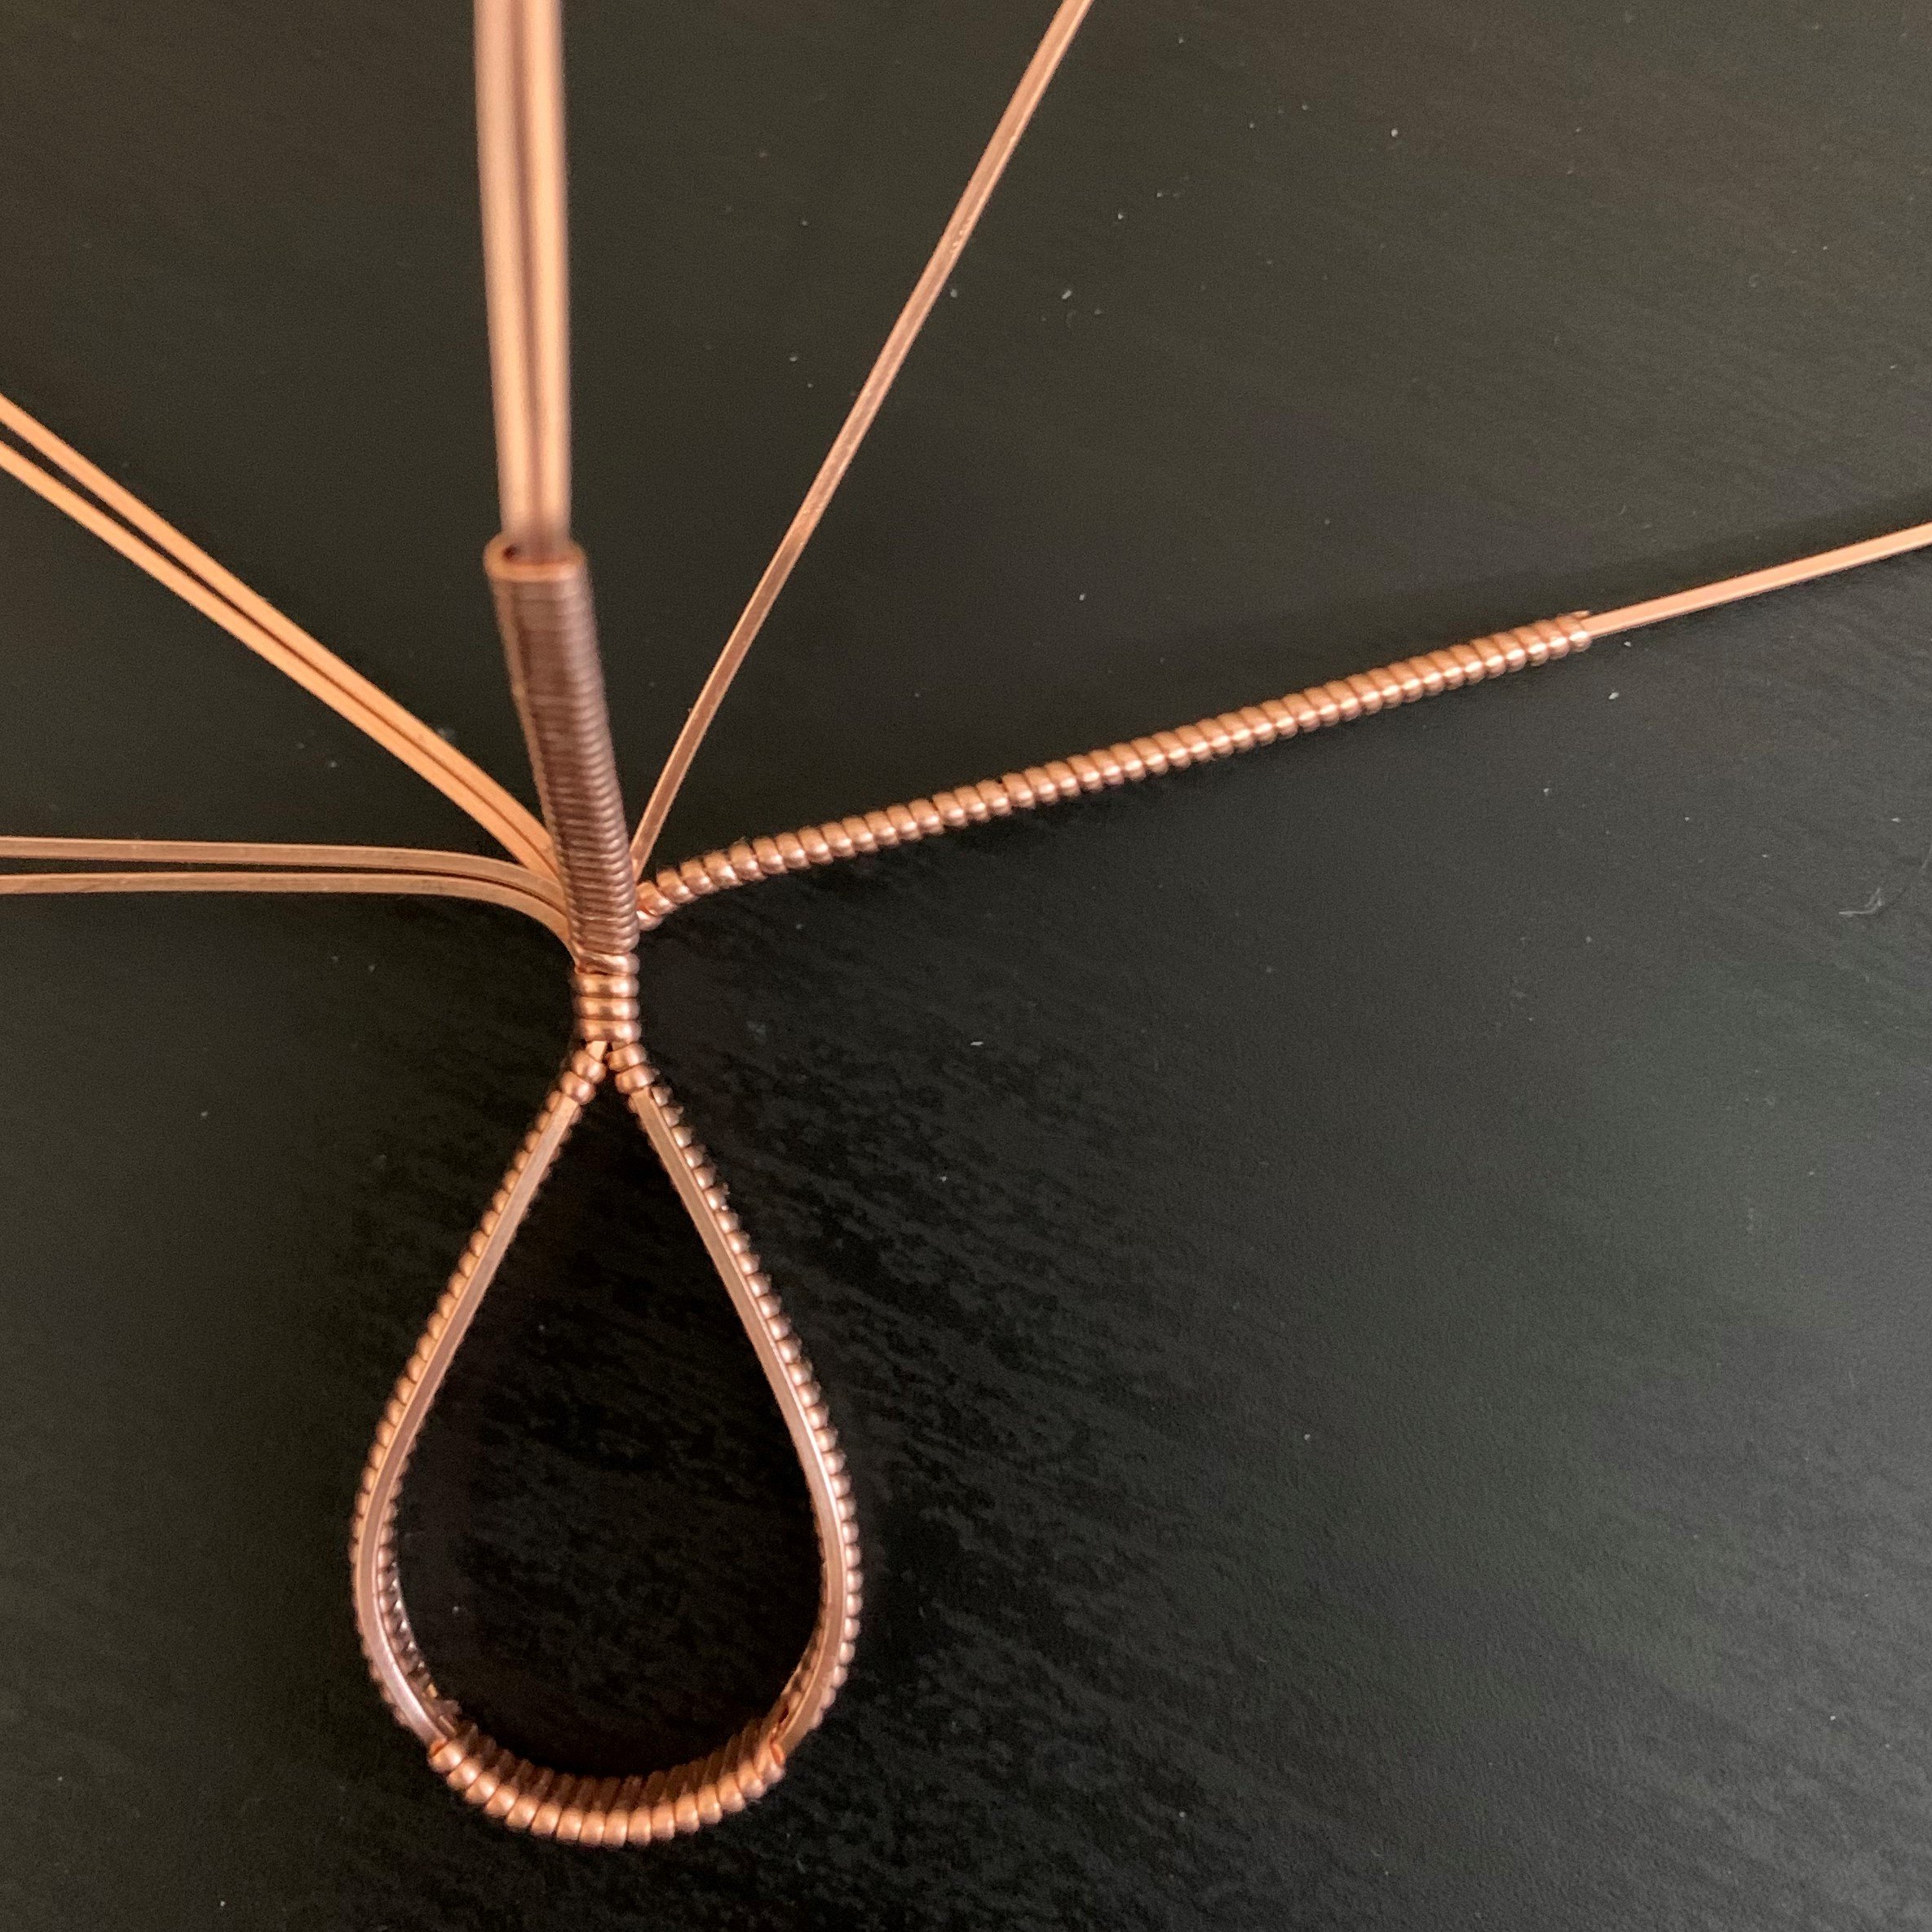
Use a ring mandrel to form the lower half of the outer elements. Place the element at ring size 7.
Fold the wire ends around the ring mandrel, taking care not to twist the wire. You want to keep the same side of the square wire facing up at all times.
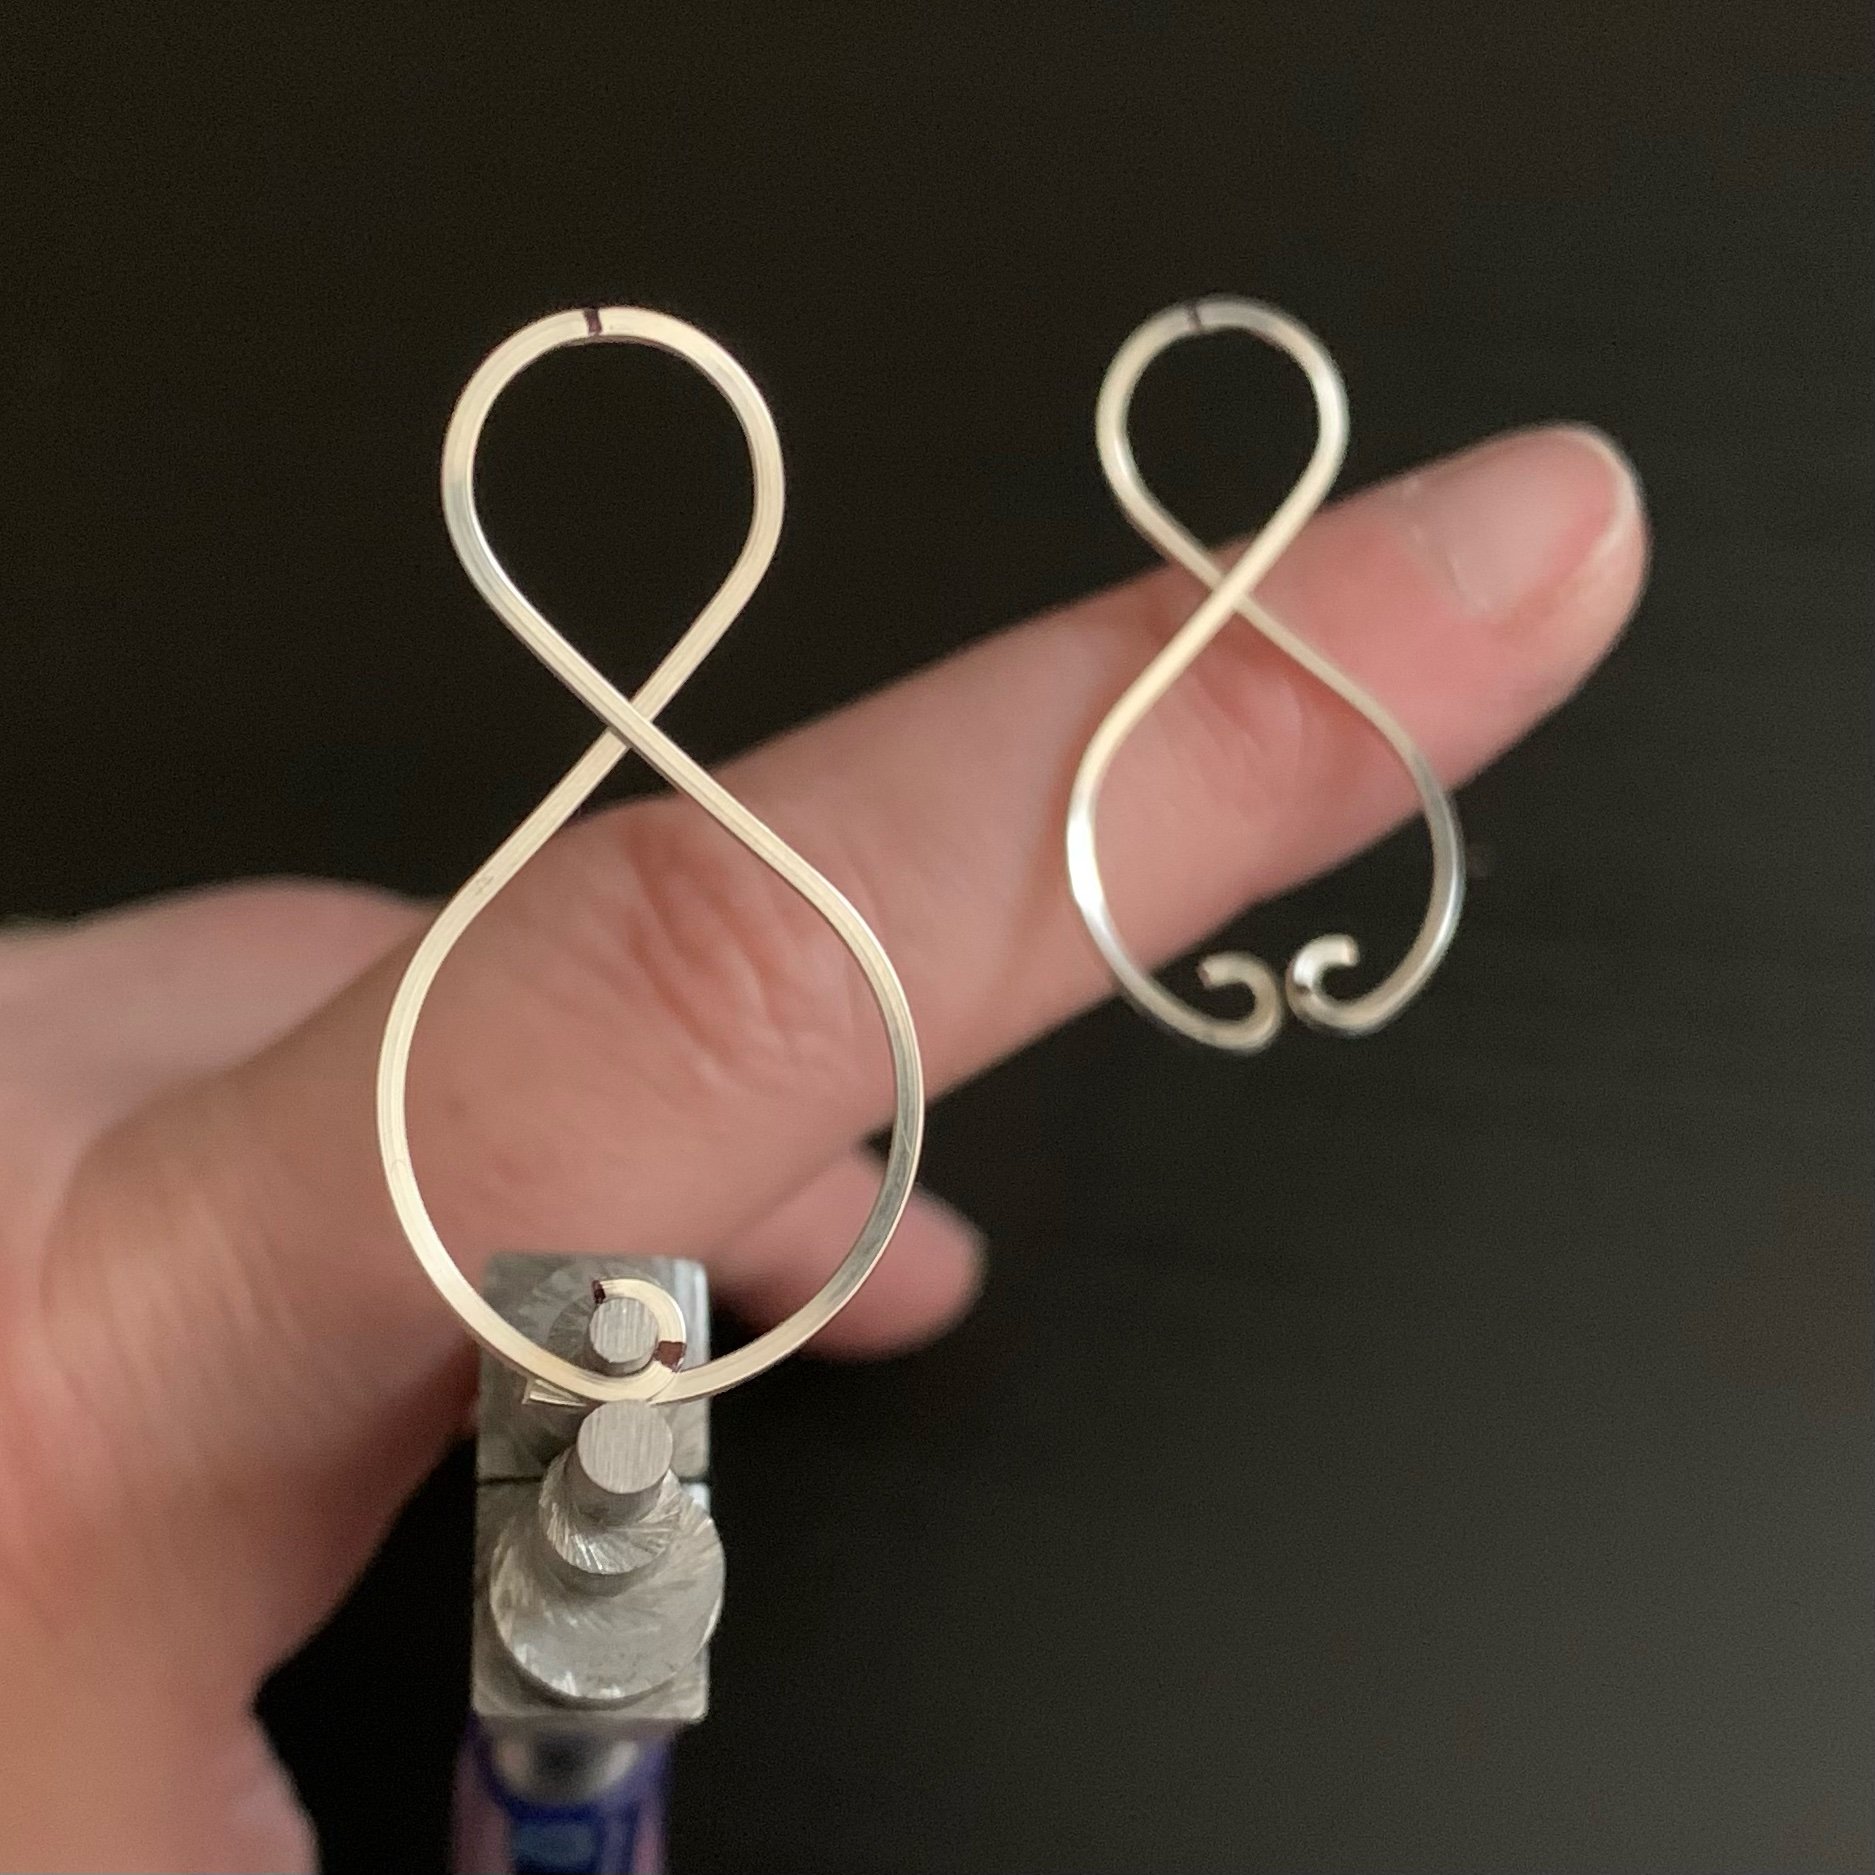
Repeat for the other element. You should now have two mirror-image figure 8s.
Step Two: Form the Outer Element Loops


Click here to go to this step in the YouTube video.
Mark the center bottom of each outer element, then measure & mark a spot 4mm past center, toward the tail.
Use flush cutters to cut the spot 4mm past center on each side of each outer element.
Use the 2mm step of the bail-making pliers to curl the cut ends upward. You’re not going to make a complete circle; rather stop at about 2/3 of the way, leaving 1/3 of the circle open.
Repeat for both elements. The bottom loops should just touch each other at the center bottom.
Step Three: Finish the Outer Element Loops & Hammer


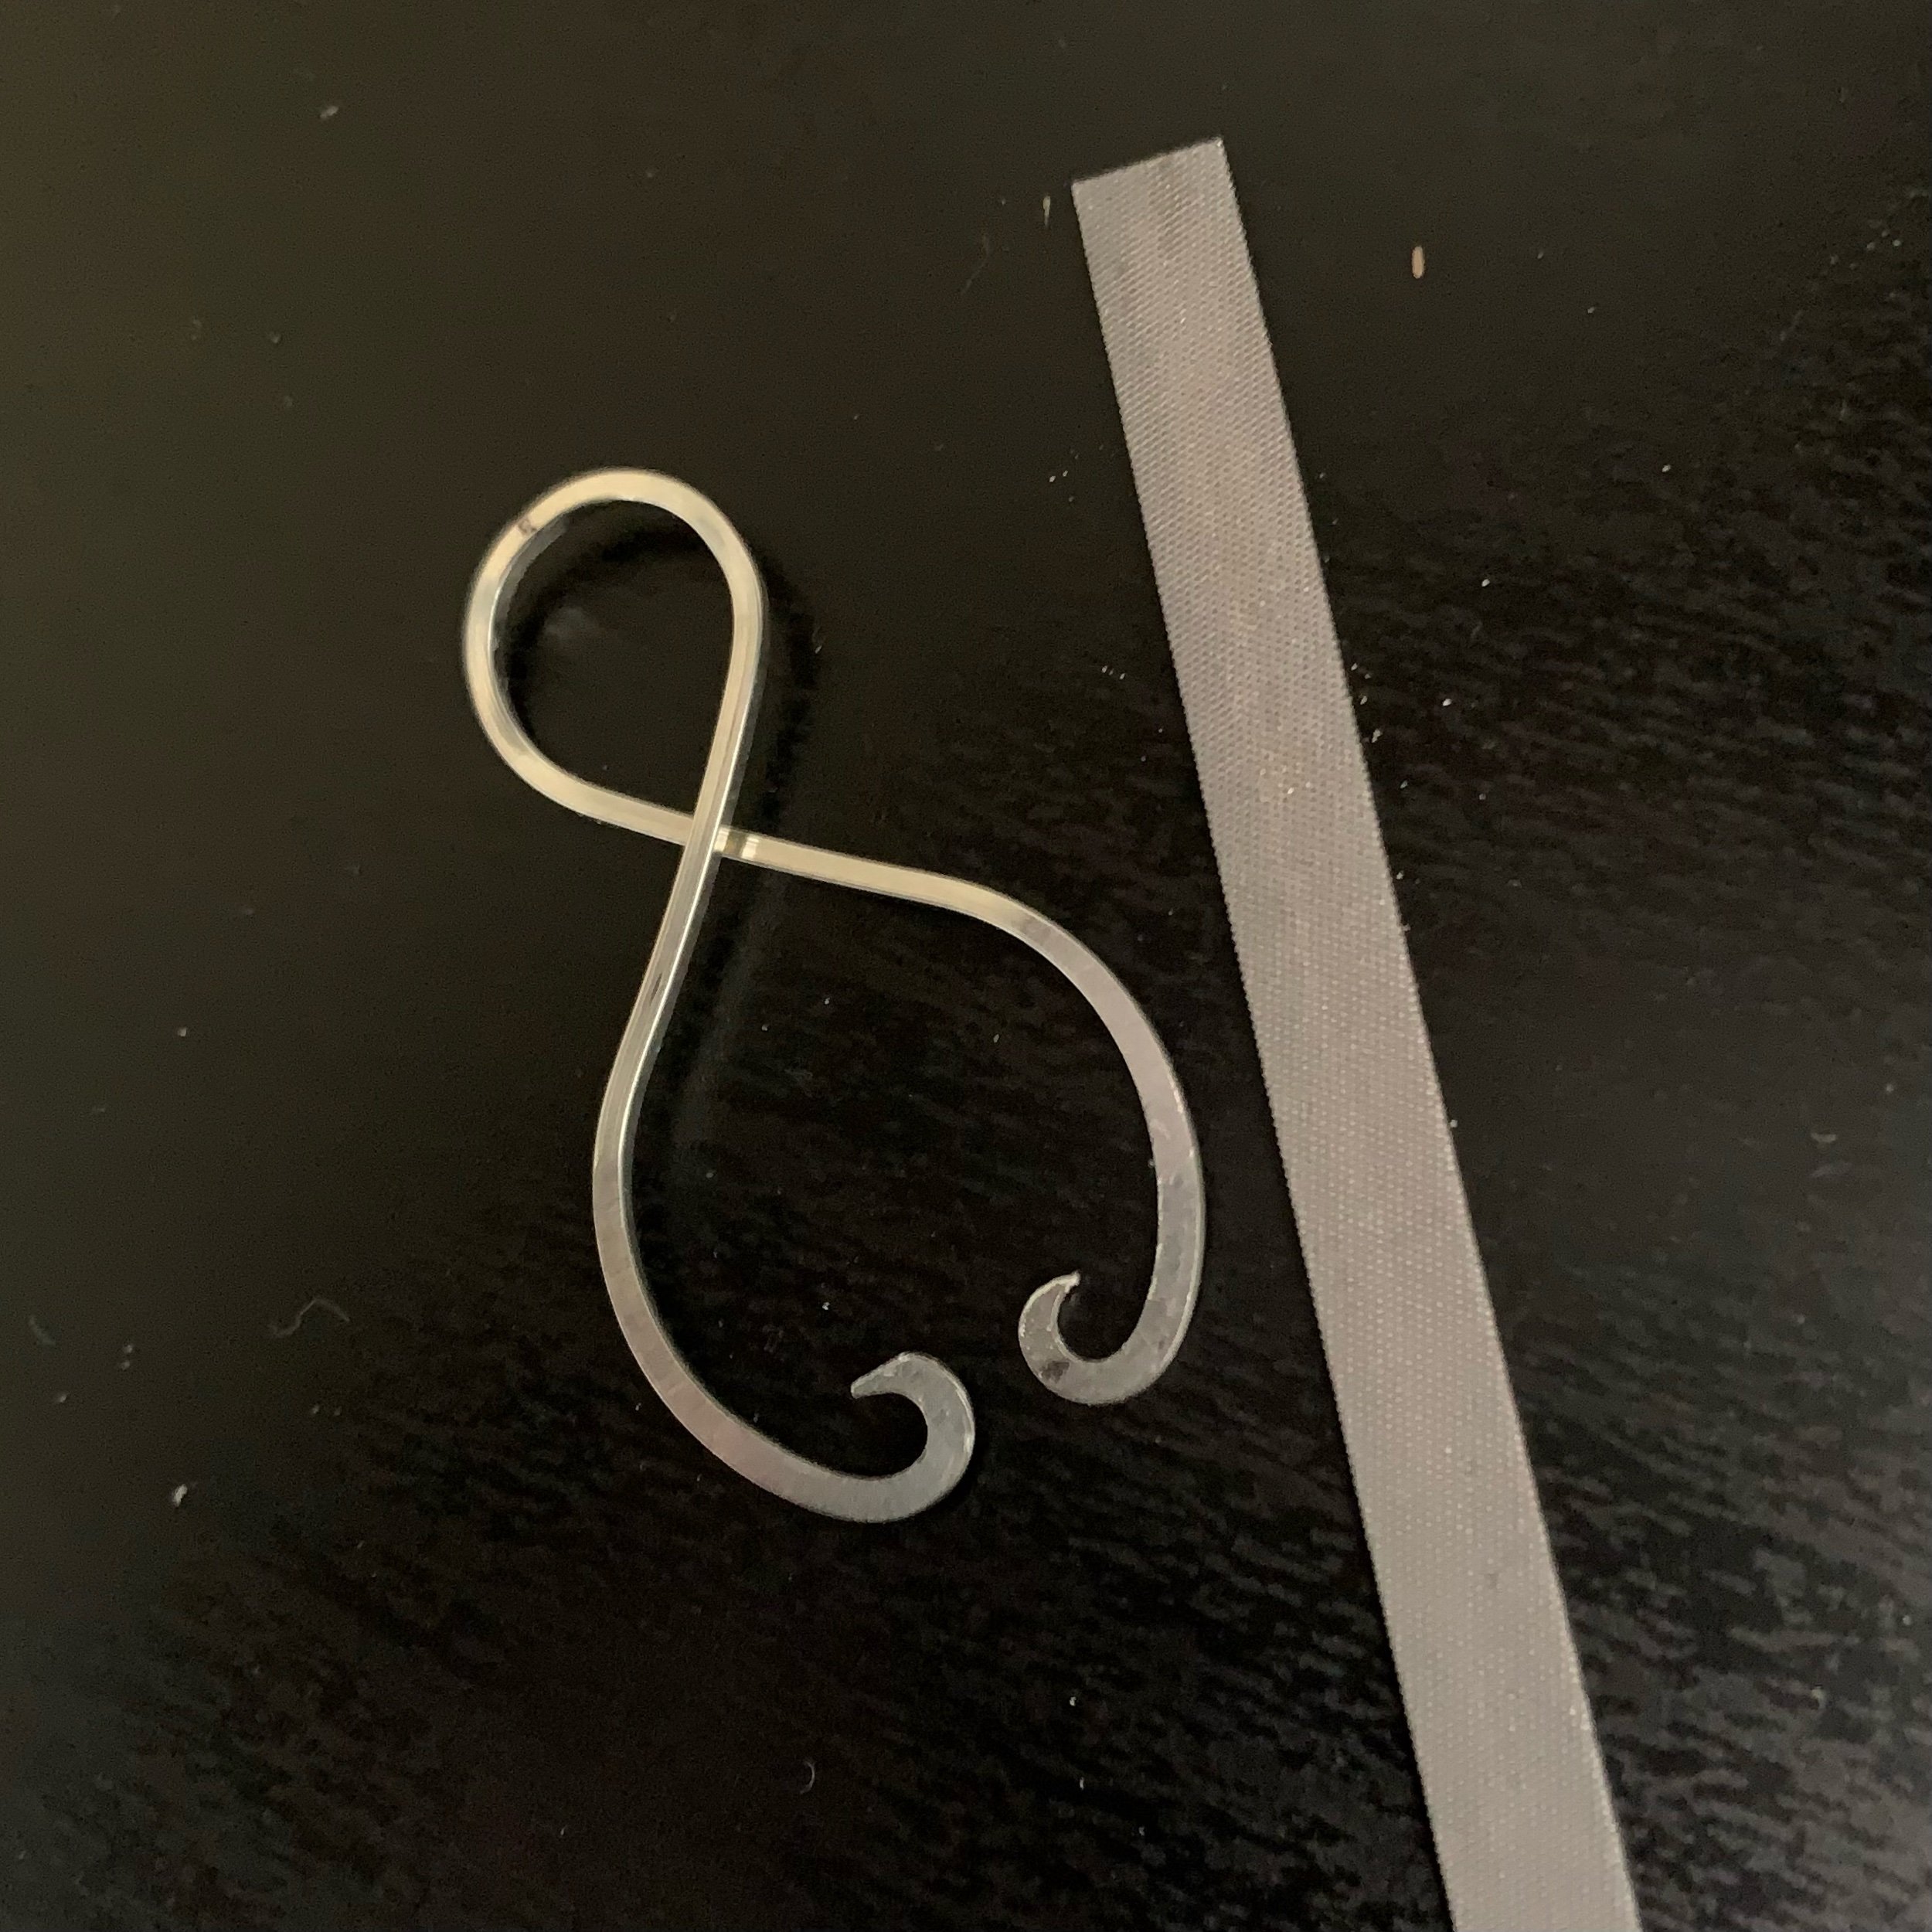


Click here to go to this step in the YouTube video.
Hammer the bottom half of each outer element. Don’t hammer too close to the center cross.
Cut a triangle off the top of each outer-element bottom loop using your flush cutters. This reduces the amount of filing and sanding needed to create a clean, graduated curve.
File the bottom loops to shape. I find it helpful to hold the piece with my flat-nosed pliers and start by filing down the little nub left by the flush cutters.
File and sand all four loops until they are smooth on all sides, the ends aren’t too pokey, and the curls don’t have any blunt ends.
Hammer the top half of the top loop of each outer element. Do not hammer the place where the wires cross in the middle.
Step Four: Form the Inner Elements


Click here to go to this step in the YouTube video.
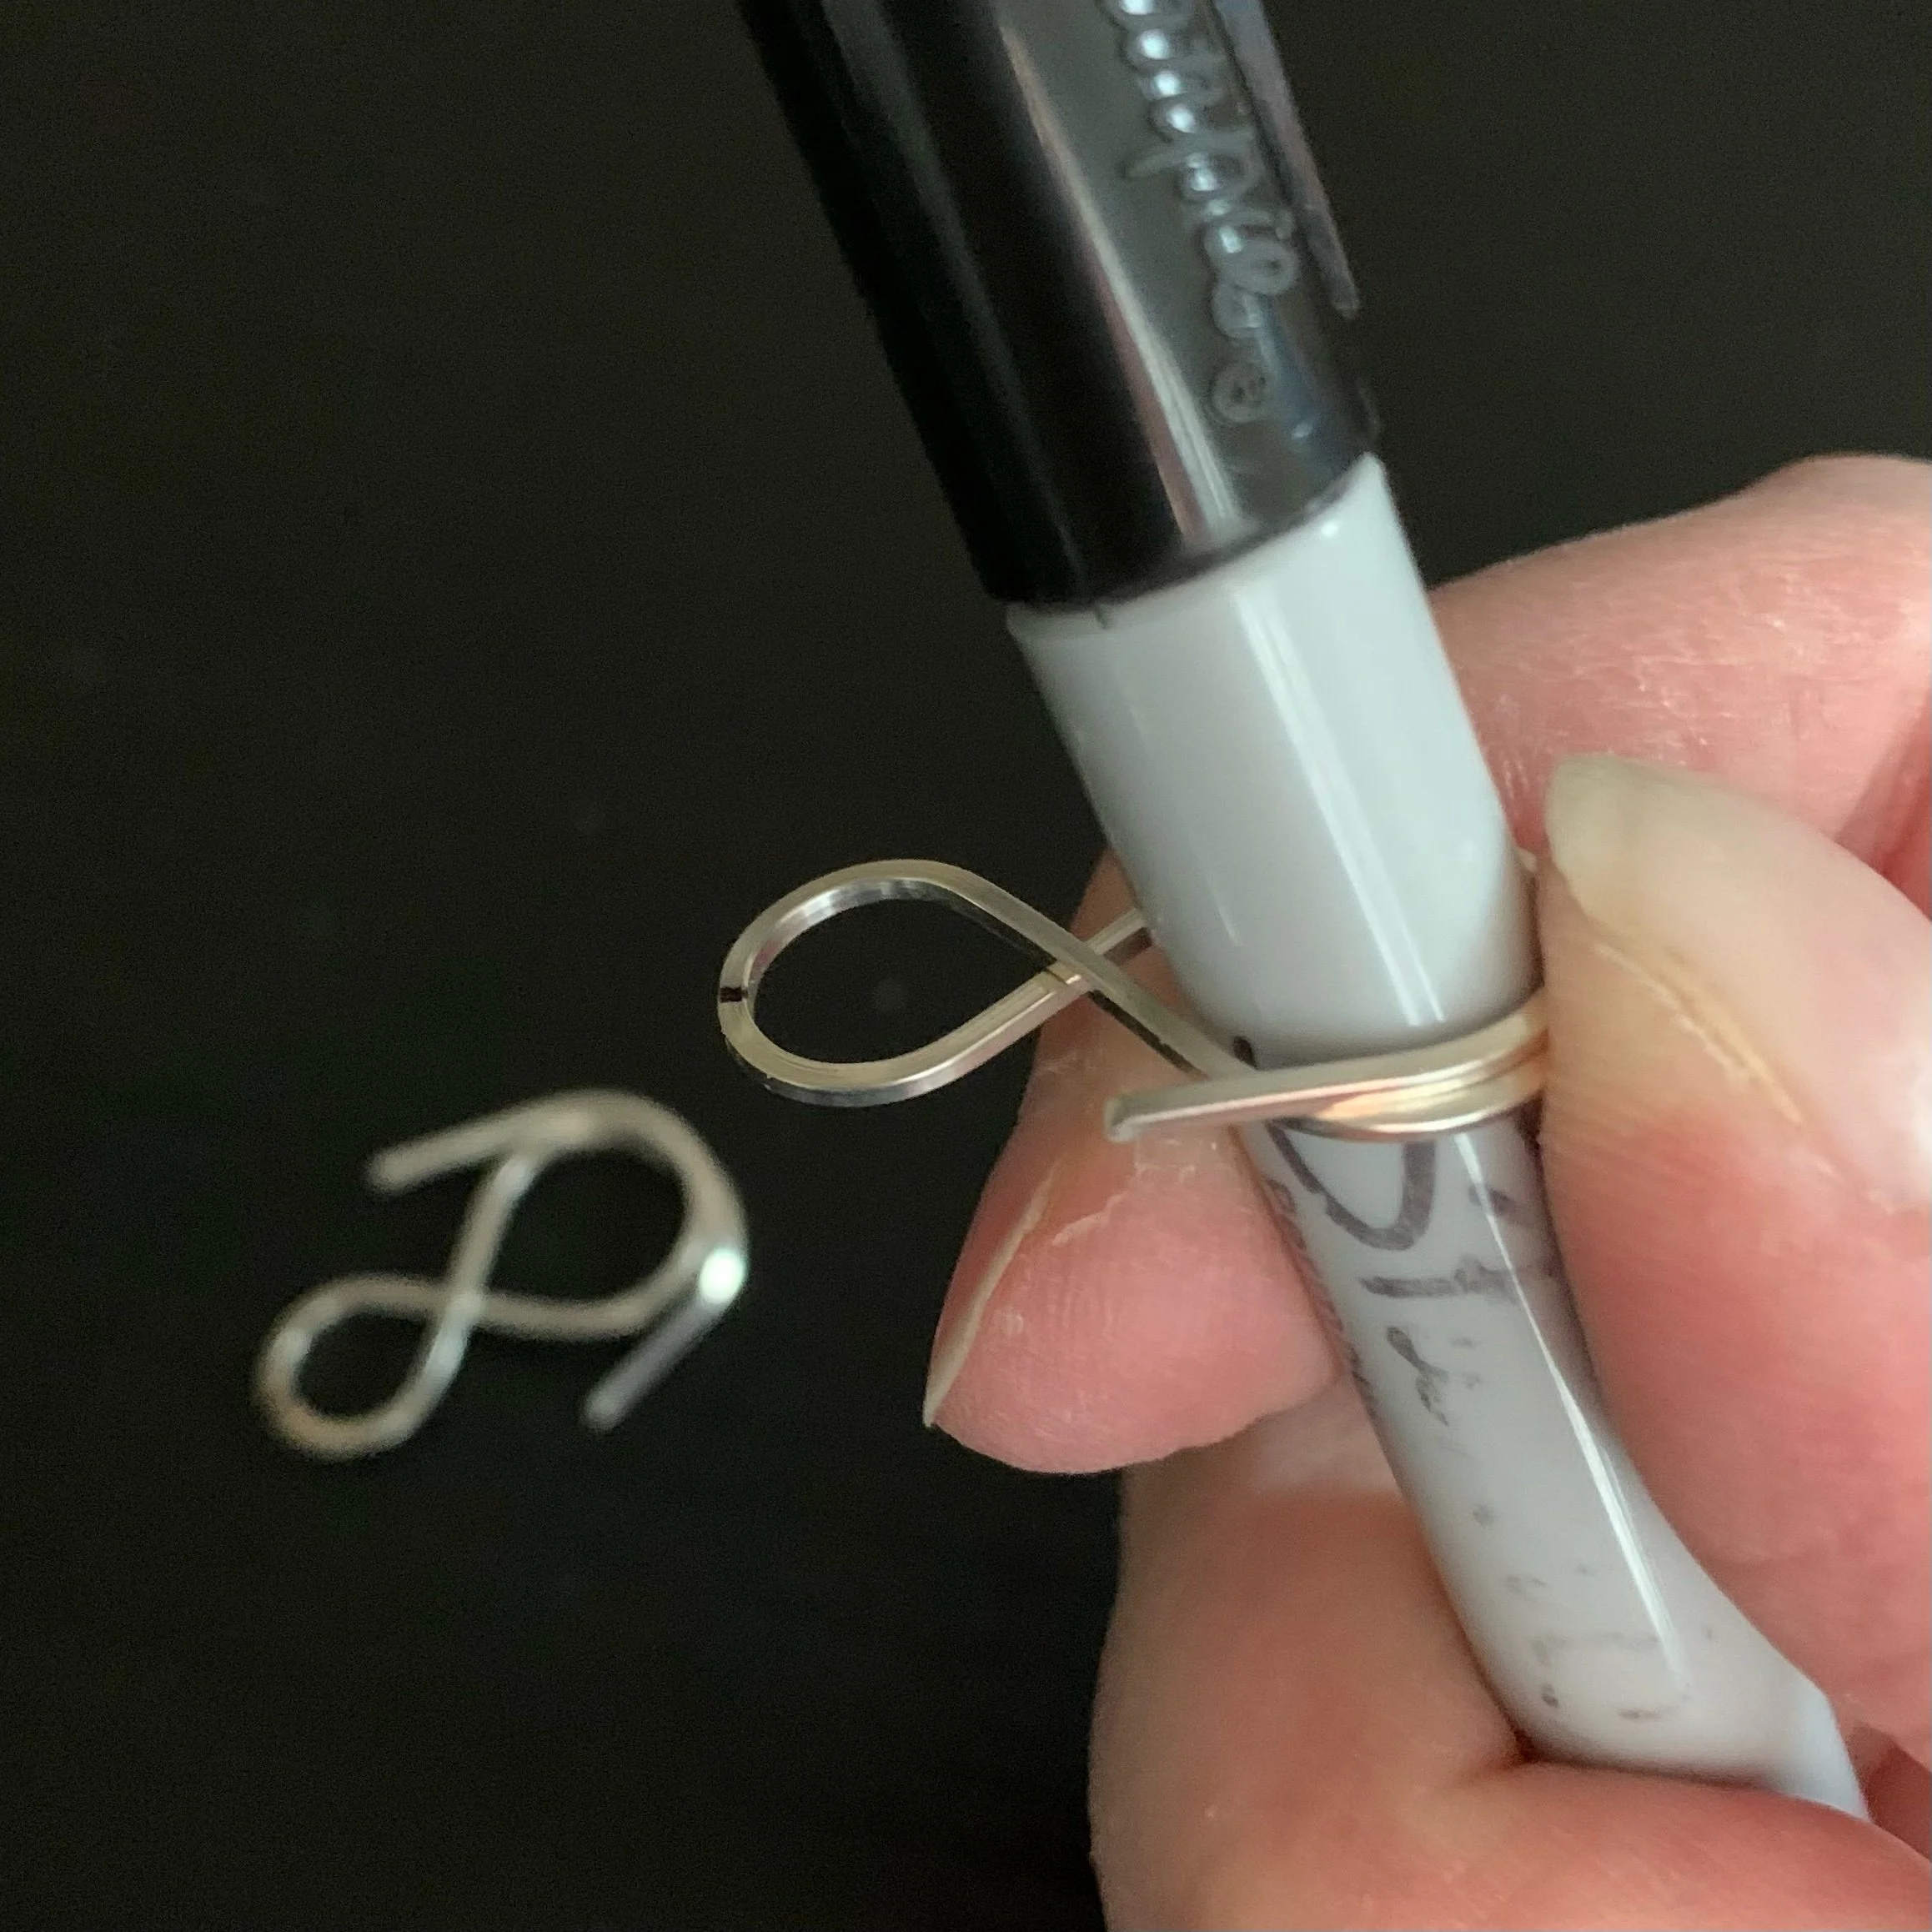
Form the inner elements from the 4” lengths of 18-gauge square wire. Follow the same technique as you did for the outer elements, except use the 7mm step on the bail-making pliers to form the top loop. Remember to cross the right wire over the left wire on one element, and cross the left wire over the right wire on the other. You want identical pieces that are mirror images of each other.
Use an approximately 1cm-sized mandrel or dowel to form the bottom circles of the inner elements. The shaft of your fine-point Sharpie works well for this.
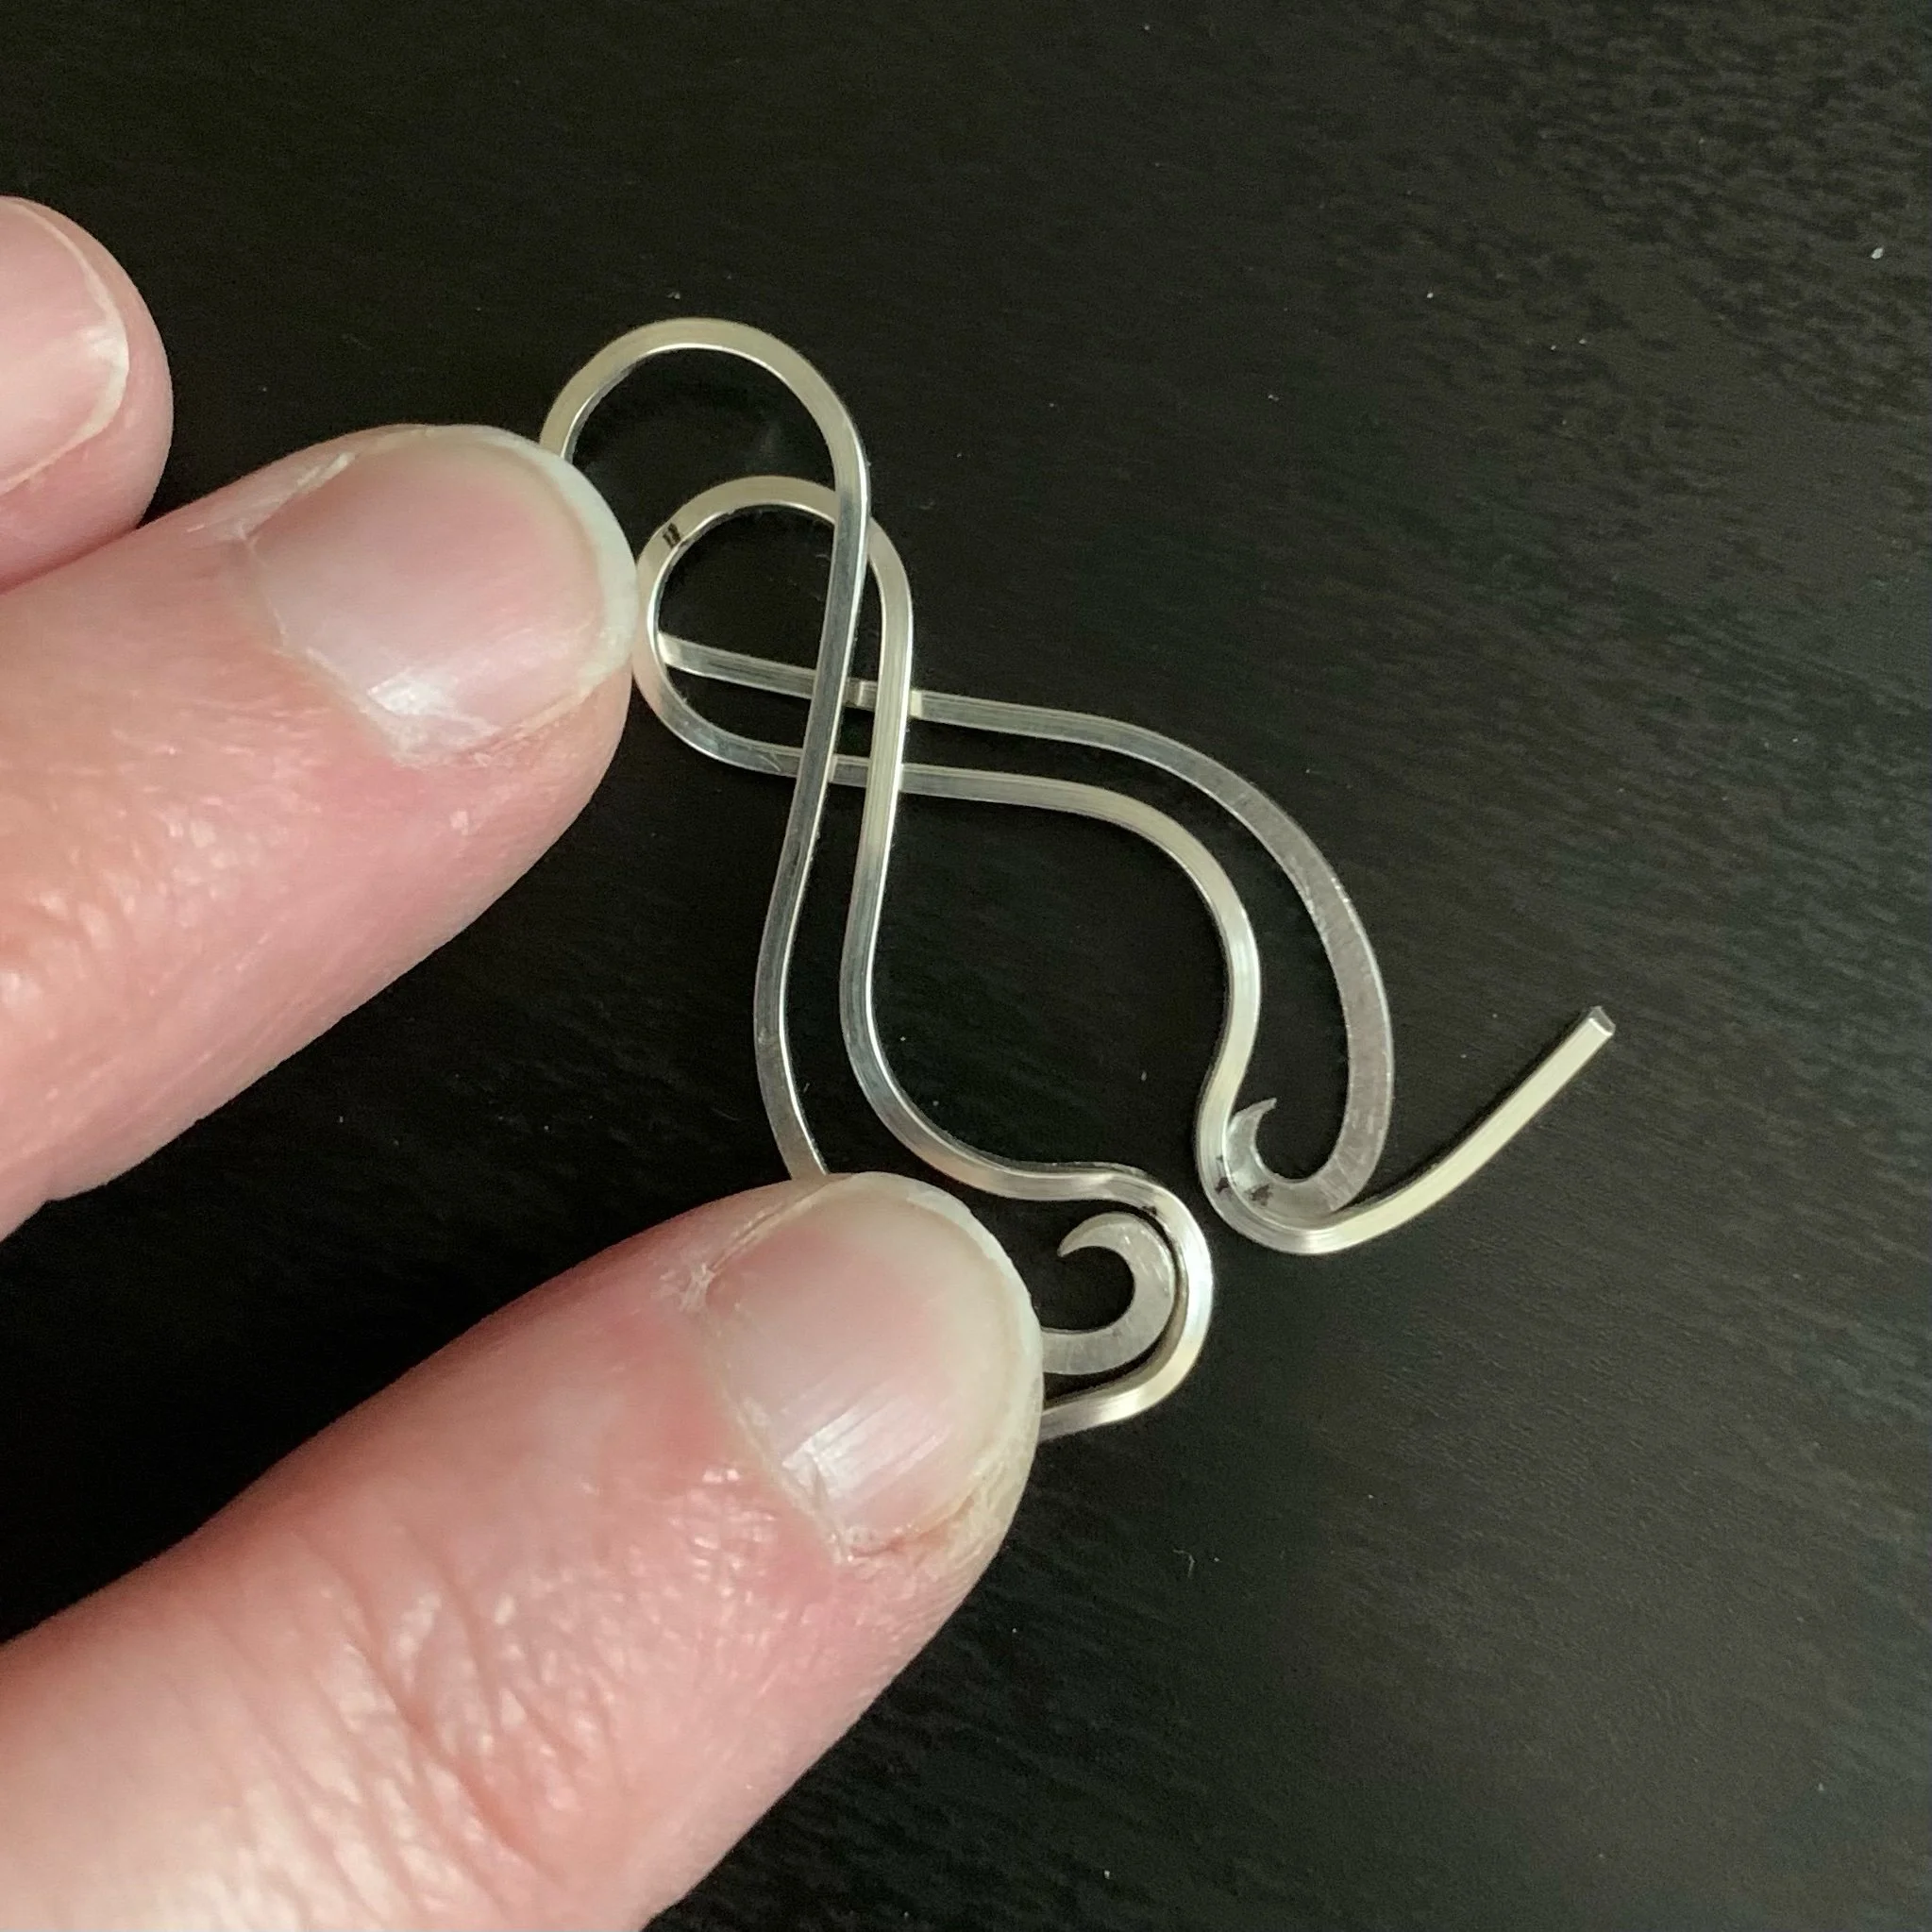
Fit the inner pieces into the outer elements. The pieces fit together by separating the cross on the outer elements and sliding the inner element between. Mark the bottom center of each inner element with your Sharpie, using the bottom loops of the outer element as a guide.
Use the 5mm step of your bail-making pliers to grasp one side of the bottom middle mark on an inner element. You don’t want to grasp centered on the Sharpie mark because this will cause your curve to start too late.
Use your flat-nosed pliers to pull the tail around the 5mm step. Create a half-circle and end with the tail pointed outward.
Step Five: Fit and Attach the Inner & Outer Elements


Click here to go to this step in the YouTube video.
Now re-fit the inner element into the outer element. The 5mm curve should fit nicely around each 2mm loop. Adjust as needed, paying attention to the way the two elements intersect in the middle of the piece, as this is your main design focus.
Once you are happy with how the two pieces fit together, grasp the bottom of the two elements and use a rawhide or nylon mallet to hammer the middle intersection of the two pieces. This will create divots in both wires that gently lock the elements together.
Turn the piece around now that the elements are locked together, and use your planishing or ball peen hammer to flatten the bottom half of the elements. You’re primarily hammering the inner element at this point, since the bottom half of the outer element has already been hammered, so it’s a bit thinner than the inner element.
Bend one of the 22-gauge half-round length into a U shape, flat side in, and hook it to the bottom of the earring, across all four wires. Choose a front and back of the earring, and ensure this loop goes across the back of the earring.
Put the earring down on your working surface so the two half-round wire ends stand up. This will be the front of your earring. Tightly cross the two ends of the half-round wire across the face of the earring, ensuring that all four inner & outer element wires are flat next to each other (not on top of each other) and tightly bound with no space between. Use your flat-nosed pliers to crimp the half-round wrapping wires into place.
Feed each end of the half-round wires through the earring and flip the piece one more time. You are now looking at the back of the piece. Tightly cross the wires again, and use your flat-nosed pliers to crimp these wires into place. The front of the earring has two wraps, and the back of the earring has three wraps.
Step 6: Finish the Connected Elements


Click here to go to this step in the YouTube video.
Trim the tails of the inner element using your flush cutters. Do this at an angle, following the outer curve of the earring.
Use a file to shape the bottom tails to gentle curves with no blunt edges. Use sandpaper as well if needed.
From the back of the piece, pass the bottom half-round wire end through the space and face the flat side toward the piece. Pull the top half-round wire down diagonally across the wraps toward the bottom of the piece.
Wrap the half-round wires around the bottom curve of the outer element three times, ending at the back of the earrings.
Clip the half-round wires using your flush cutters, then use your flat-nosed pliers to press them down on the back of the piece.
Repeat for both earrings. Check for any pokey elements by running your finger along the bottom edge of the earrings. You should not feel any catches or rough spots. If you do, fix this with sandpaper.
Step Seven: Create & Attach Ear Wires


Click here to go to this step in the YouTube video.
Create a simple pair of ear wires using the two lengths of 20-gauge round wire. Start by forming a 2mm loop on one end of each wire.
Next, form a 7mm loop facing the opposite direction from your first loop. Make about a 2/3 circle, leaving 1/3 open.
Optionally, hammer the front portion of the 7mm loop. Don’t hammer too far up toward the top of the ear wire, as this part will go into the ear and a round wire is more comfortable in a piercing than a flattened or hammered wire.
Use the 9mm step to create a small, outward-facing bend in the ends of the ear wires.
Sand the wire ends that will go into the ears. Feel these with your fingertips to ensure they are fully smooth with no pokey bits.
Attach the ear wires to your earring elements. Polish and wear for daytime or evening events!
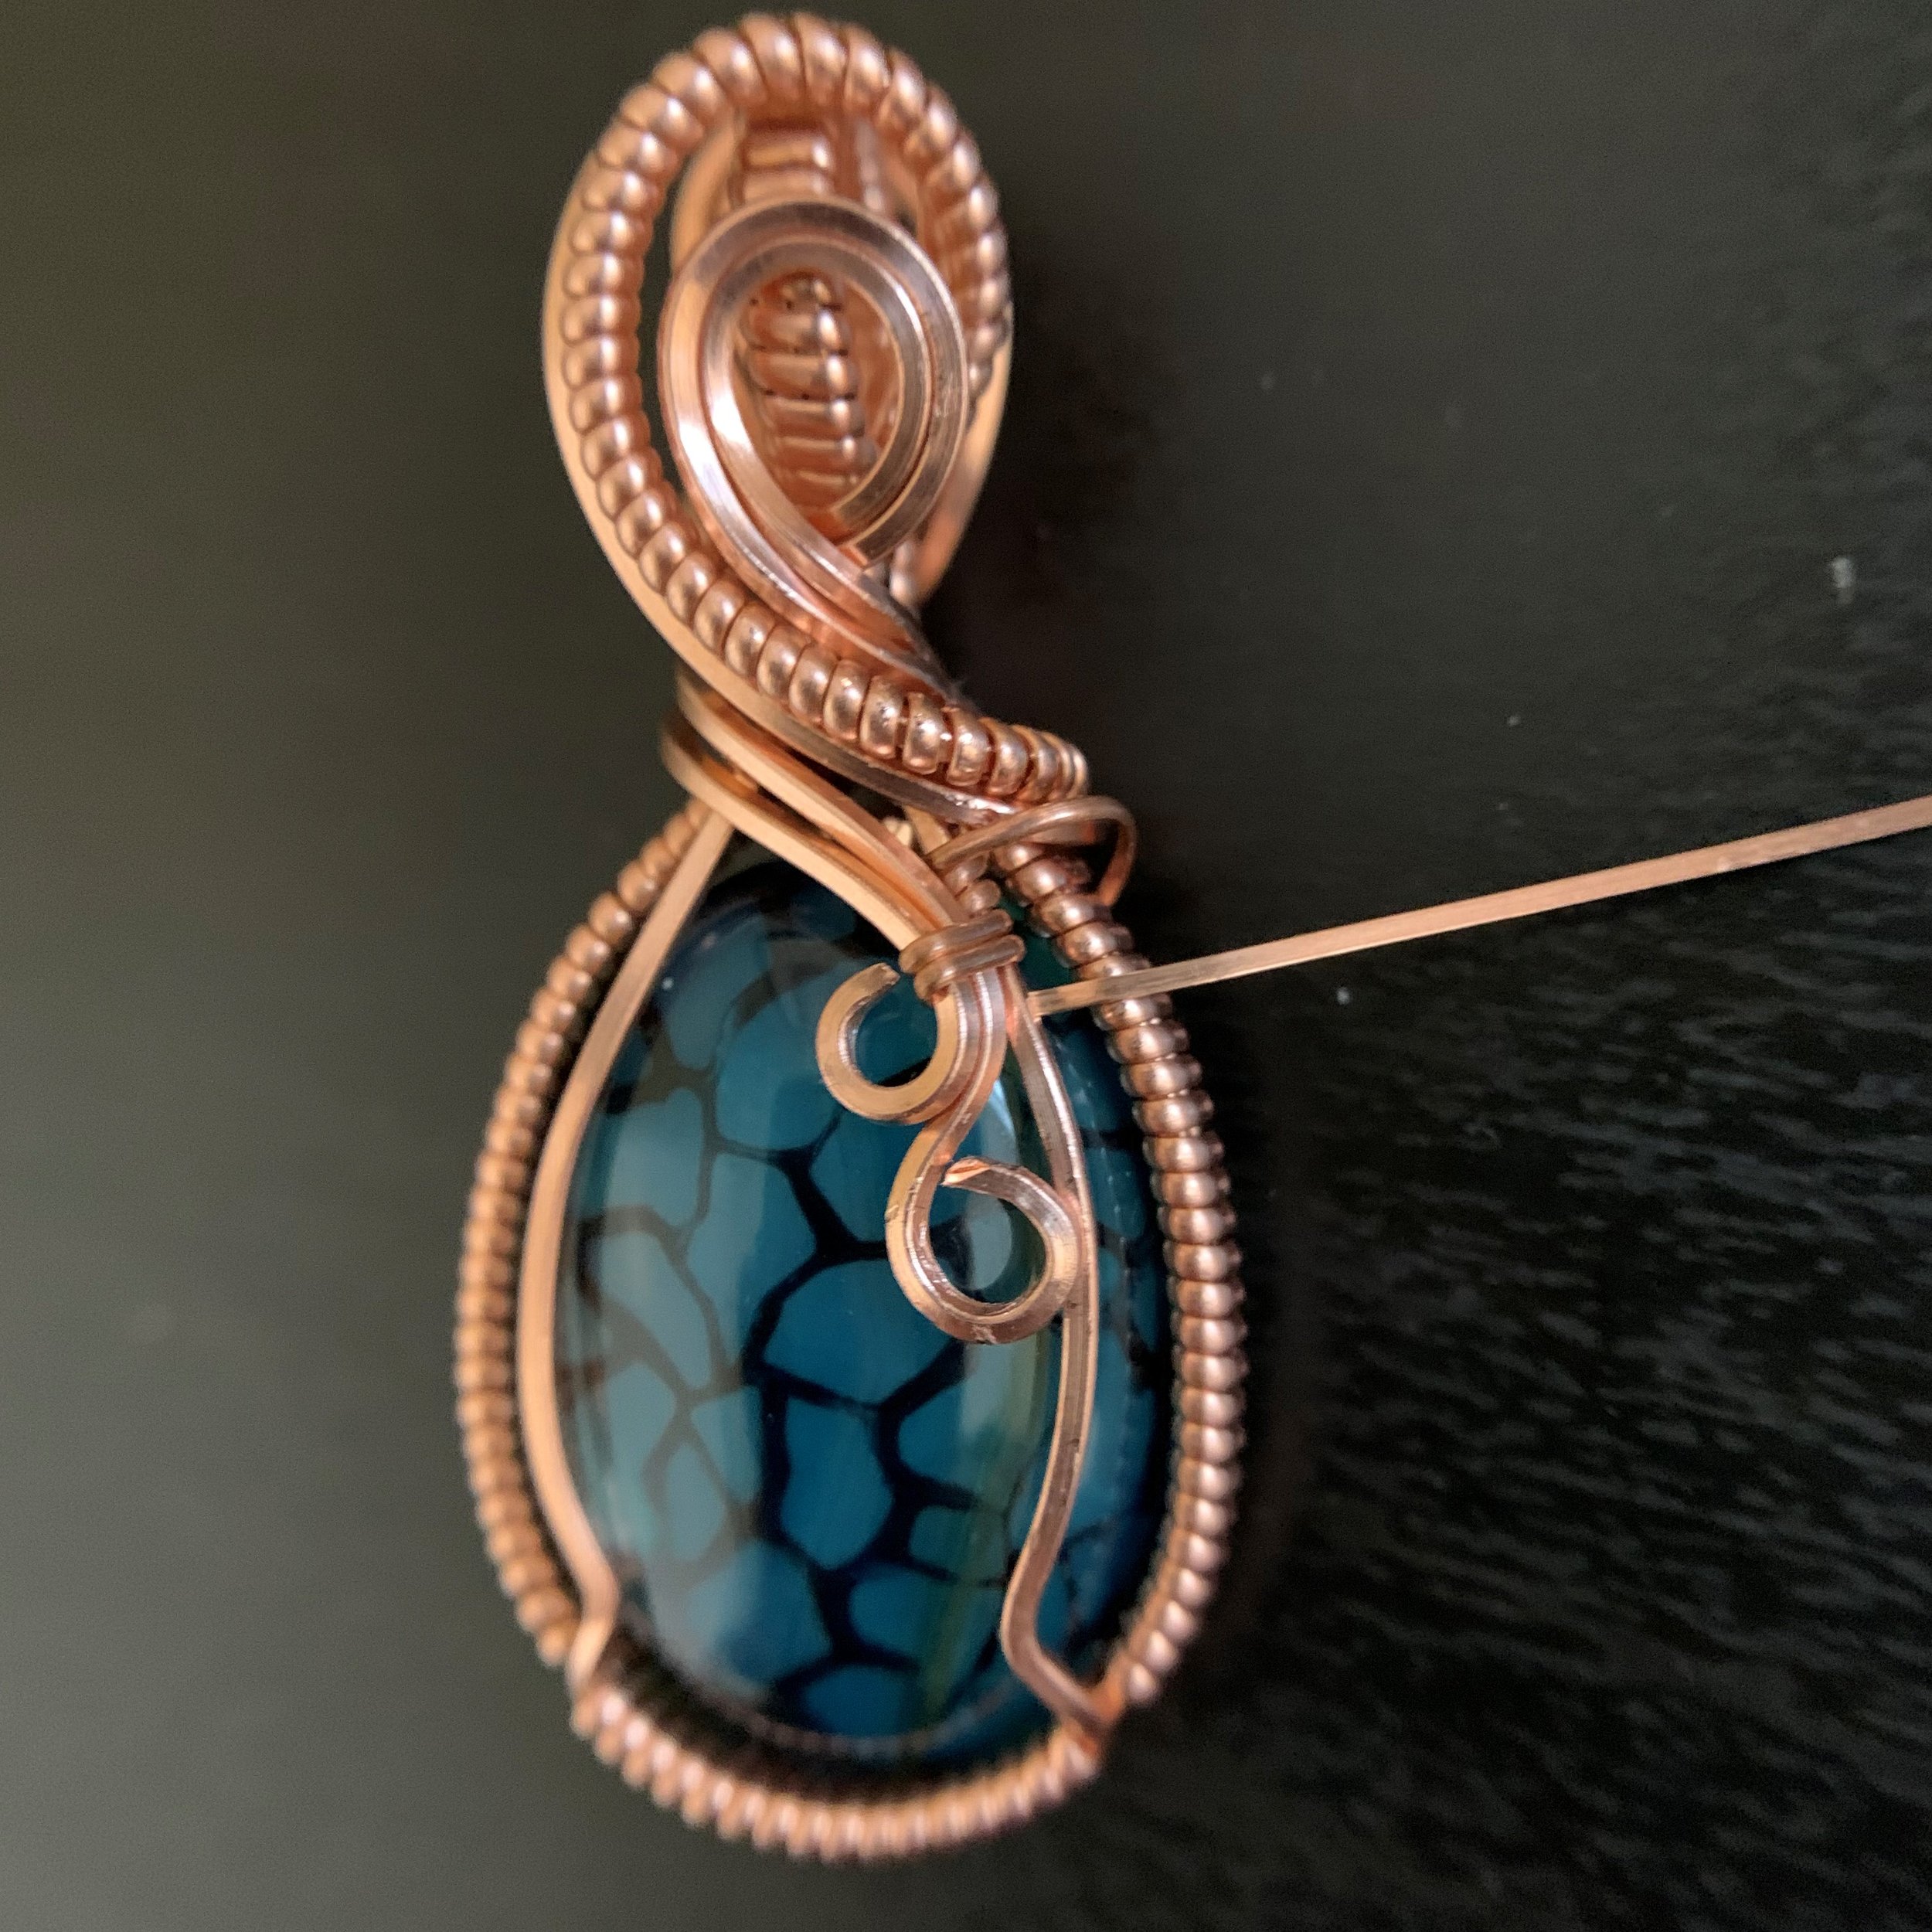
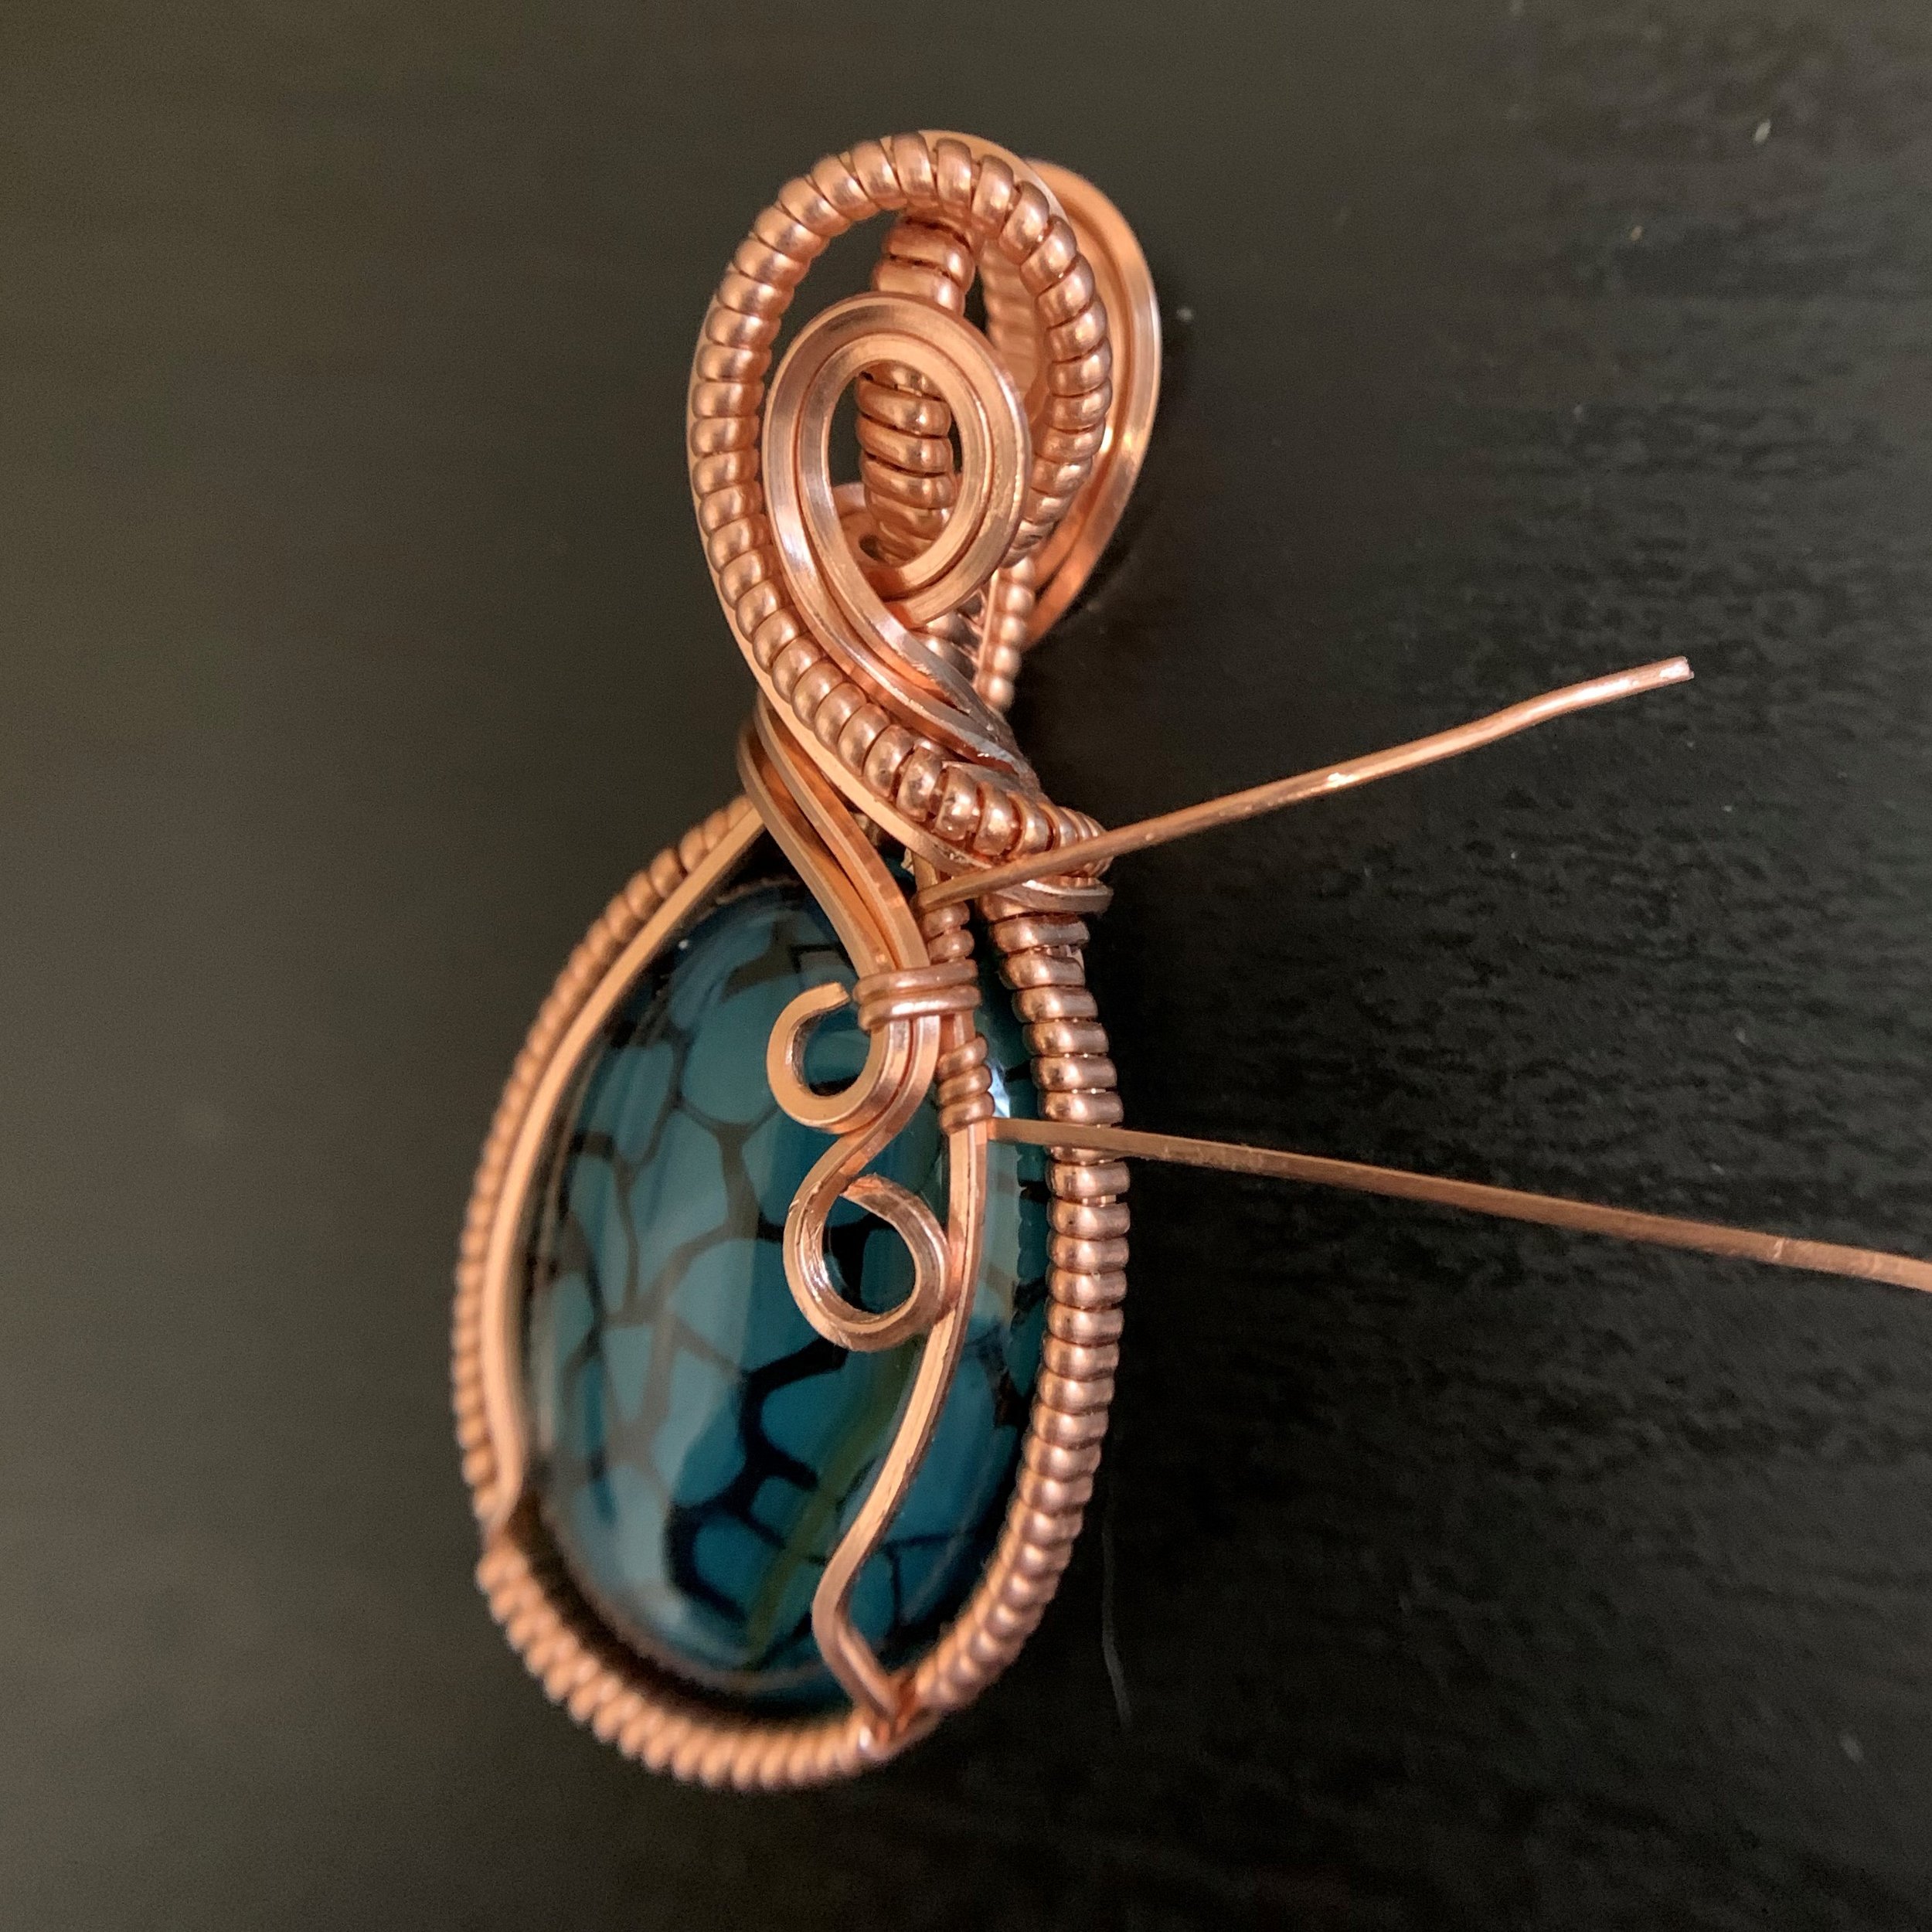
Classic Wire Wrapped Pendant
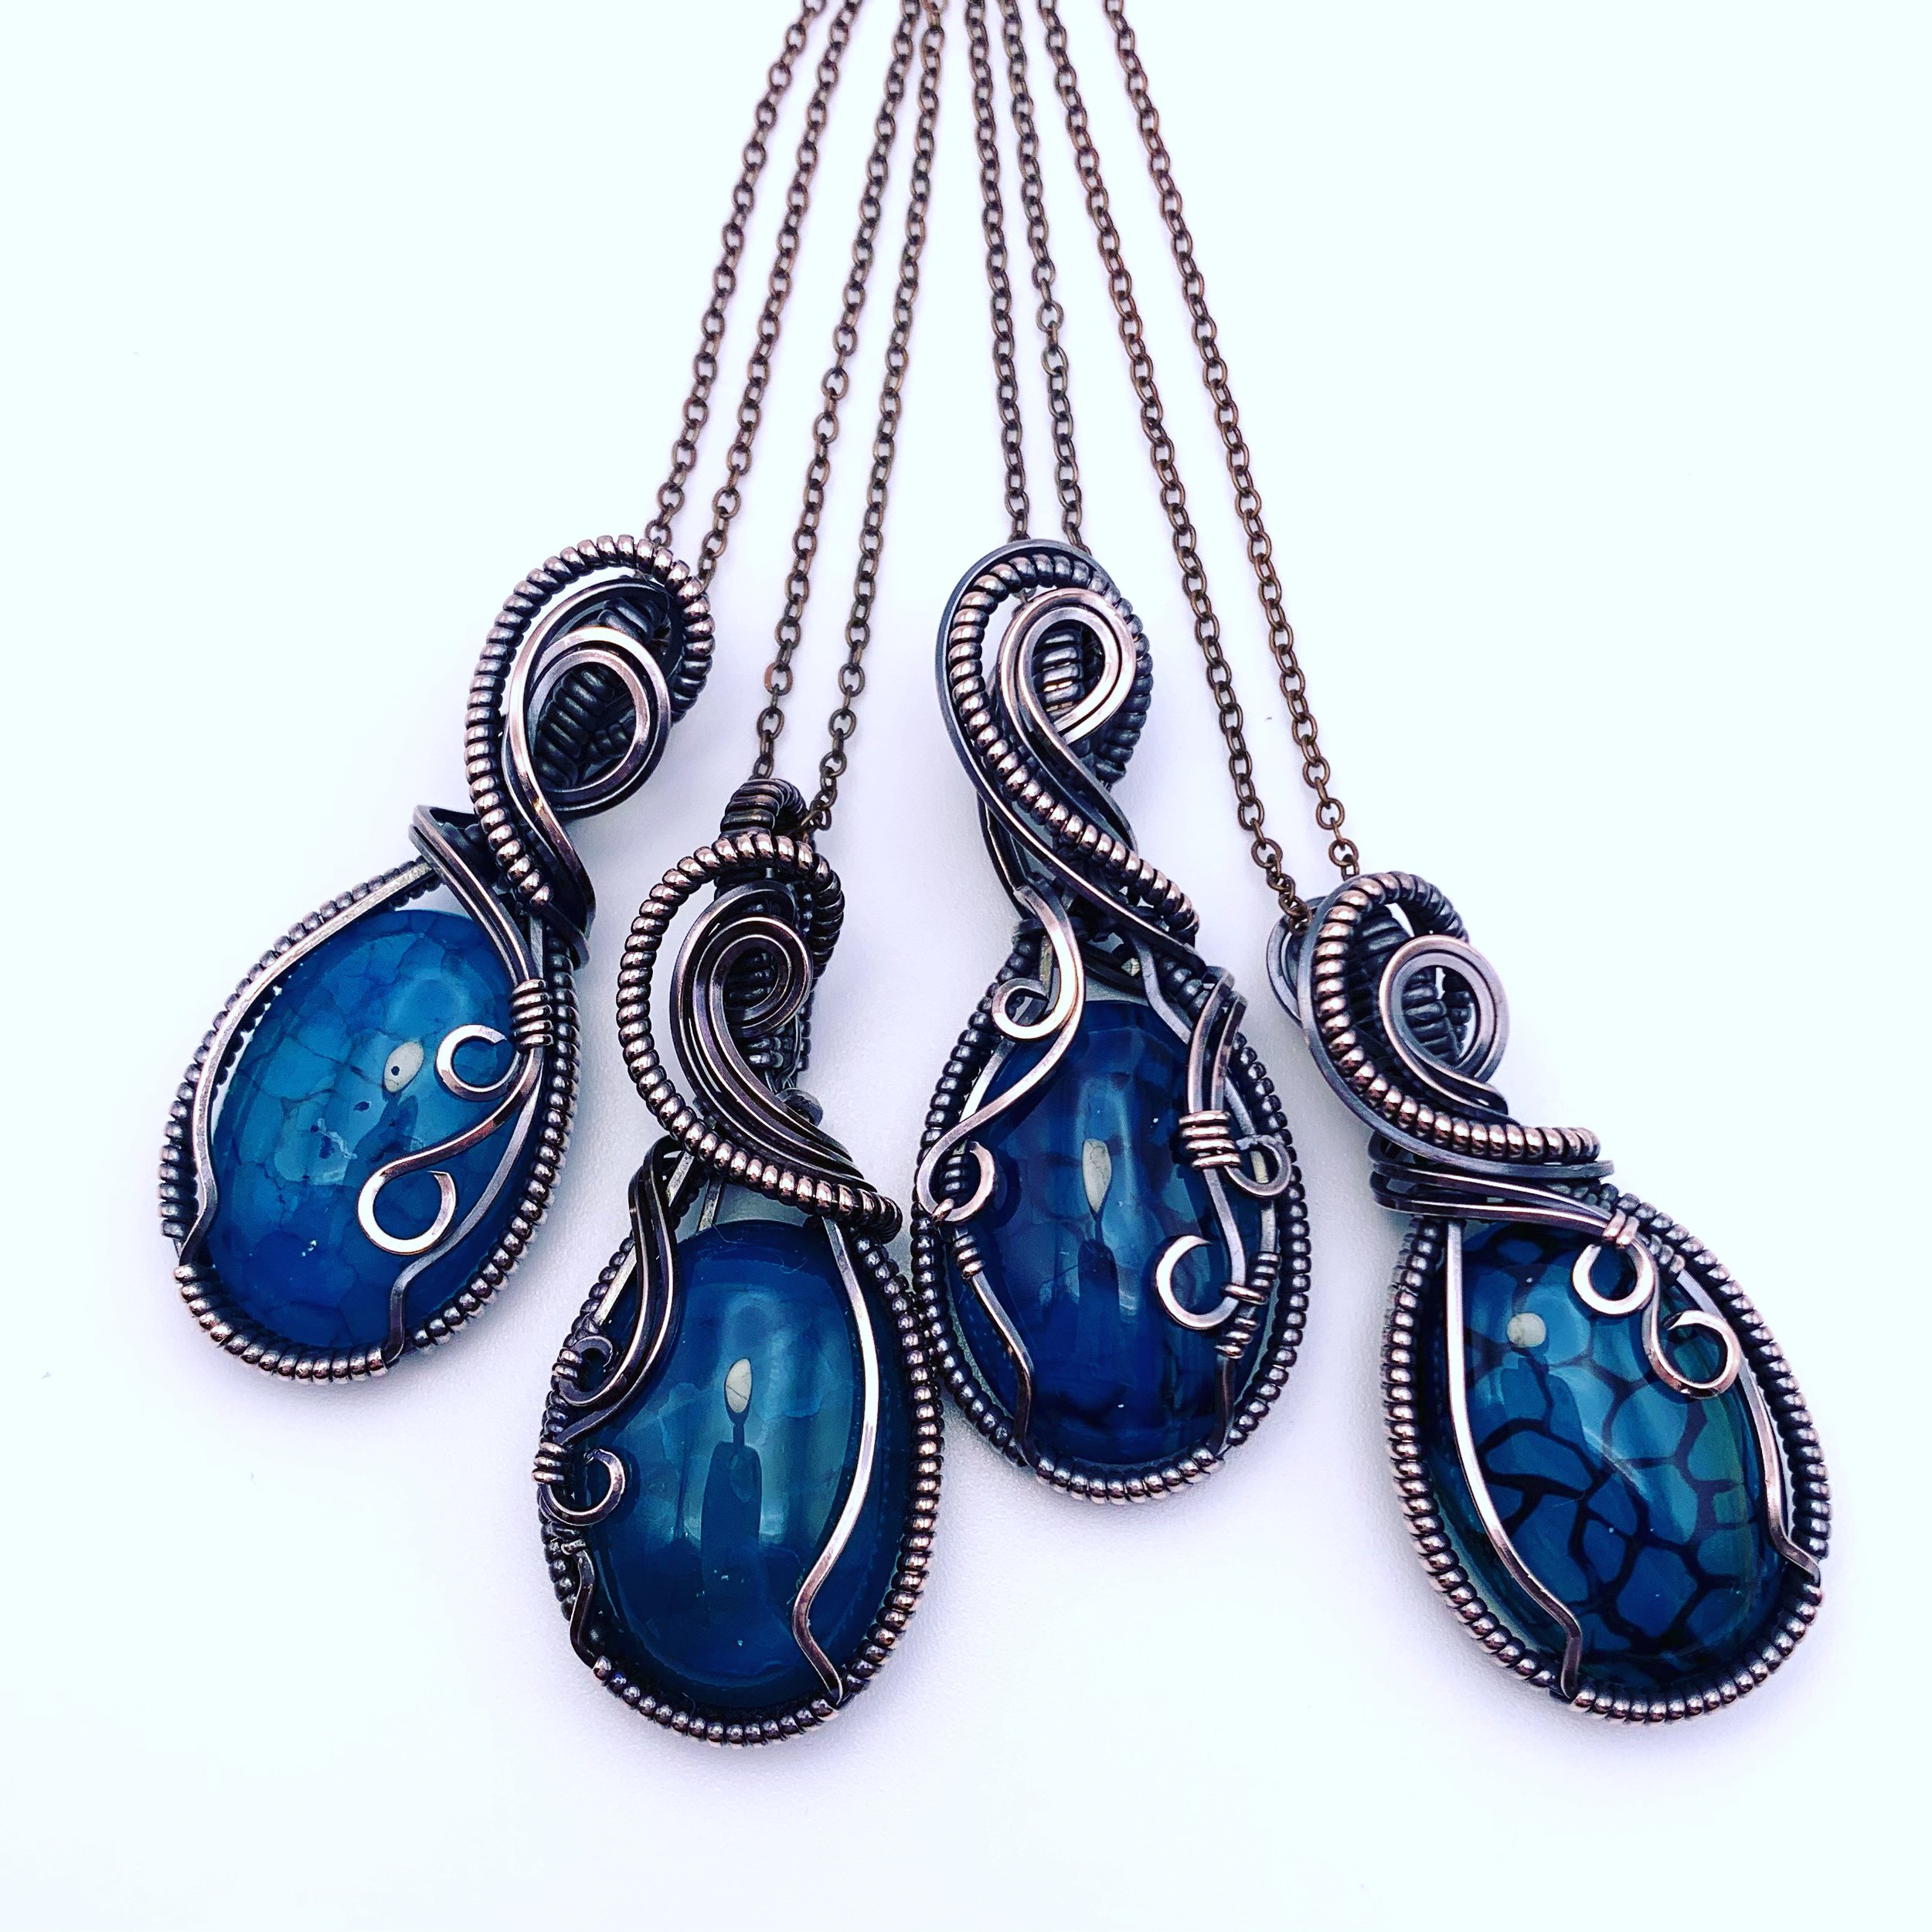
Classic Wire Wrapped Pendant
Wire wrapped cabochons are the bread and butter of many wire wrappers. Whether you are a beginner looking for a project to get started or you’ve been wrapping for a while and want to see a new twist on a standard design, this tutorial is for you.
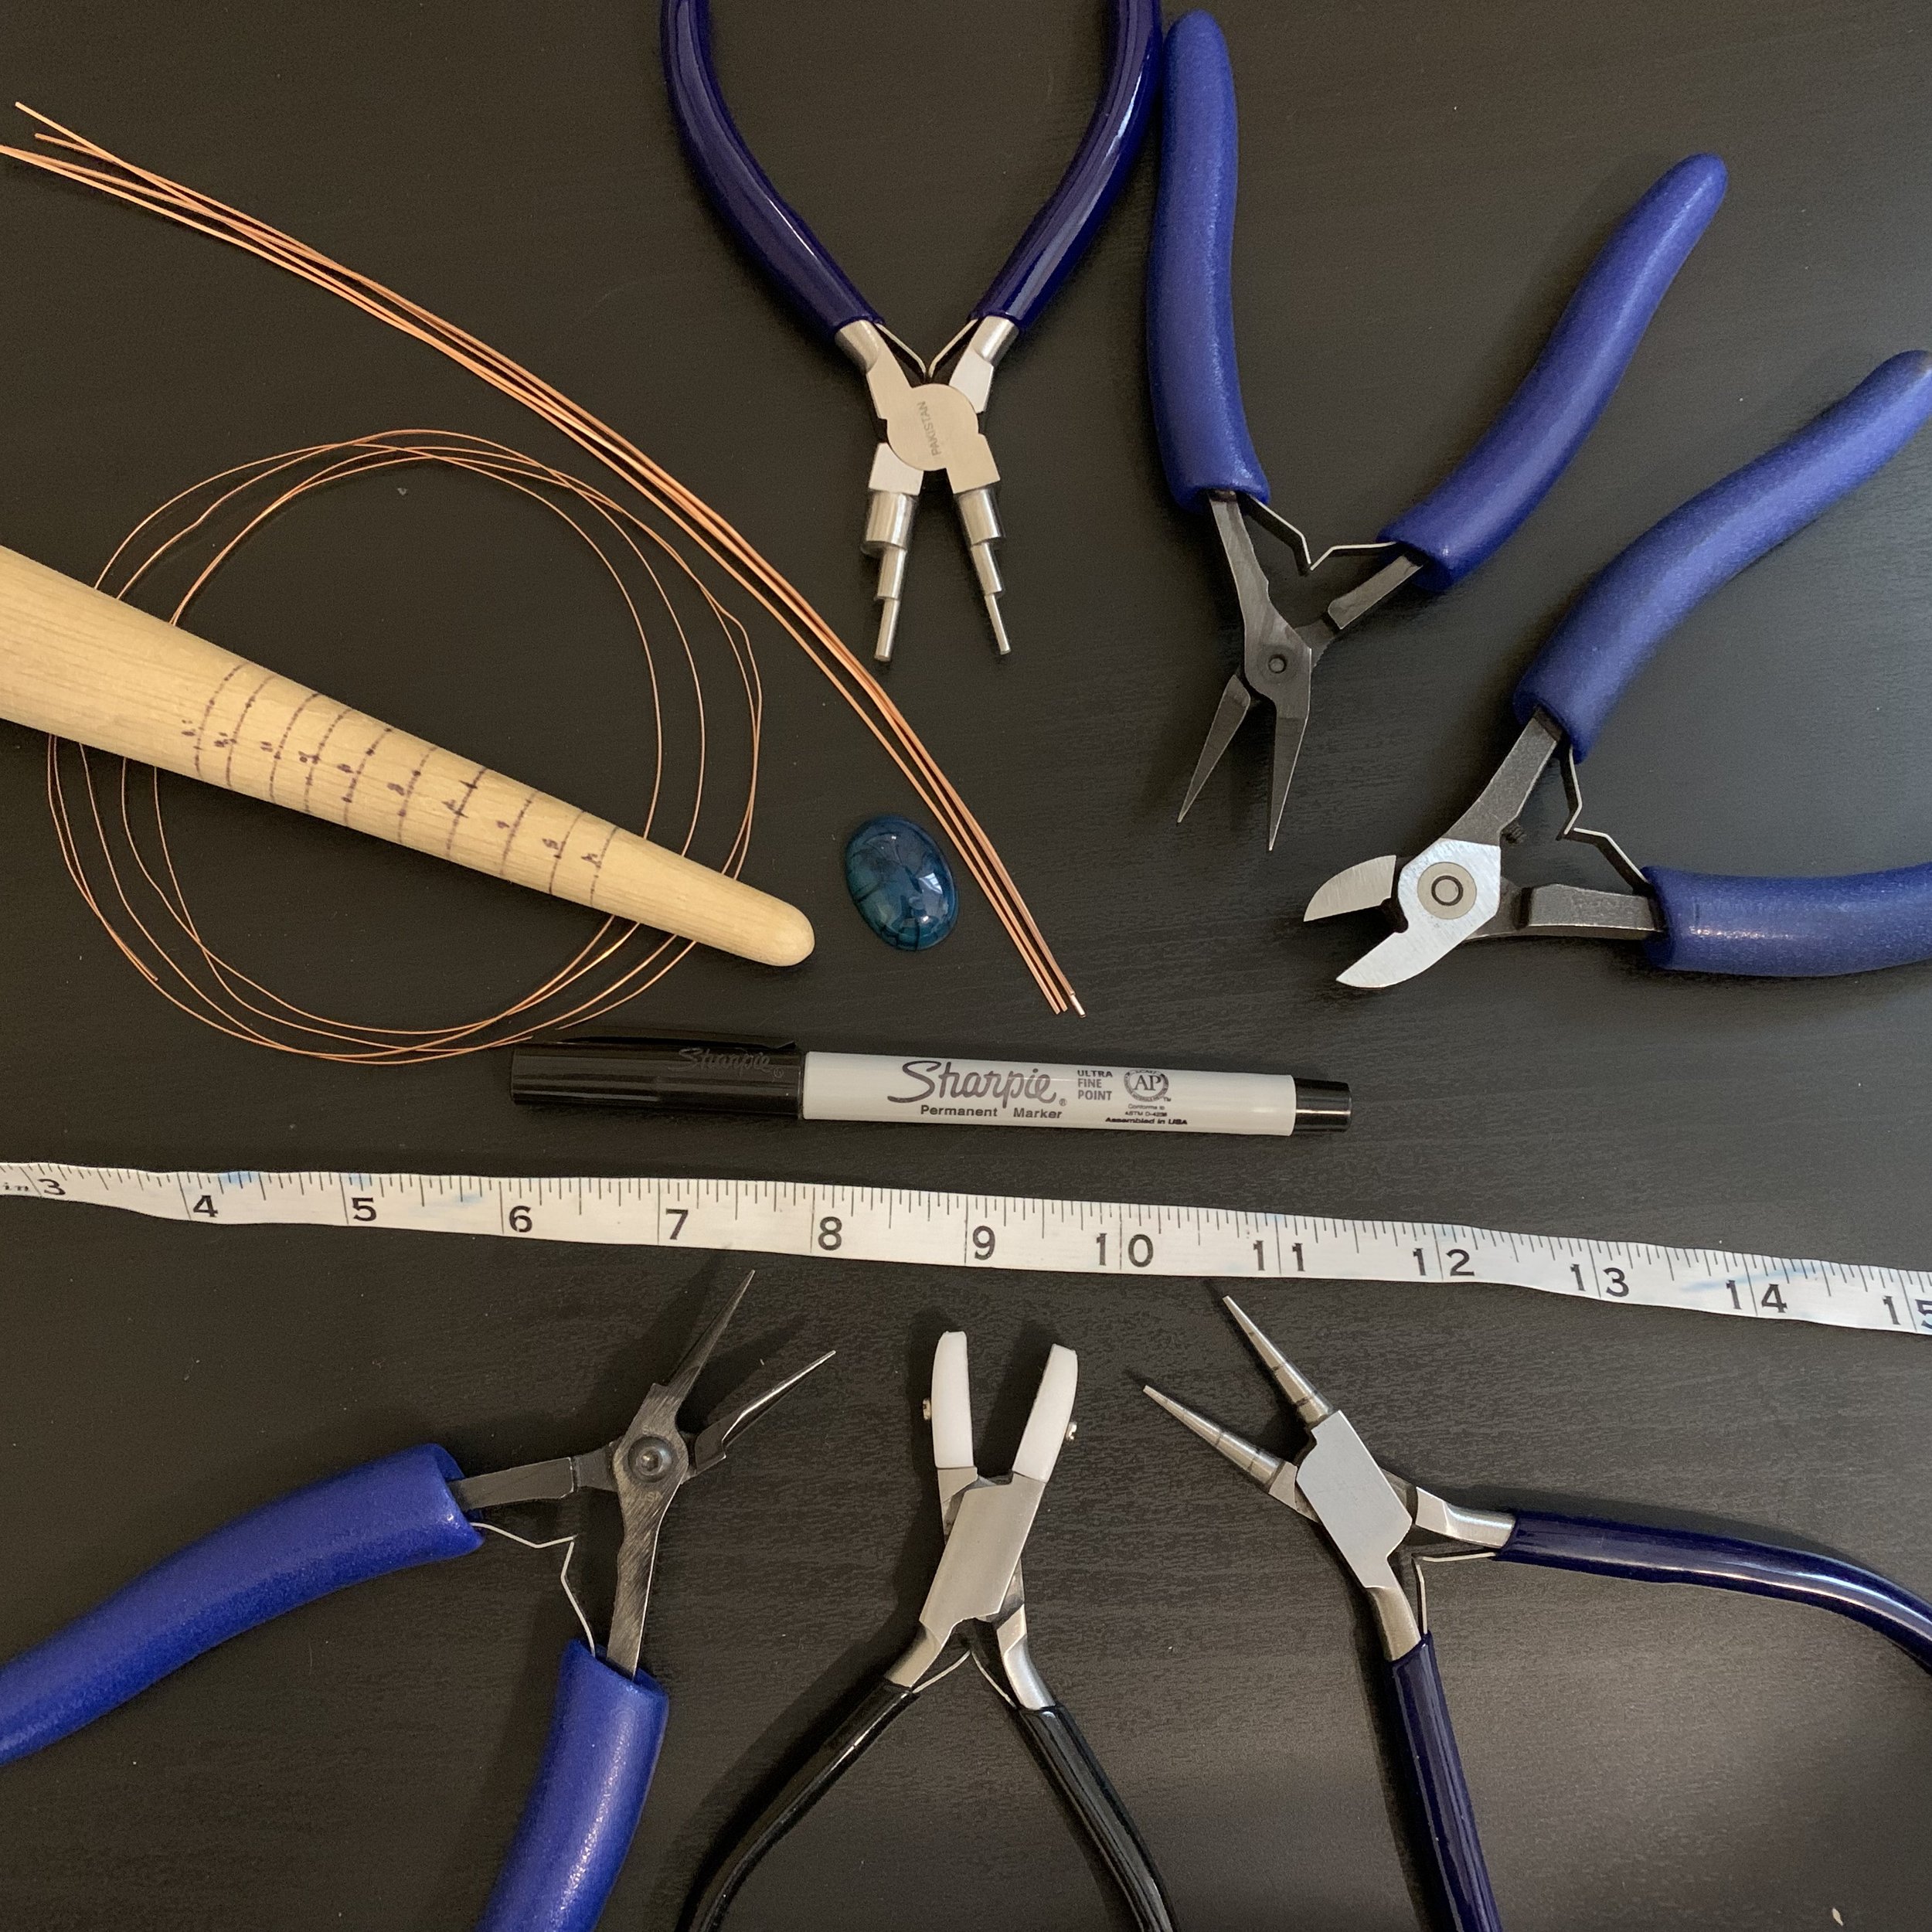
Tools & Materials
4 lengths 10” 20 gauge half hard square wire
1 length 44” 20 gauge dead soft half round wire
1 length 4” 22 gauge dead soft half round wire
1 cabochon, 18mm x 25mm
Pliers: Flat-nose pliers, bail-making pliers with 2mm and 3mm tips, and flush cutters.
Optional Pliers: Needle-nose pliers, round-nose pliers, and nylon-tipped pliers
Ring Mandrel
Measuring Tape & Sharpie
Video Demonstration
You may wish to start by watching a video of the entire process. Then you can follow the detailed steps and photos below.
Step One: Start the Wrap
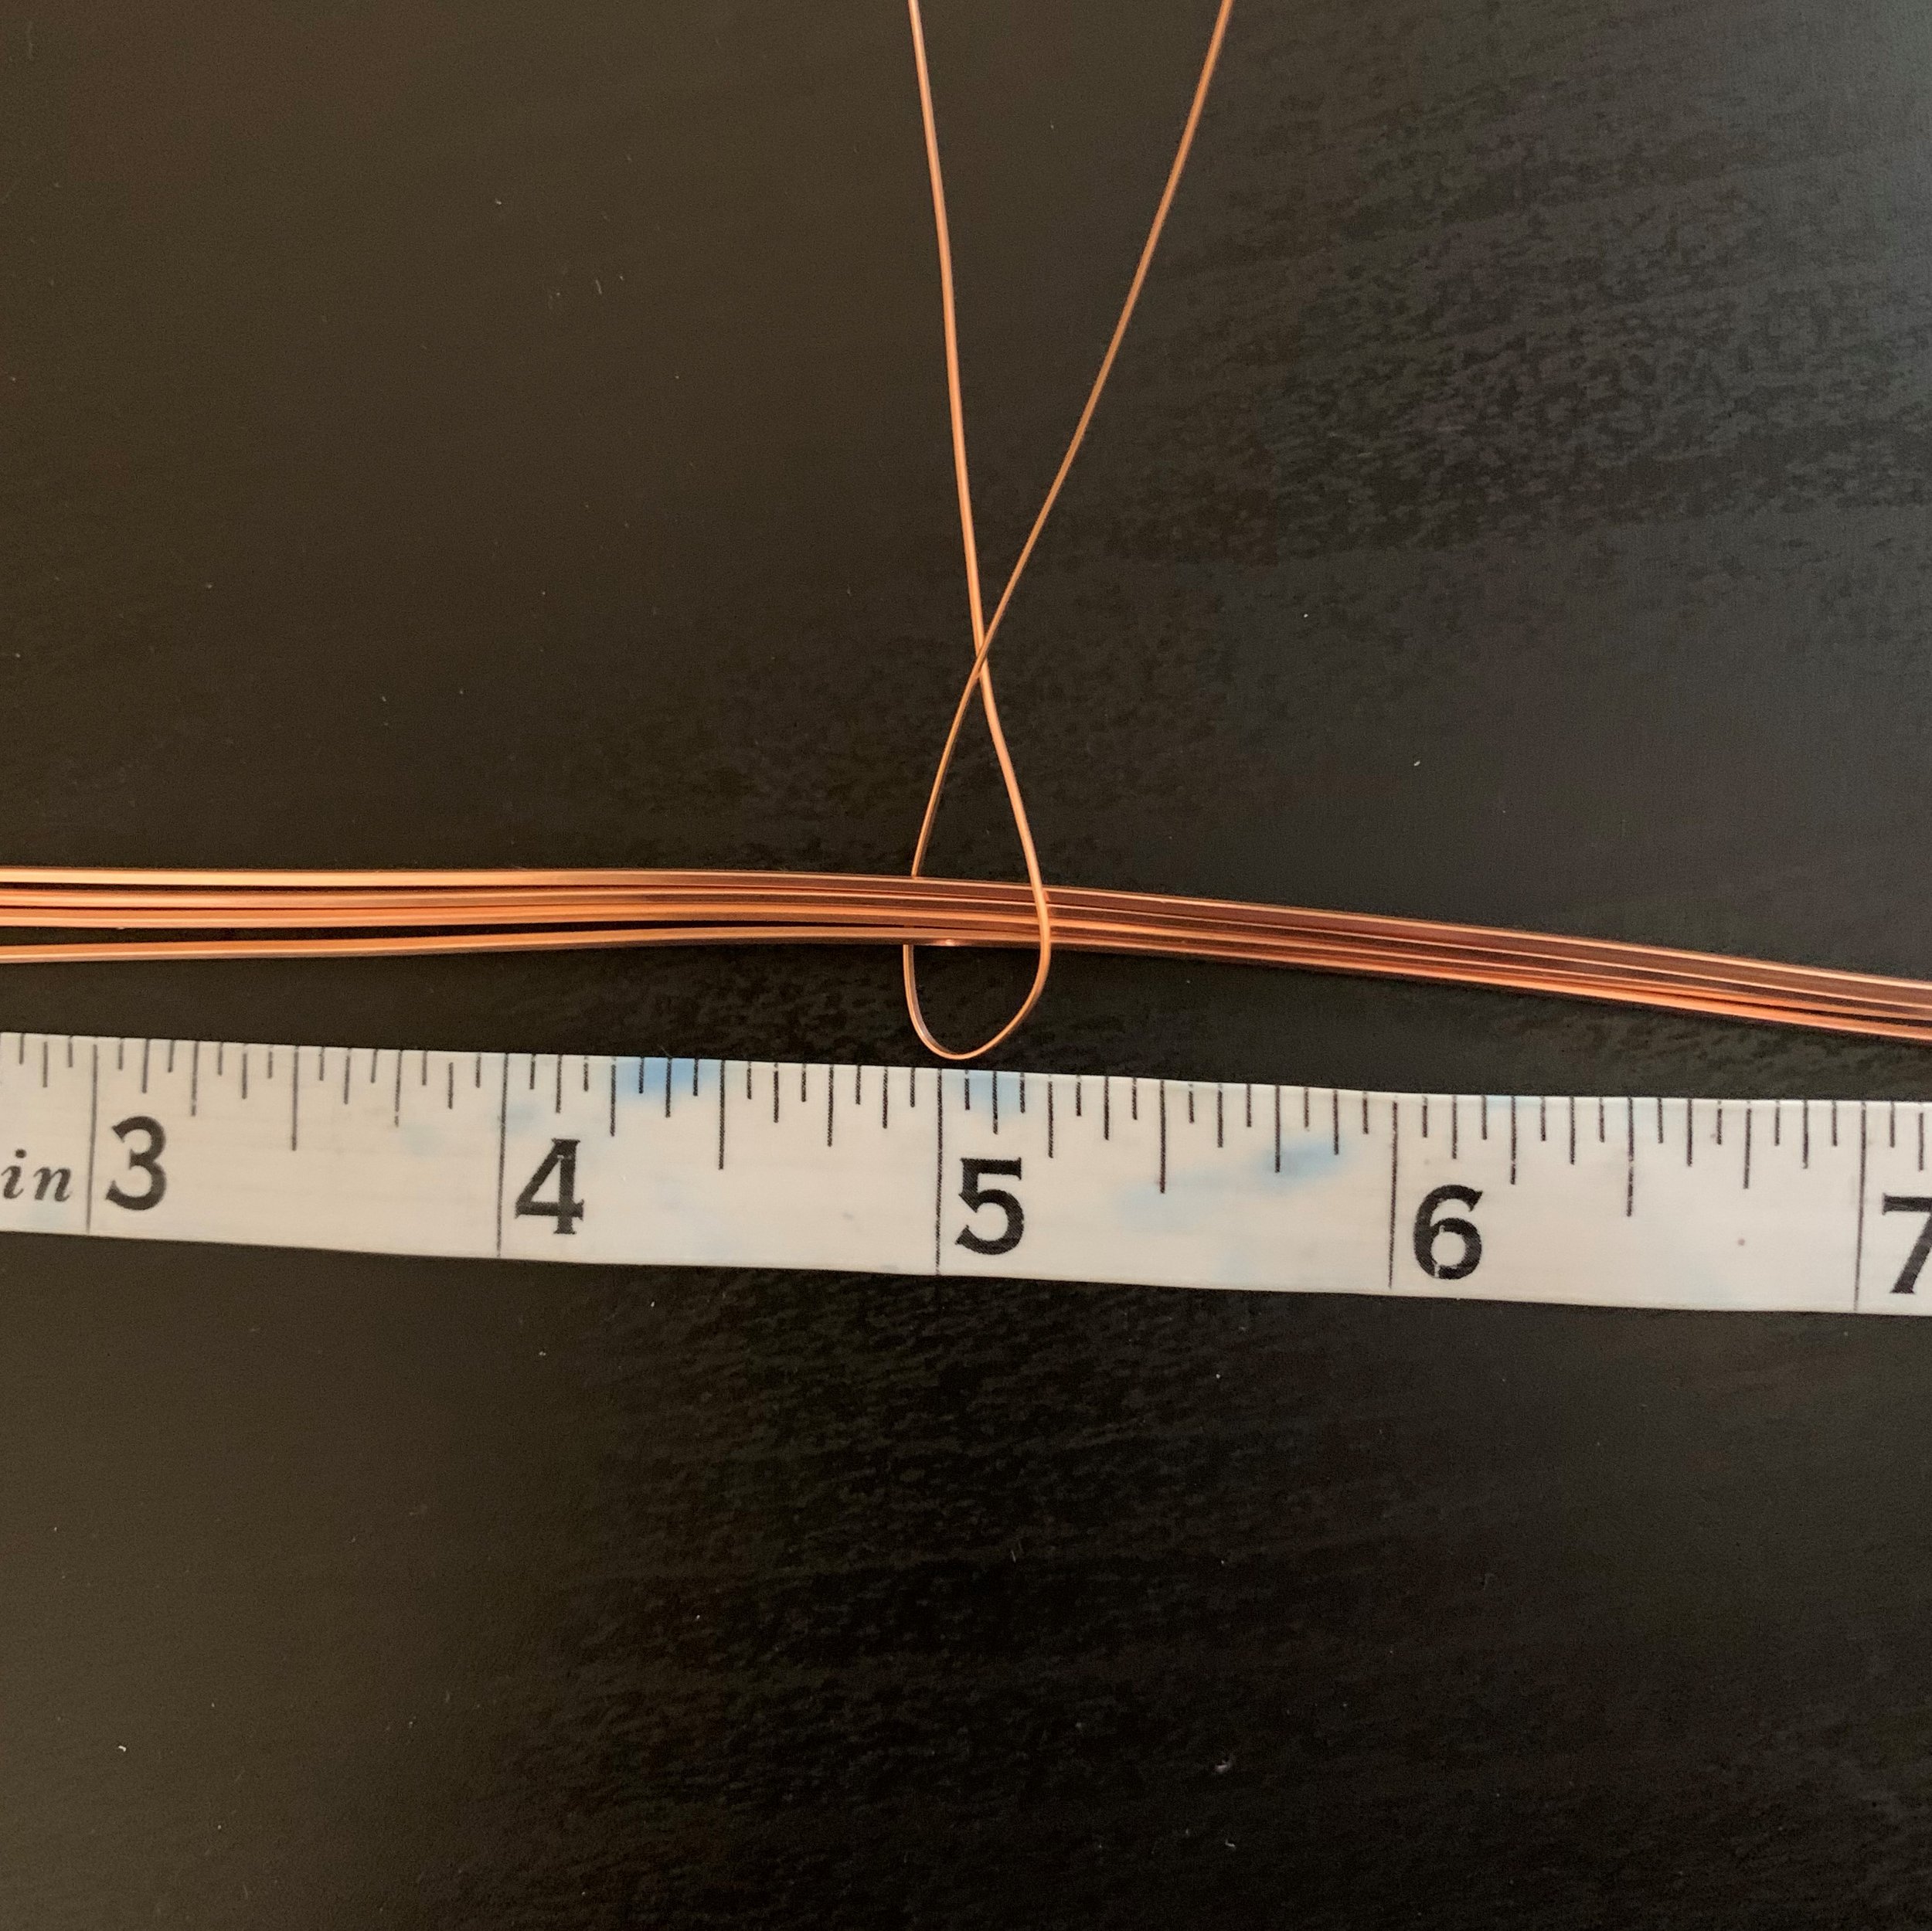
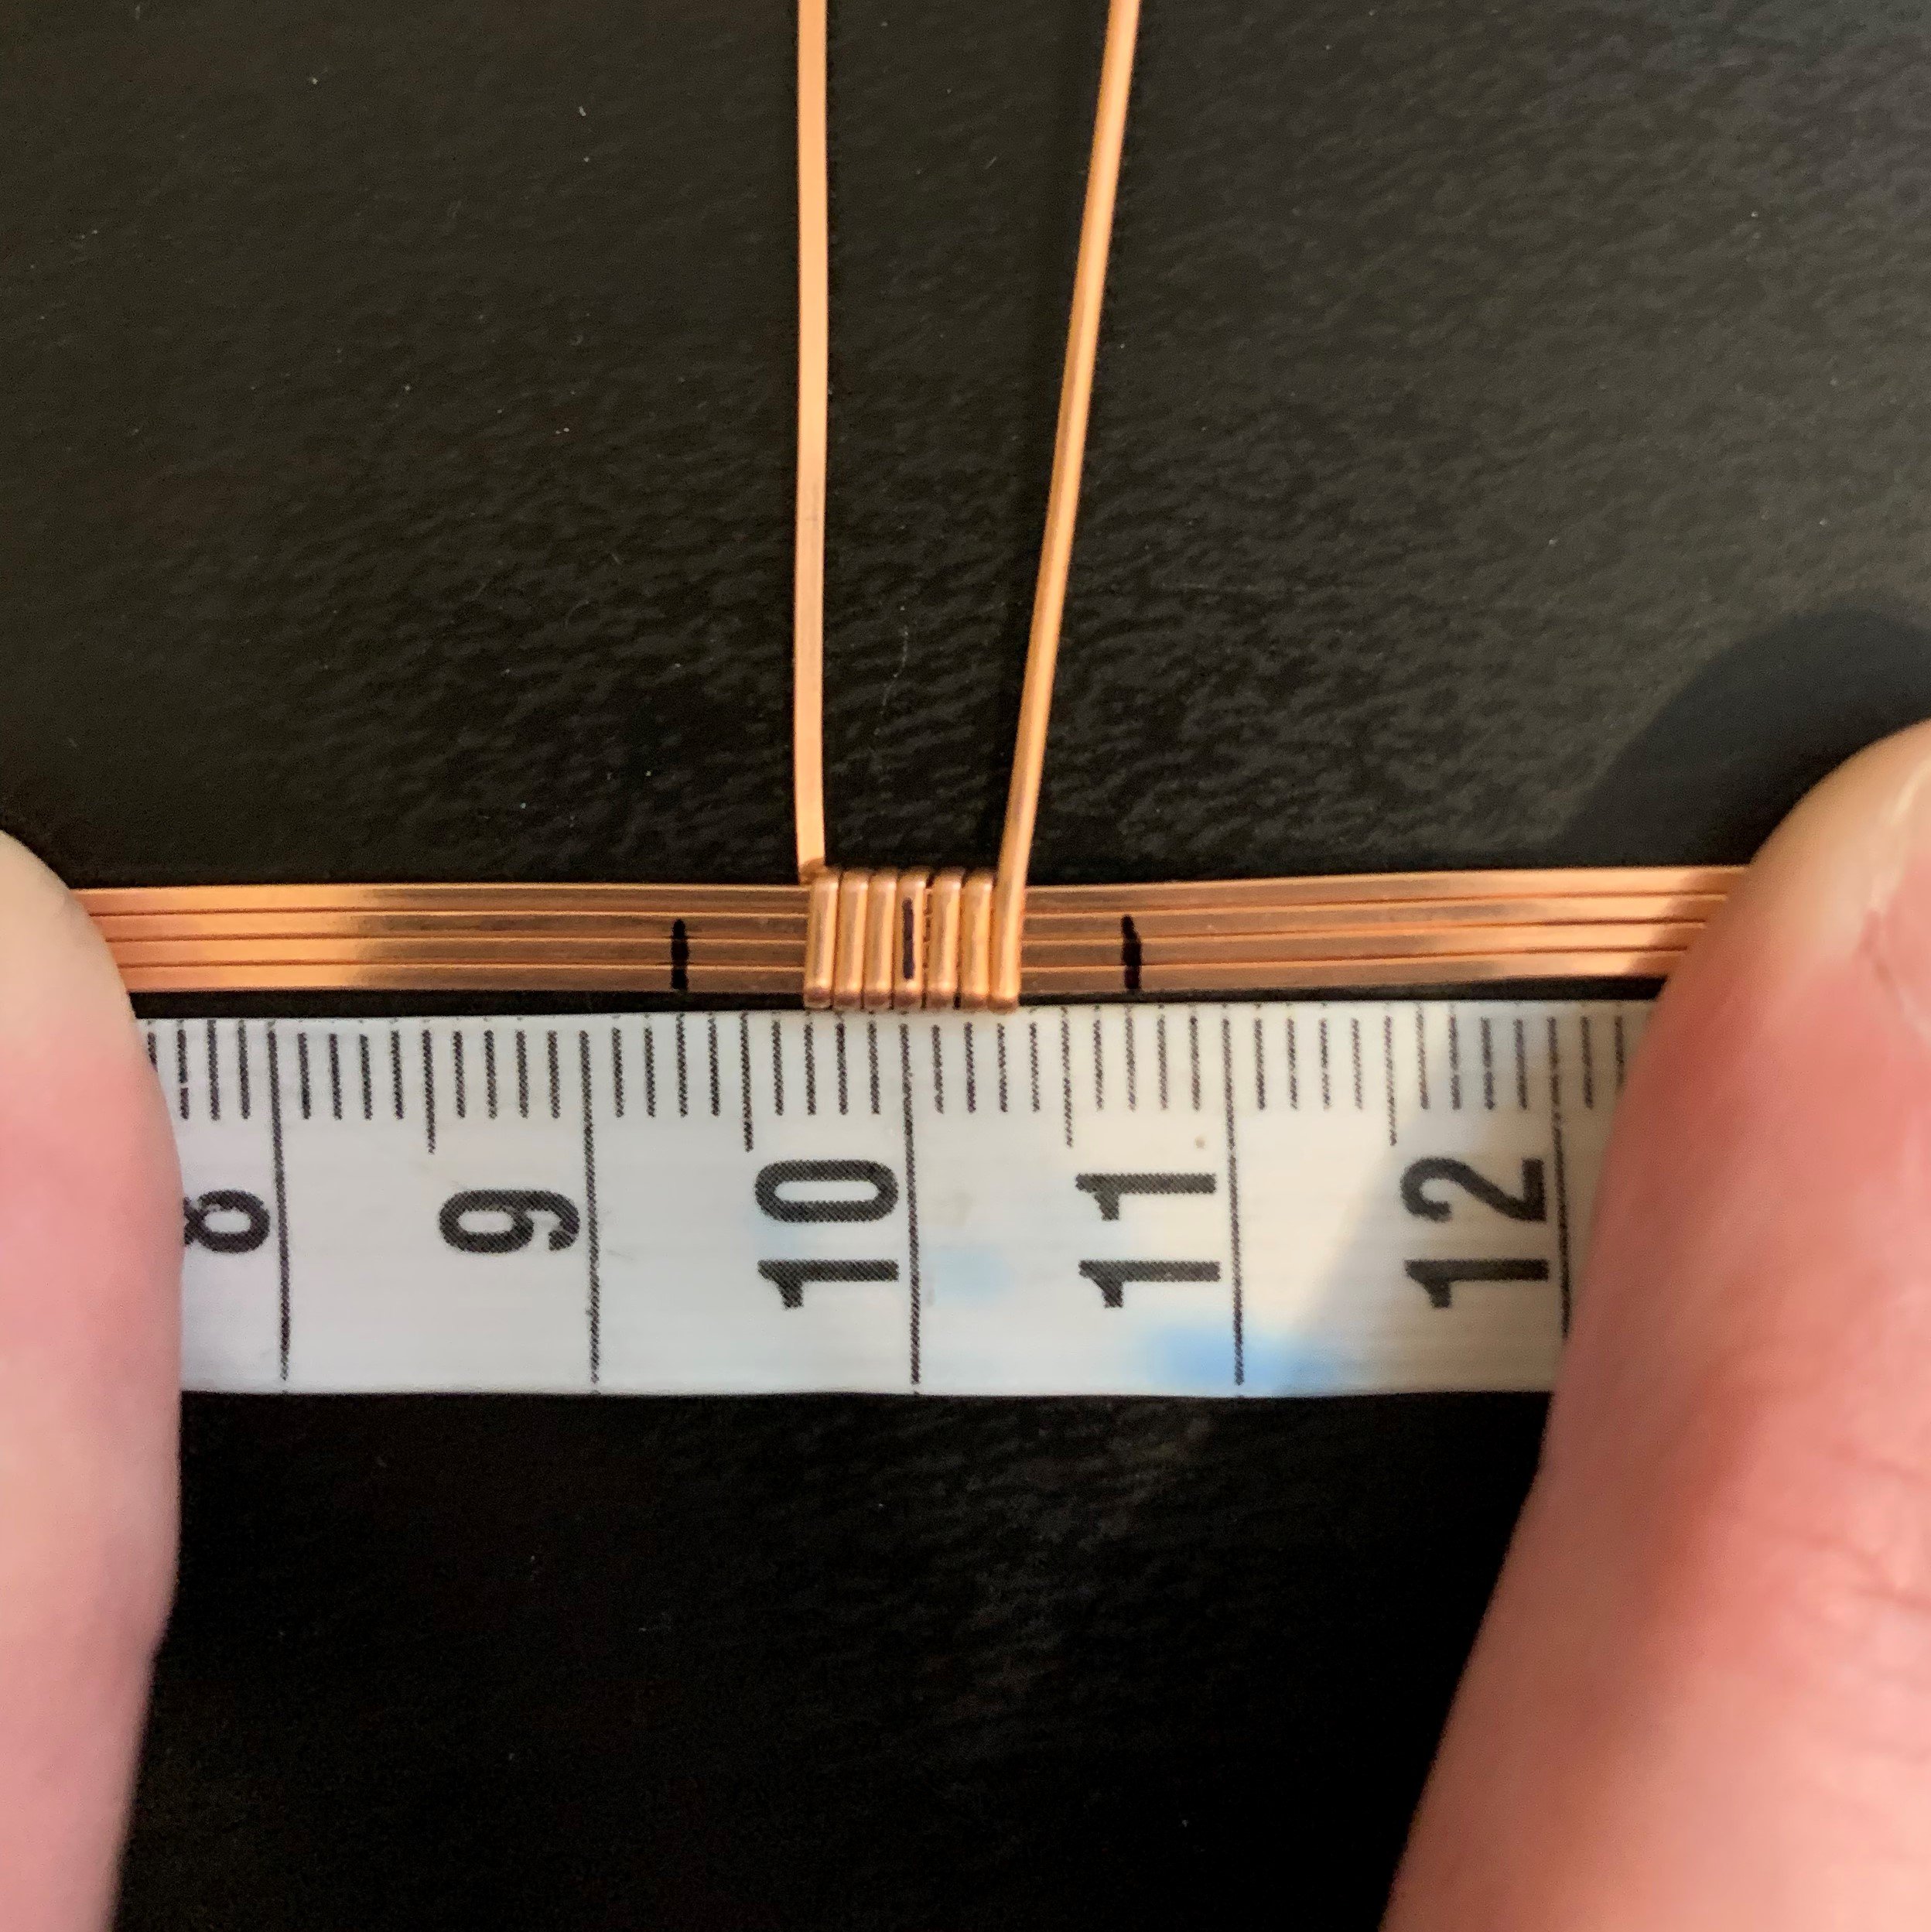
Bend the 20-gauge half-round wire in half, with the flat side facing inward and the rounded side outward. Place it around the middle of the four lengths of 20-gauge square wire.
Start wrapping a few times around the square wire, stopping to press down your wraps with flat-nose or nylon-tipped pliers every few wraps.
Measure and wrap a 14-15mm length. You will notice throughout steps one and two of this tutorial that anytime you finish wrapping a section of the base wire, you should end with the wrapping wires both facing “down.”
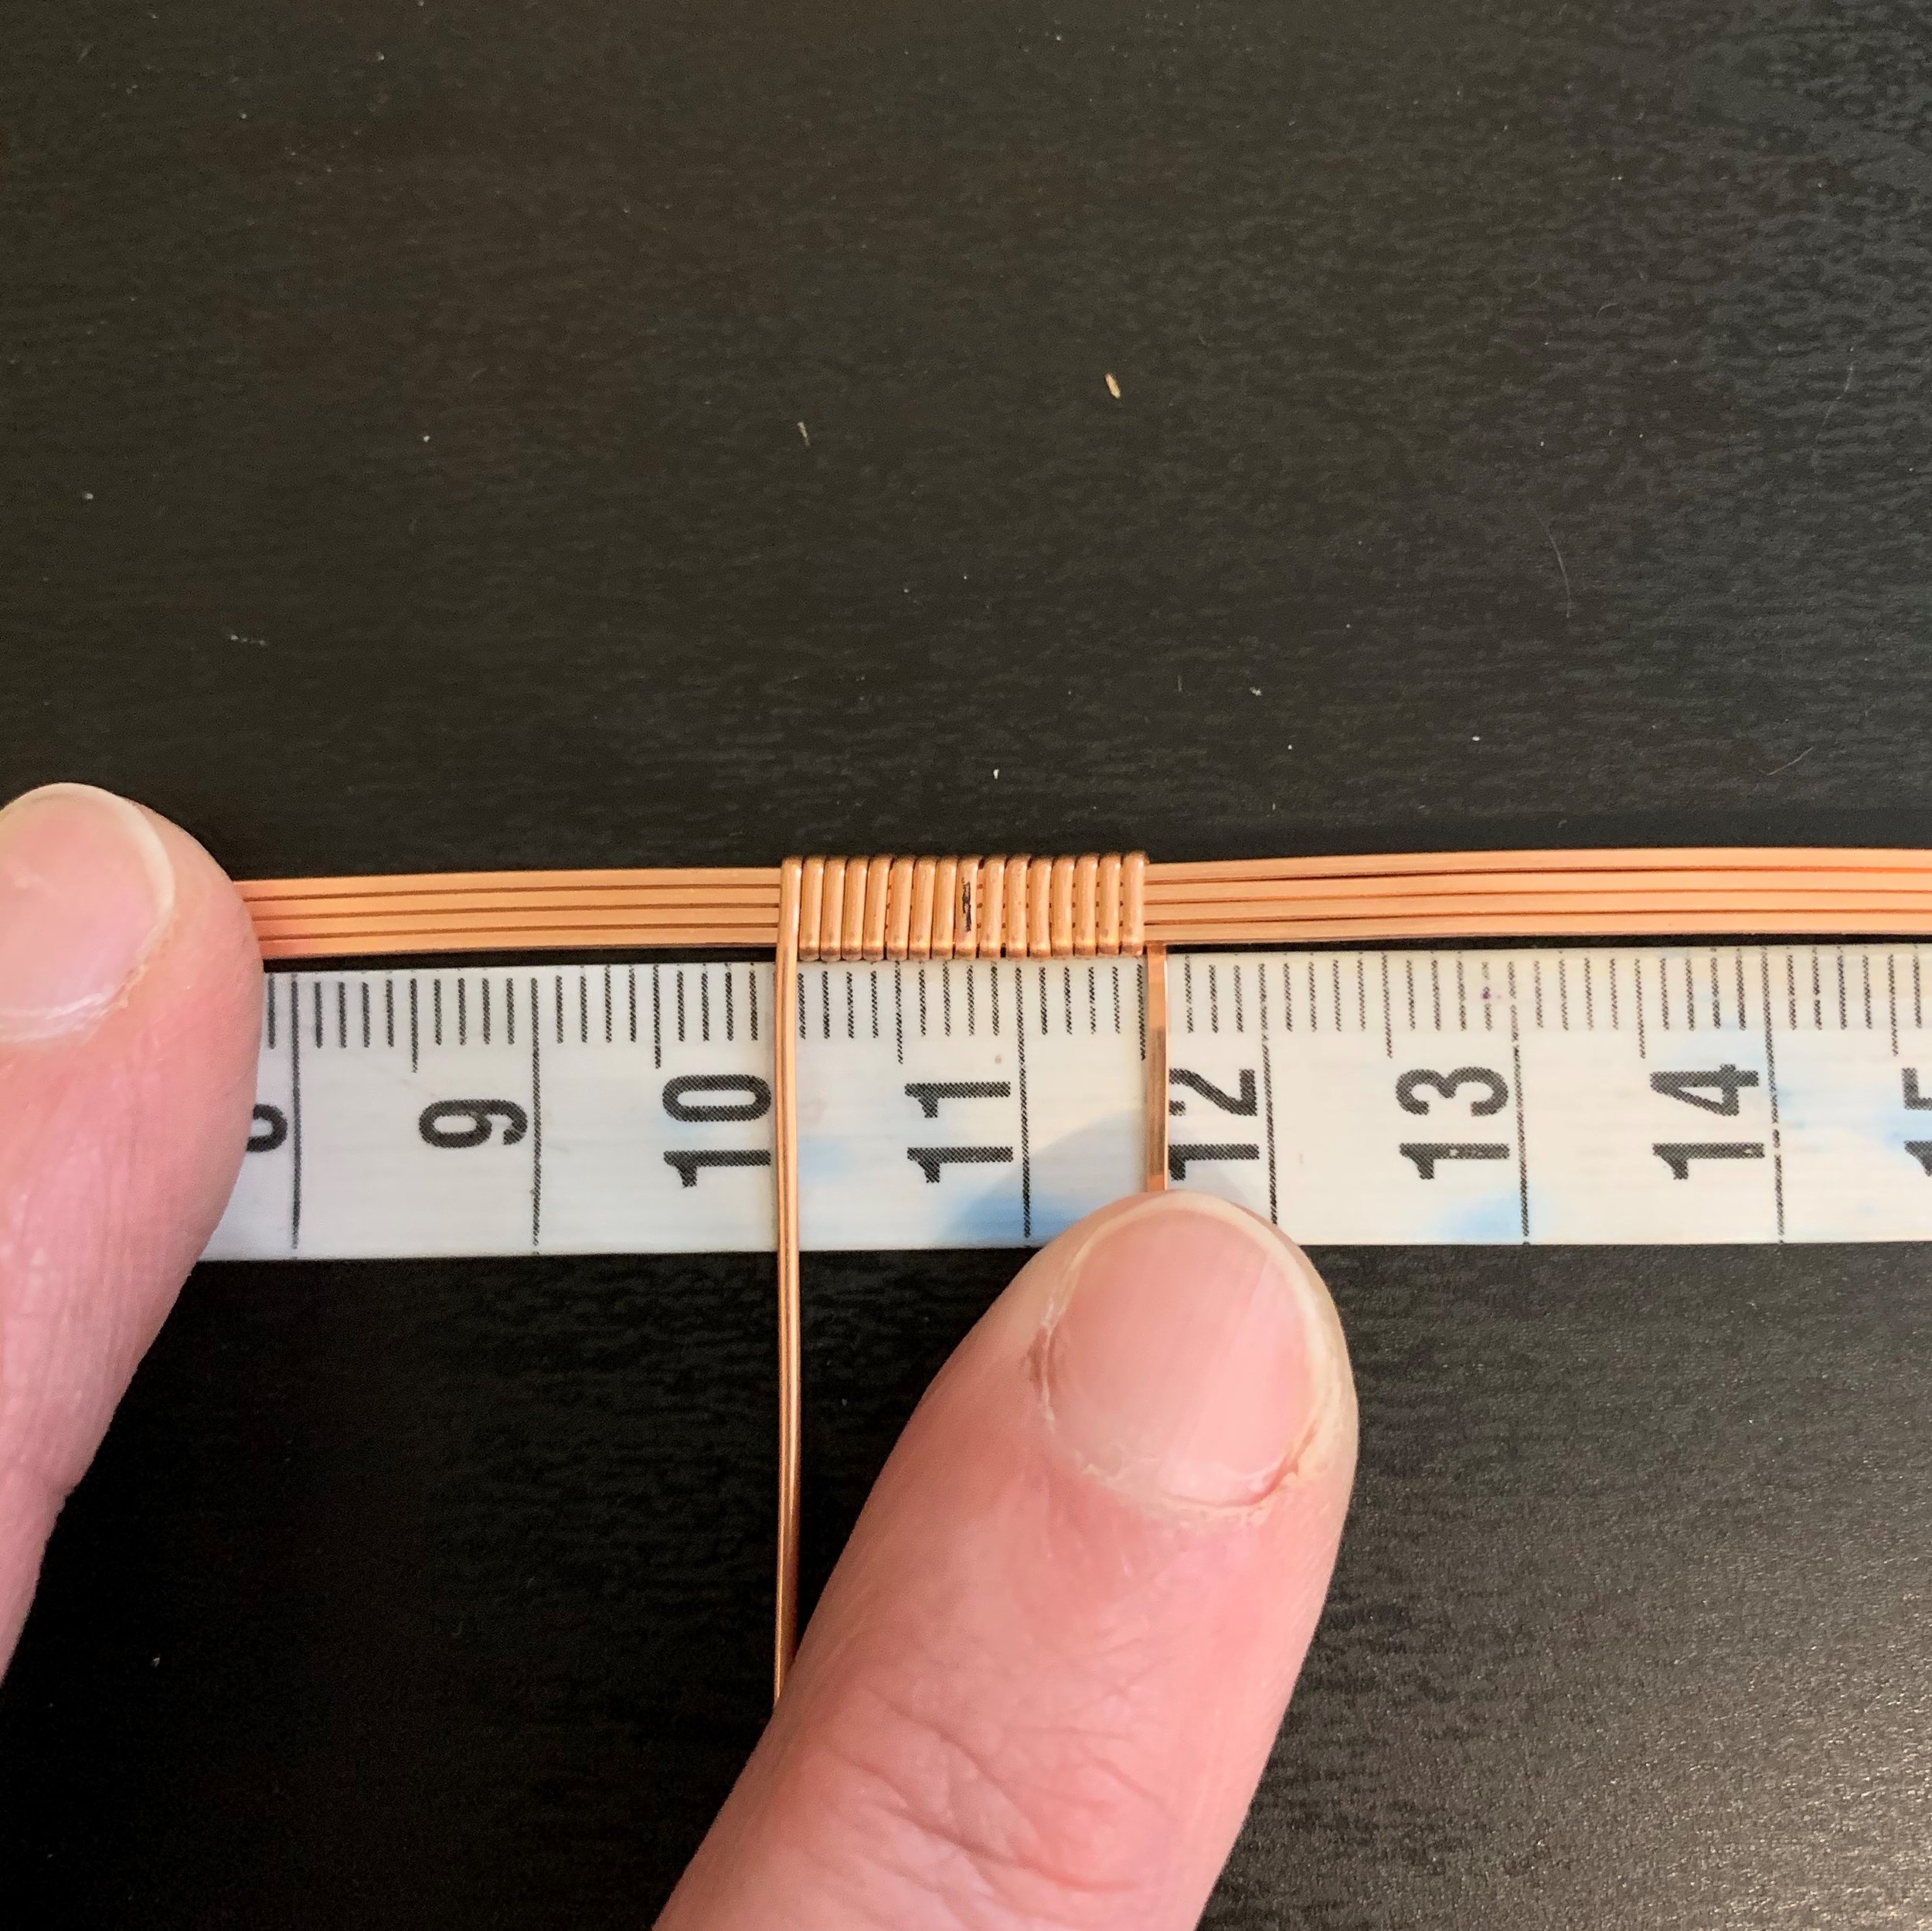
Measure and mark from each end of the center wrap: 23mm, 28mm, and 30mm. These marks will serve as guides for the remainder of your base wrapping.
Step Two: Finish the Base Wrap
Pull the top and bottom base wires away from the center two wires at a 90-degree angle.
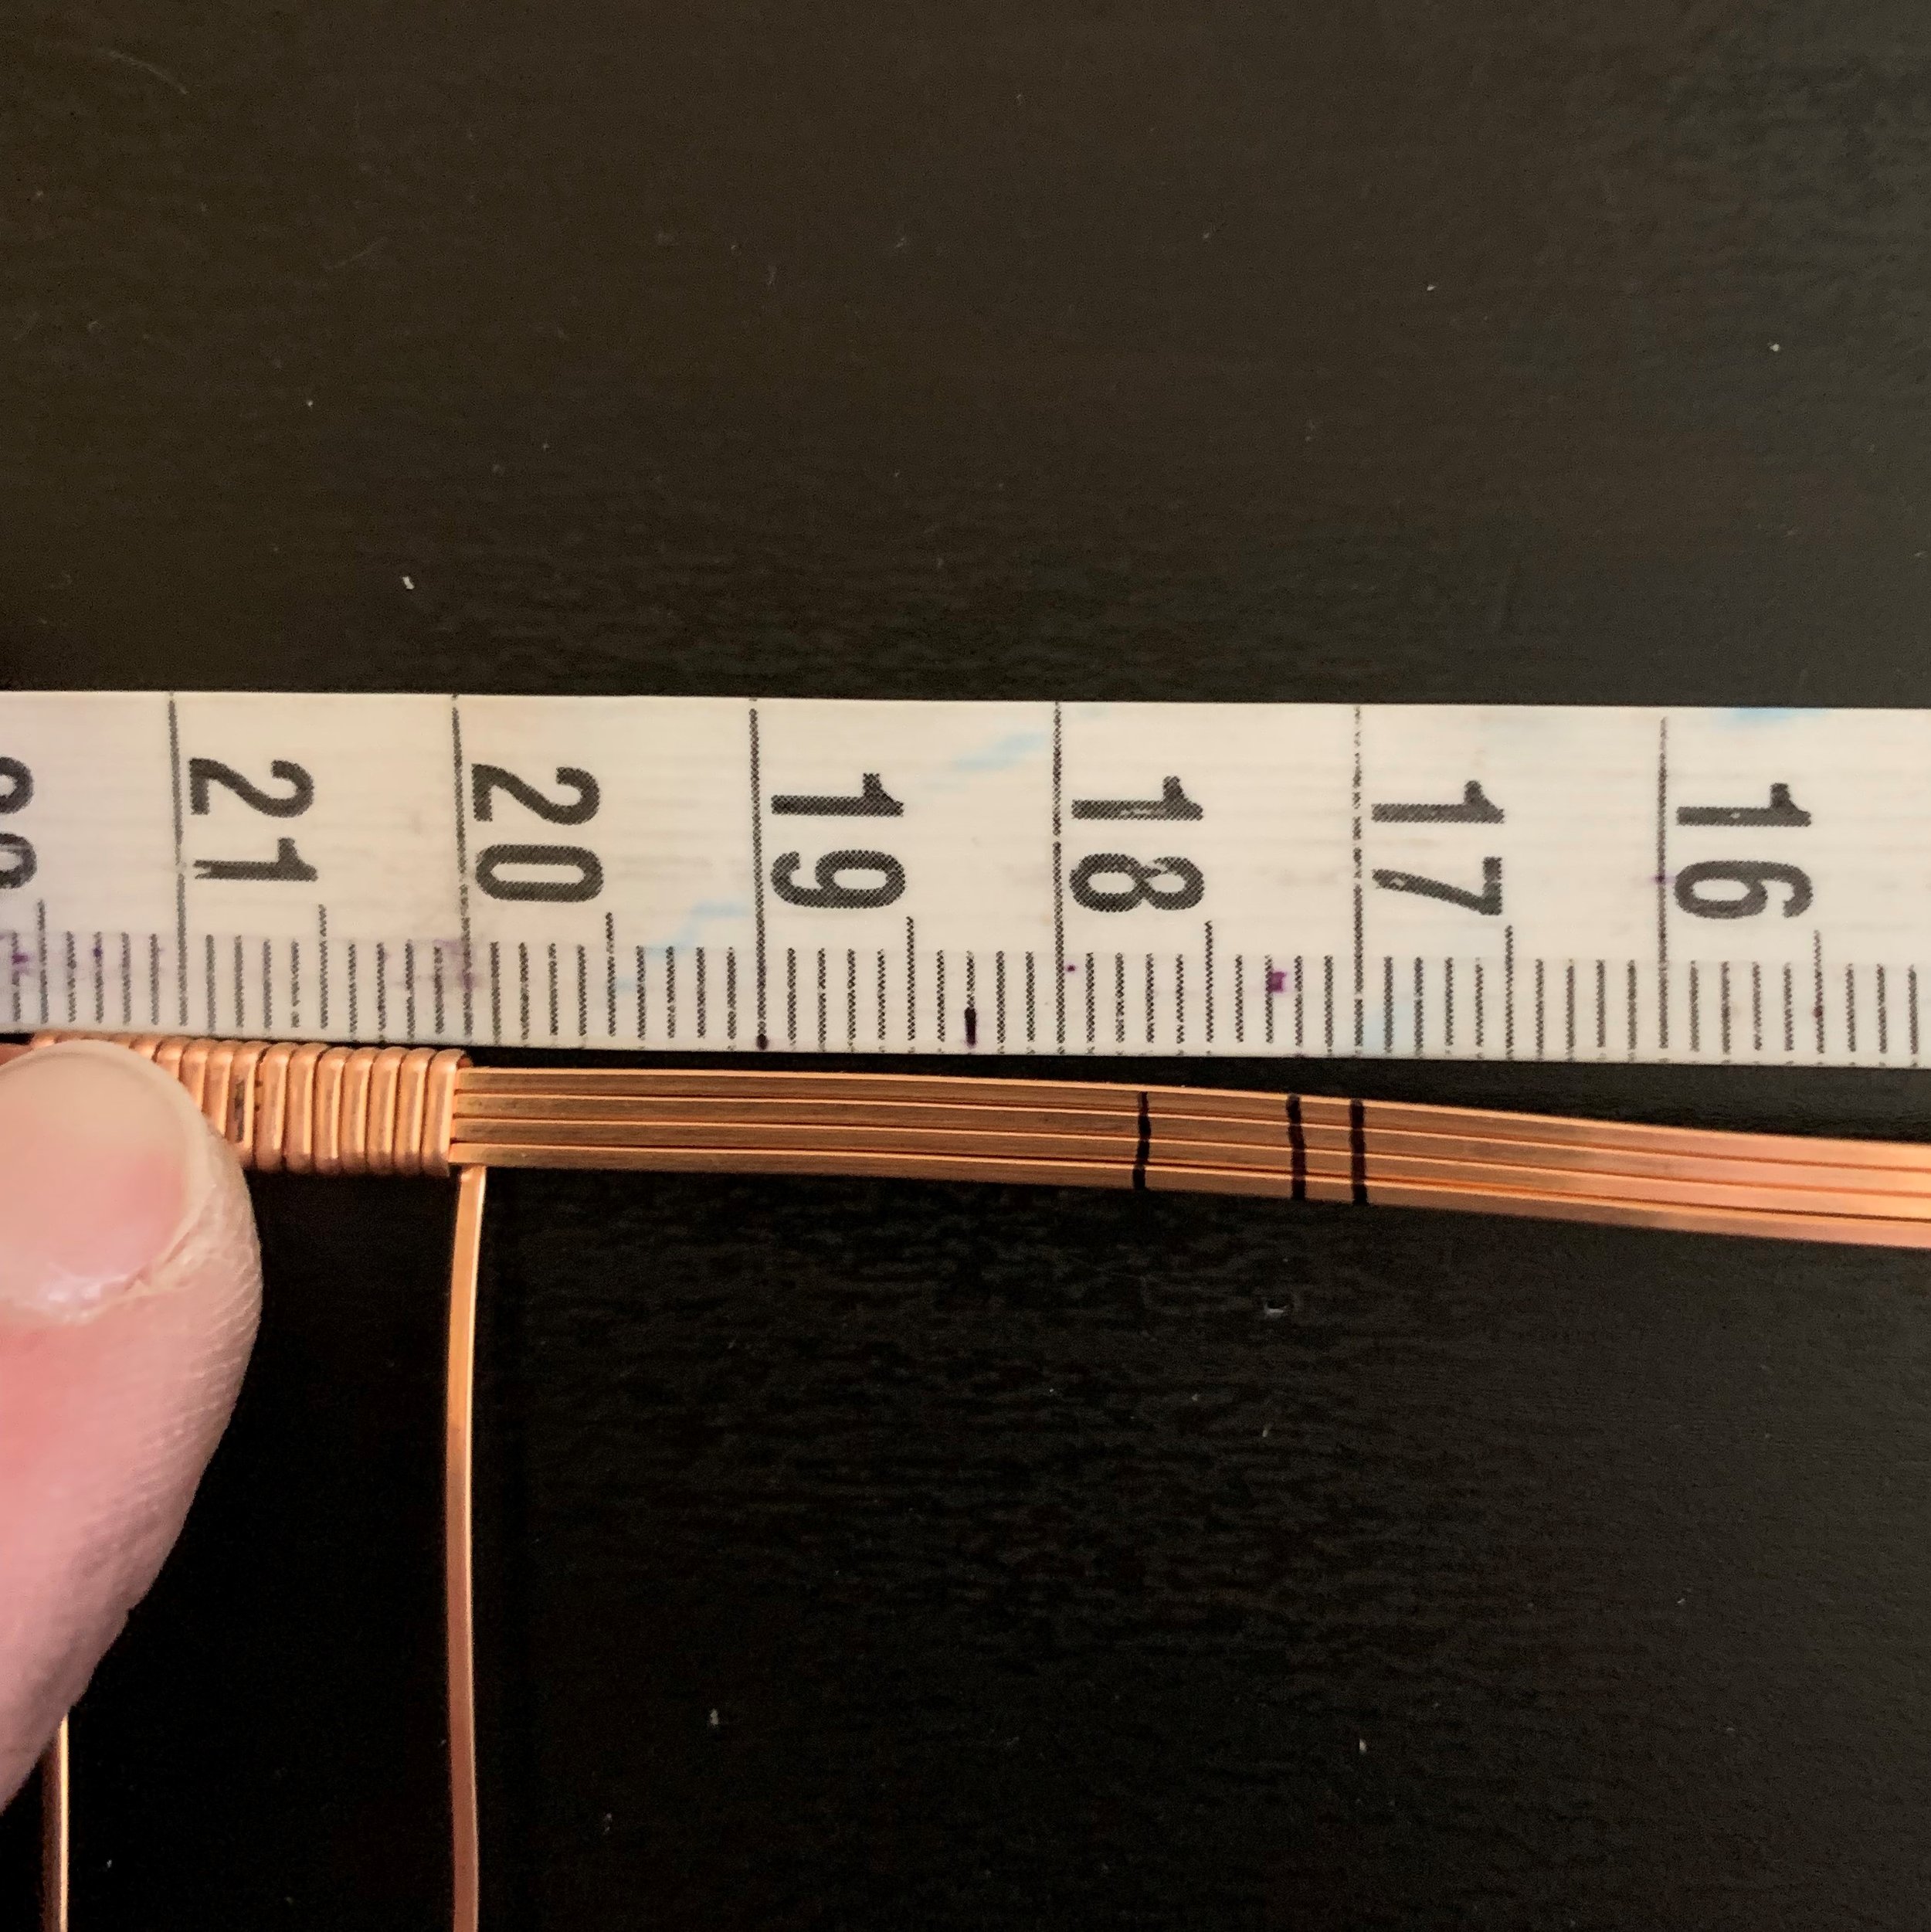
Continue the wrap around only the two middle base wires. Be careful to identify your front side and back side of the wrap. The front side should have clean, vertical wraps. The back side should have the diagonal wraps that are not as cleanly perpendicular to the base wires.
Continue the wrap out to the first mark, a length of 23mm. Pause every few wraps to tighten and flatten your wraps using your flat-nose pliers, or use nylon-tipped pliers if you have them. Nylon-tipped pliers are great for straightening wire and gently forming it without leaving tool marks.
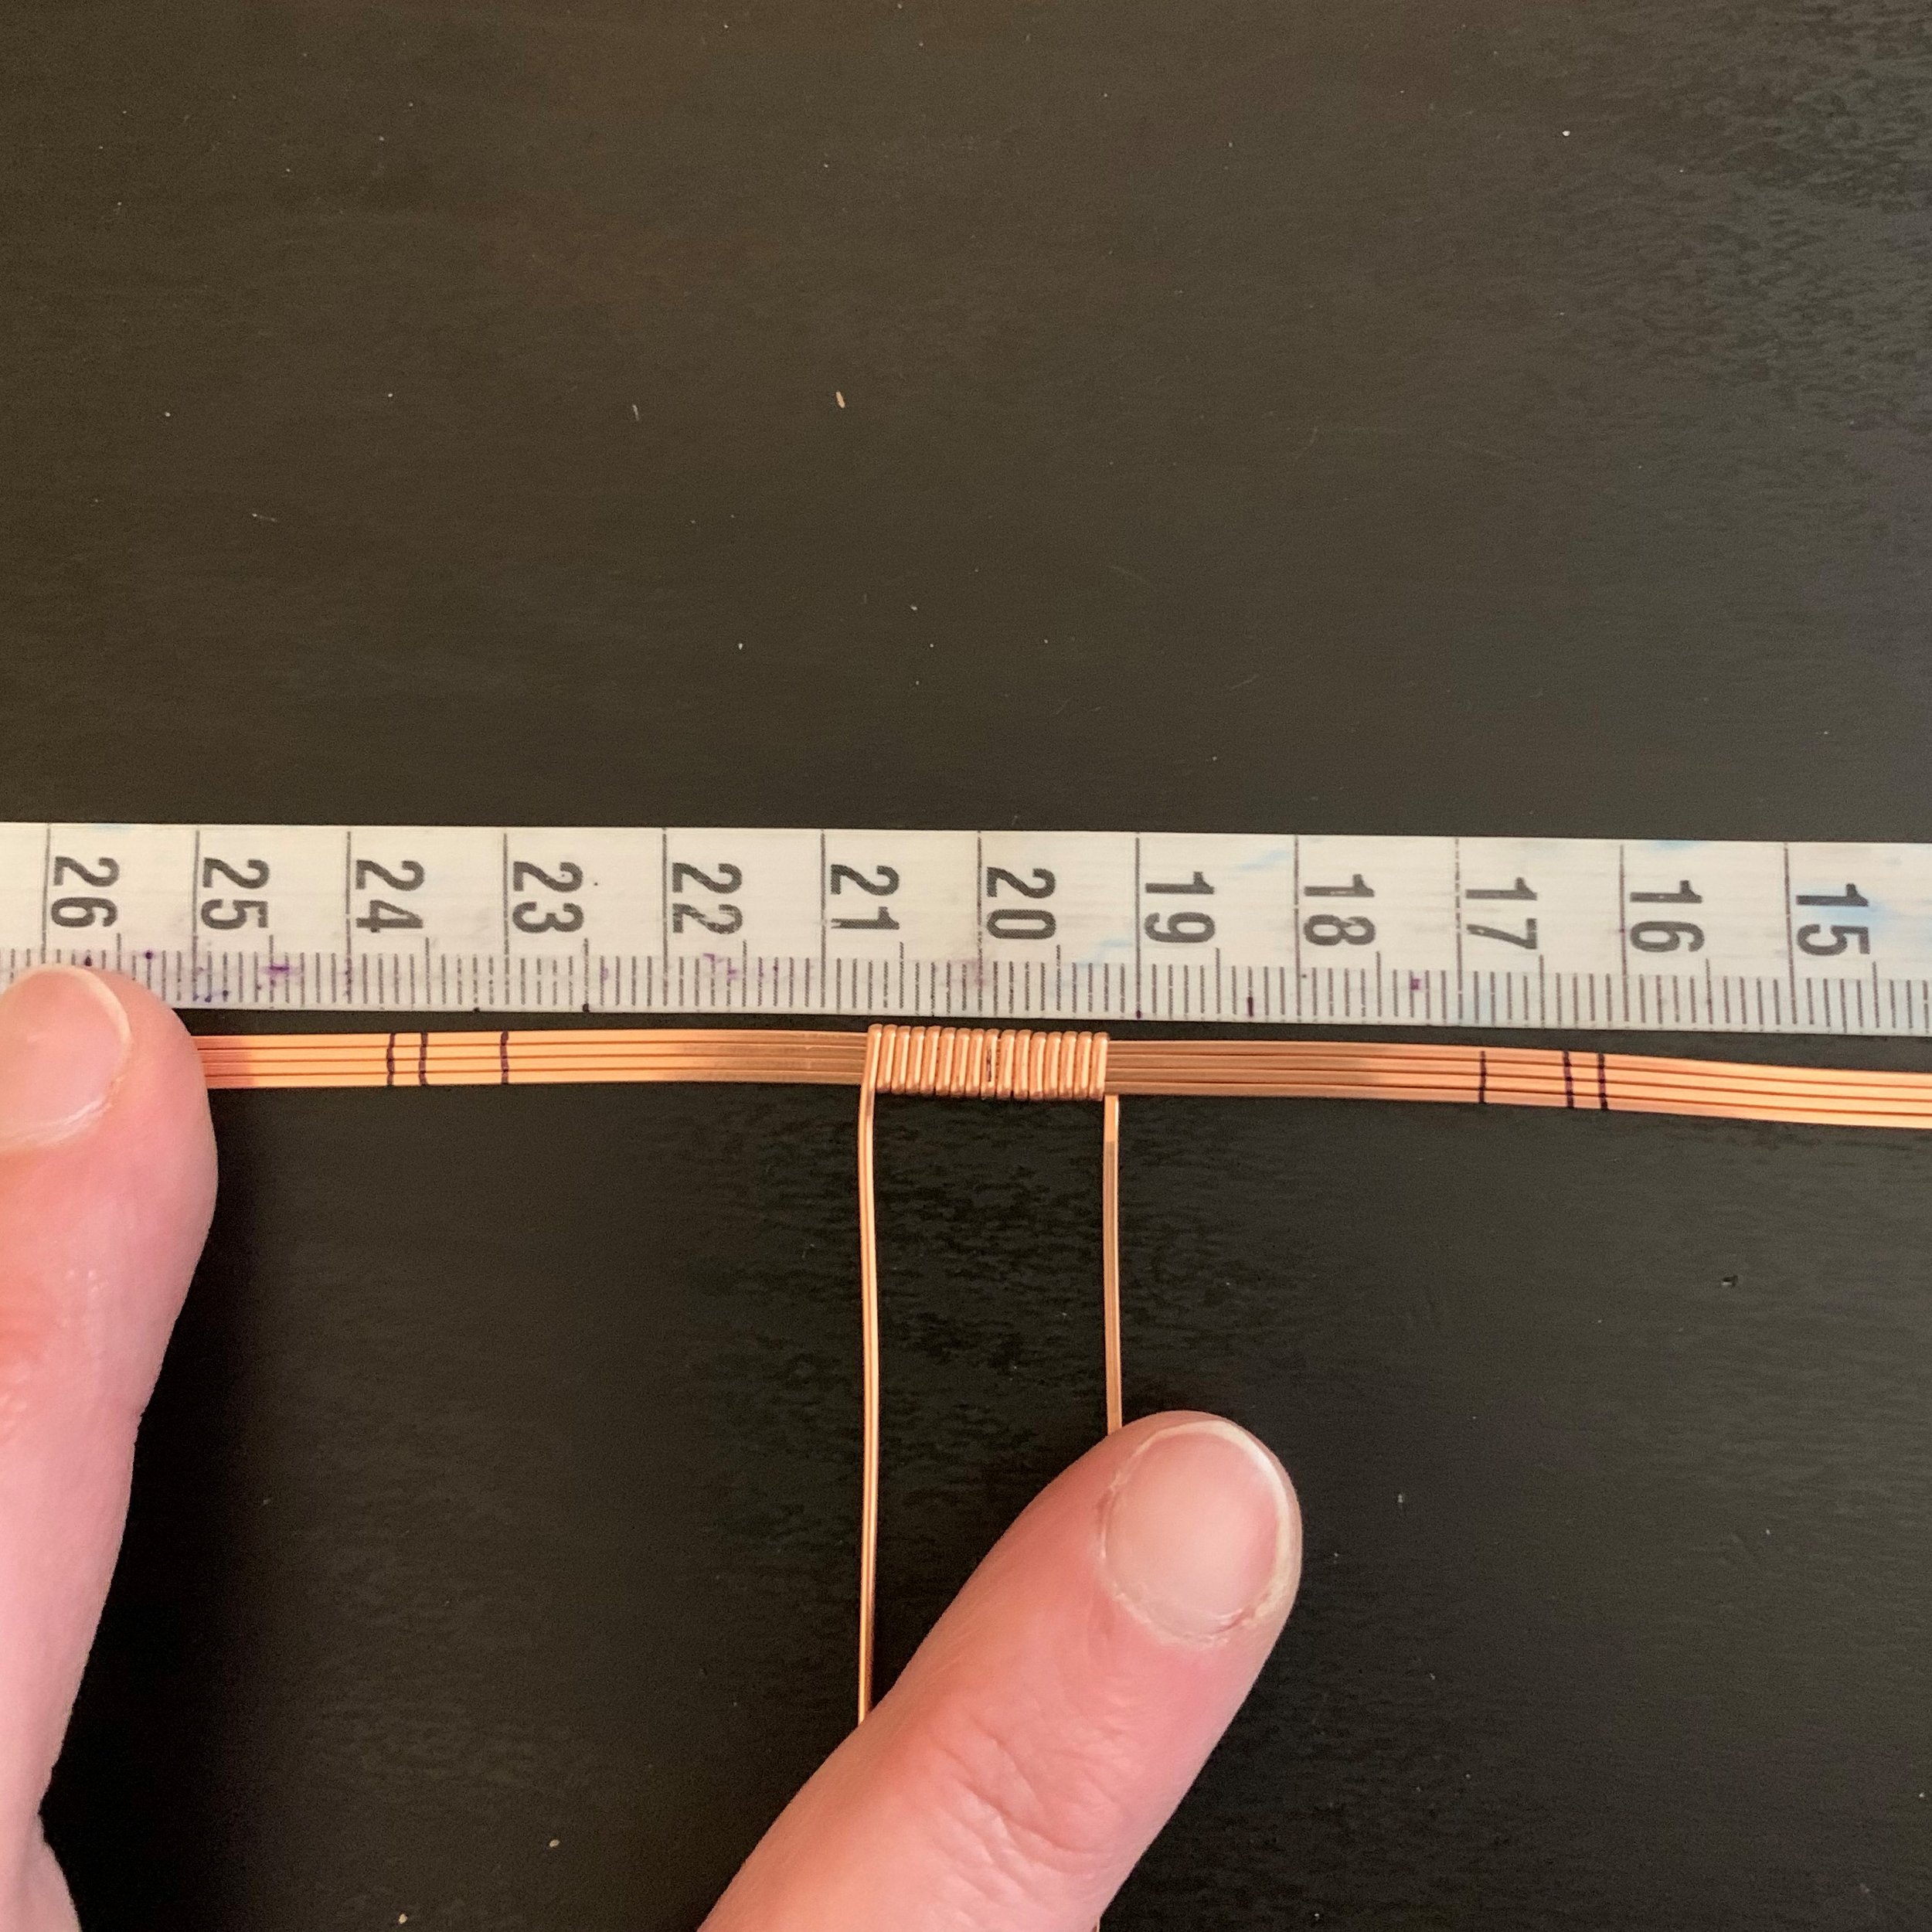
Gently bring the bottom square base wire up parallel with the center two base wires again. You may use your flat-nose pliers to squeeze the base wires together gently.
Wrap all three base wires together, to a length of 5mm, which should be your next measured mark on the wires.
Repeat this process for the top base wire now, bringing it down parallel to the other base wires and integrating it into the wrap. Wrap at least 2x around, which should bring you to your final mark on the base wires, or up to 4x around if you want a little extra negative space between the top of the stone and the bottom of the bail. A little extra space can make it easier in the finishing steps of the piece later, so consider going 4x around if you are a beginner.

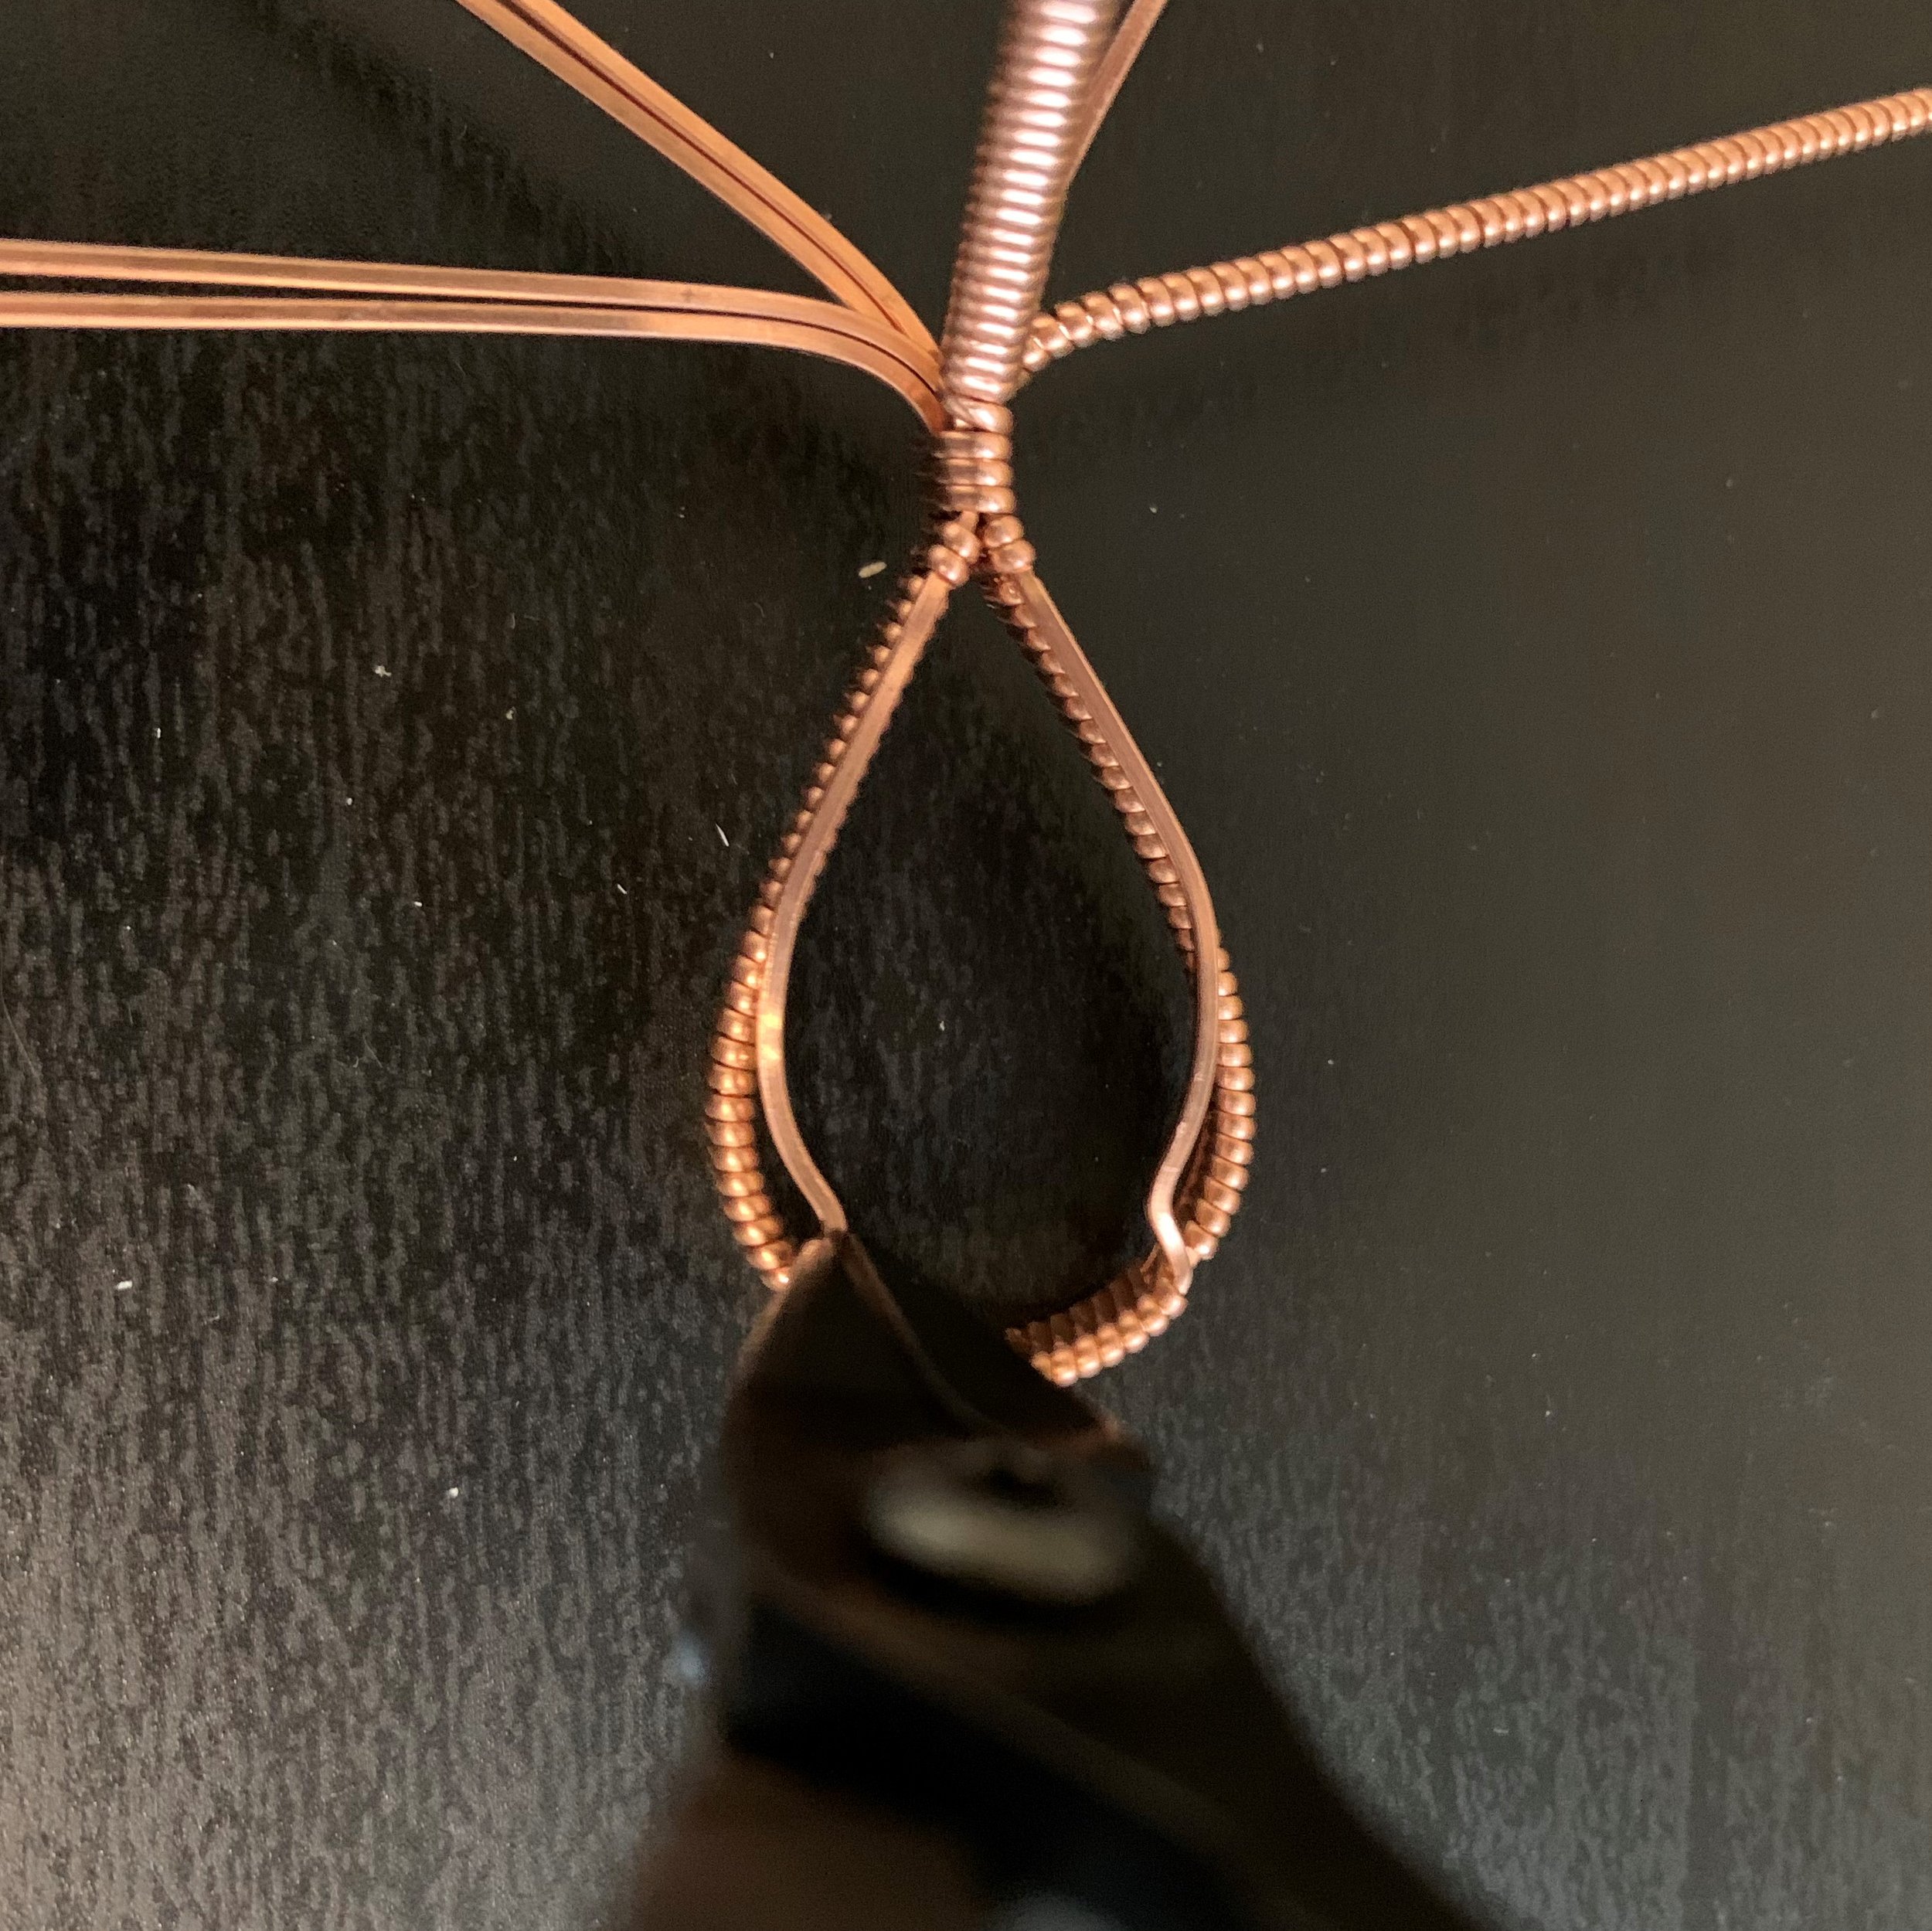
Step Three: Form the Setting
With your flat-nose pliers, place a bend in each side of the base wires, just past the end of your last wrap, upward toward the “outside” or “front” of the wrap. The outside is the side with clean, vertical wraps, not the diagonal wraps.
Use a ring mandrel to form the stone setting around ring size 7-8. This will get your shape close enough that you can later adjust the setting using the stone itself.
Pinch the ends of the wire together with your flat-nose pliers. This should feel quite natural because of the bends you placed before forming the setting.
You will notice that both ends of the half-round wrapping wire are close together. One should be on the outside of the base wires, and one is between the two sets of base wires. Using the half-round wire that is on the outside of the base wires, continue its natural path around all eight base wires three times, ending with the wrapping wire facing up toward the front of the setting.
Your wrapping wires are now facing opposite directions. Take note of which side is the front of the setting and which side is the back.
Step Four: Complete the Wrapping Wire
The wire you just used to wrap around all eight base wires three times is now facing the front of the setting. It will be used to wrap the bail of the finished piece. Separate the bail from the rest of the base wires by bending forward the front two base wires.
Continuing the natural direction of the wrapping wire, wrap several times around just these two front wires. Pause to tighten and flatten your wraps periodically as usual.
Measure and mark a 3cm length. This is how far you will wrap the bail. Trim the bail approximately 2cm past the end of your wrap.
Finish wrapping the half-round wire around the bail wires. Use your flush cutters to trim the wrapping wire on what will be the inside of the finished bail, which is currently facing upward.
Place a bend in the bail wires, just past the last wrap, pointing upward. This bend can be anywhere from 45 degrees to 90 degrees; accuracy is not critical here.
Next we will place and finish the other wrapping wire, which is still sticking out from the back of the setting. First, separate the base wires by bending pairs to each side. The first pair goes right, and both back pairs go left.
The base wire pair that went right should be separated from each other a bit, as only one of these will be wrapped with the half-round wire, and you will want some space to work.
Bend the half-round wrapping wire up the back of the setting, placing a small twist to ensure that the flat side faces in toward the piece and the rounded side faces outward.
Bring the wrapping wire between the separated base wires, then bring it down in front of the lower right-side base wire. The natural direction of the wrapping wire should allow you to start wrapping around that base wire with the flat side of the half-round wire facing inward and the rounded side outward.
Measure and mark a length of 4cm on the wrapped base wire. This is how far you will wrap it, then trim the wrapping wire and press down the end to ensure it’s secure.


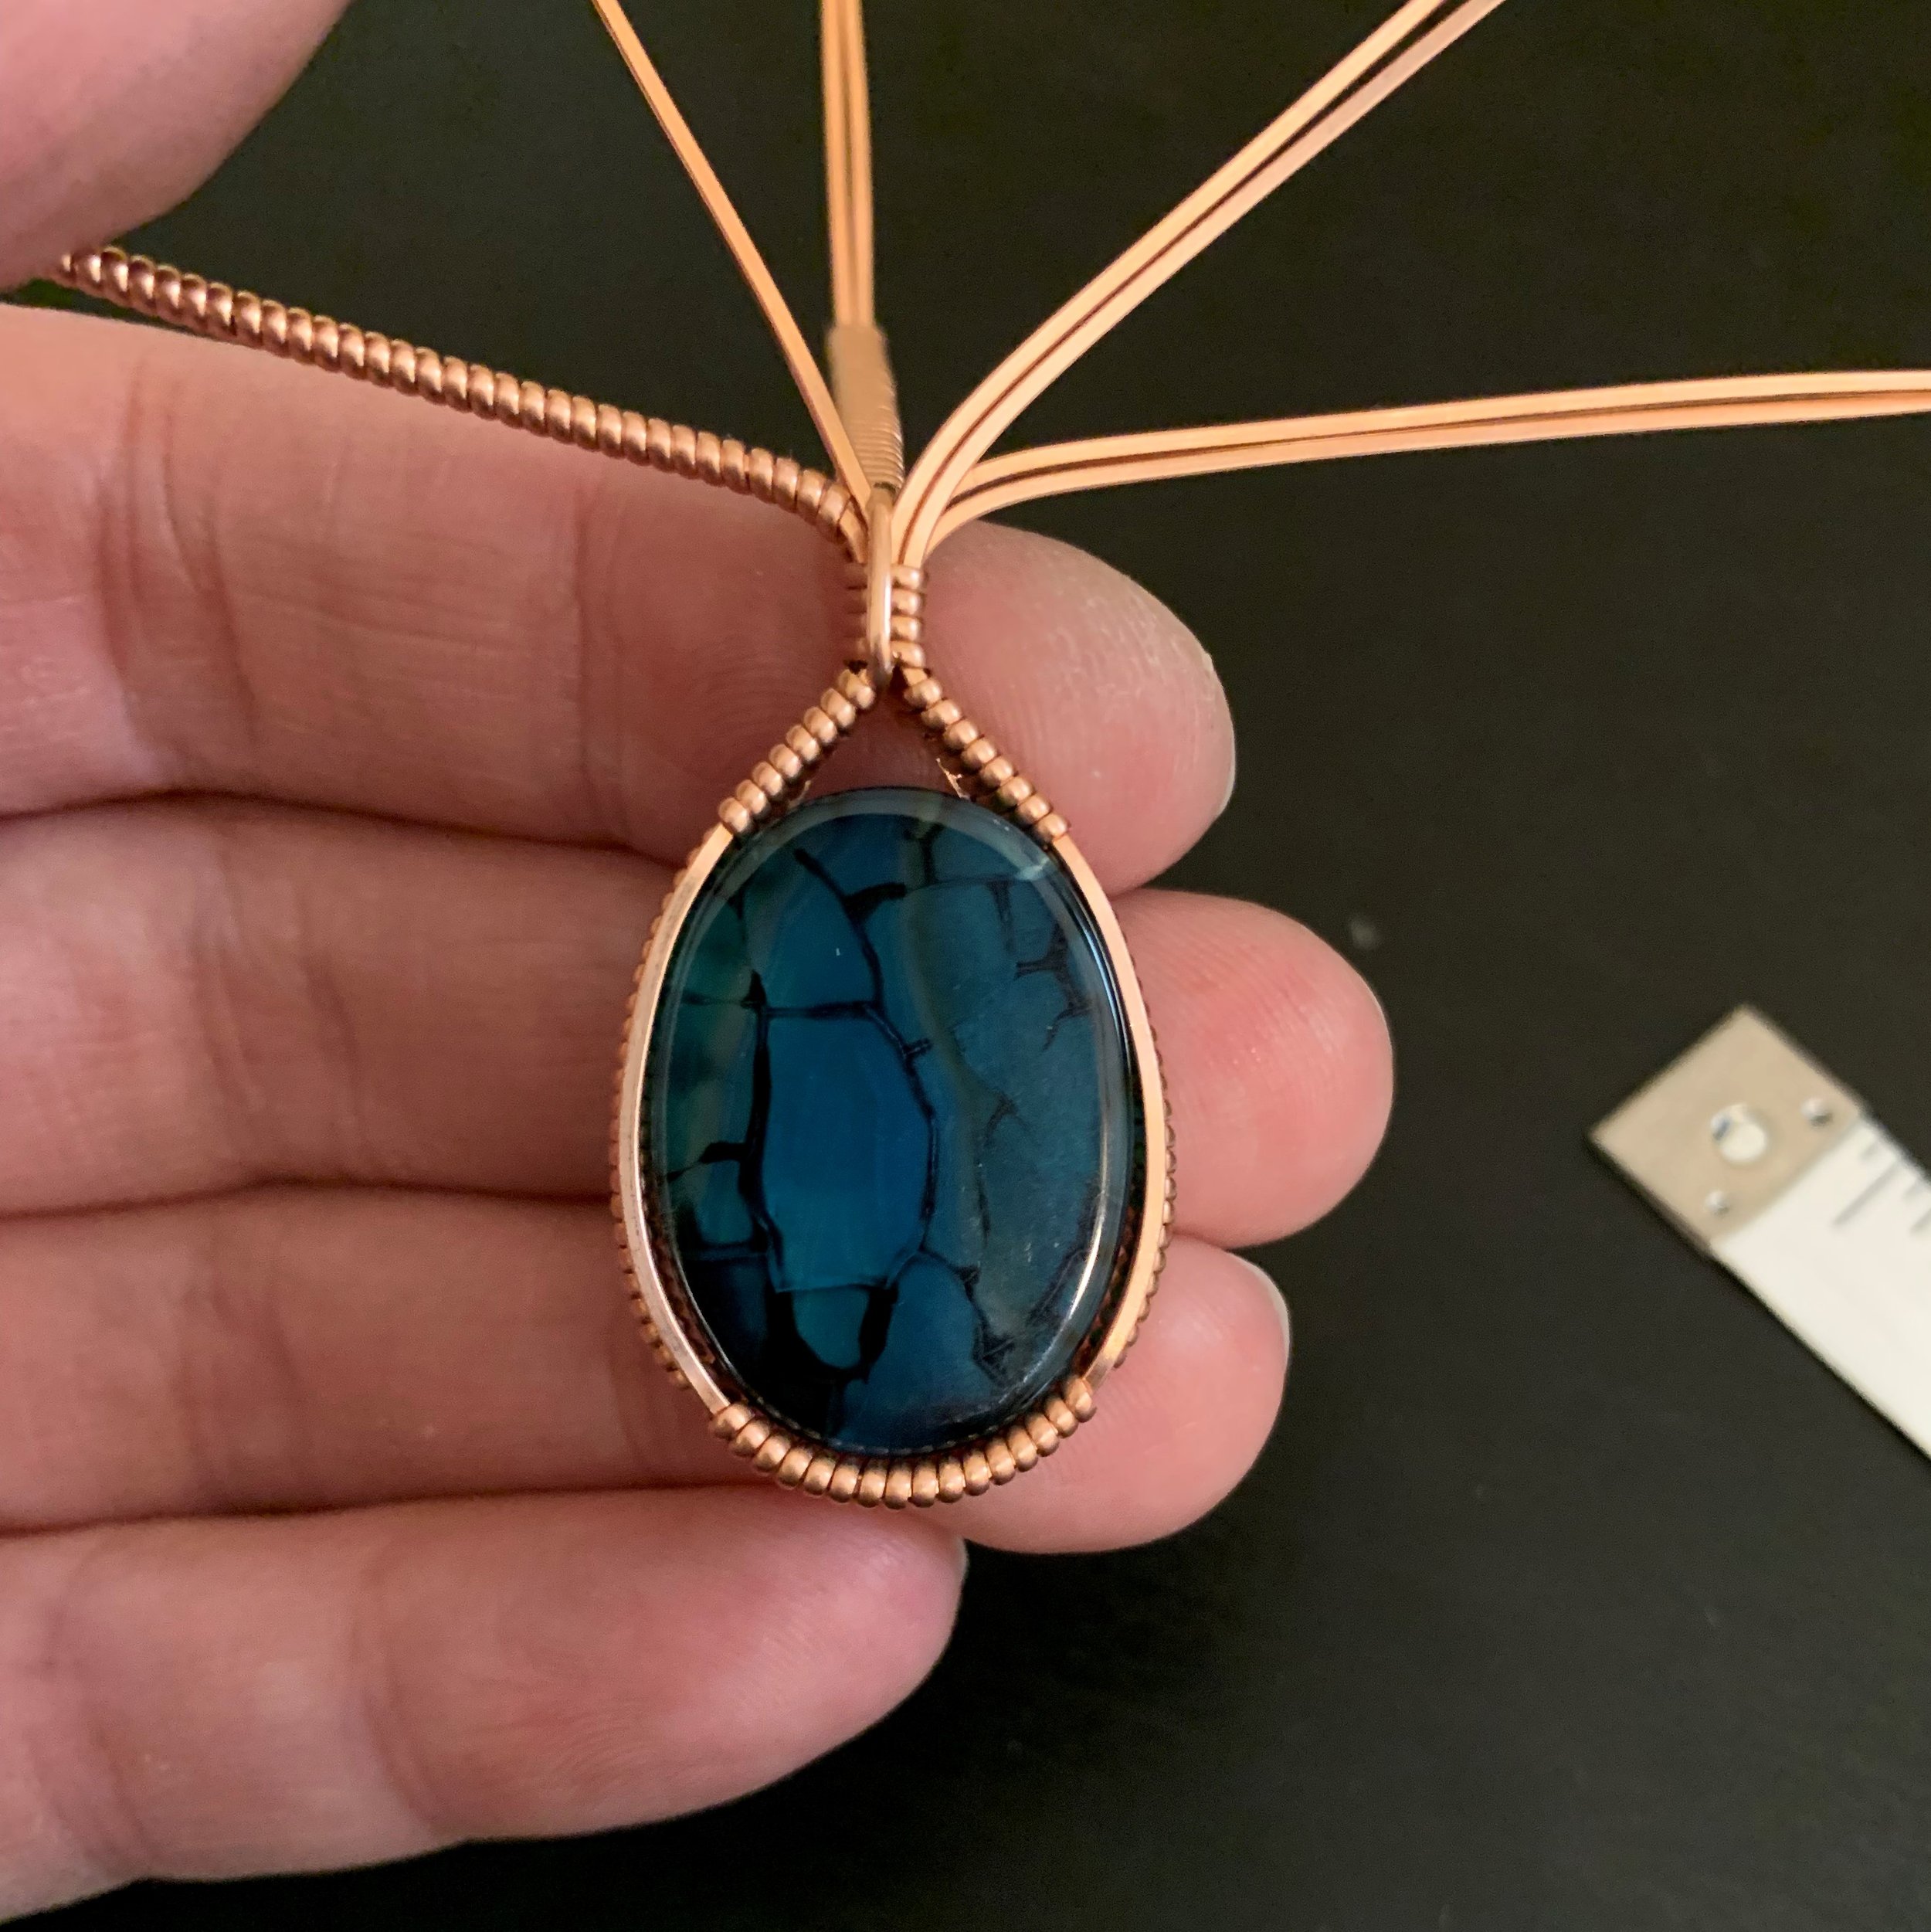
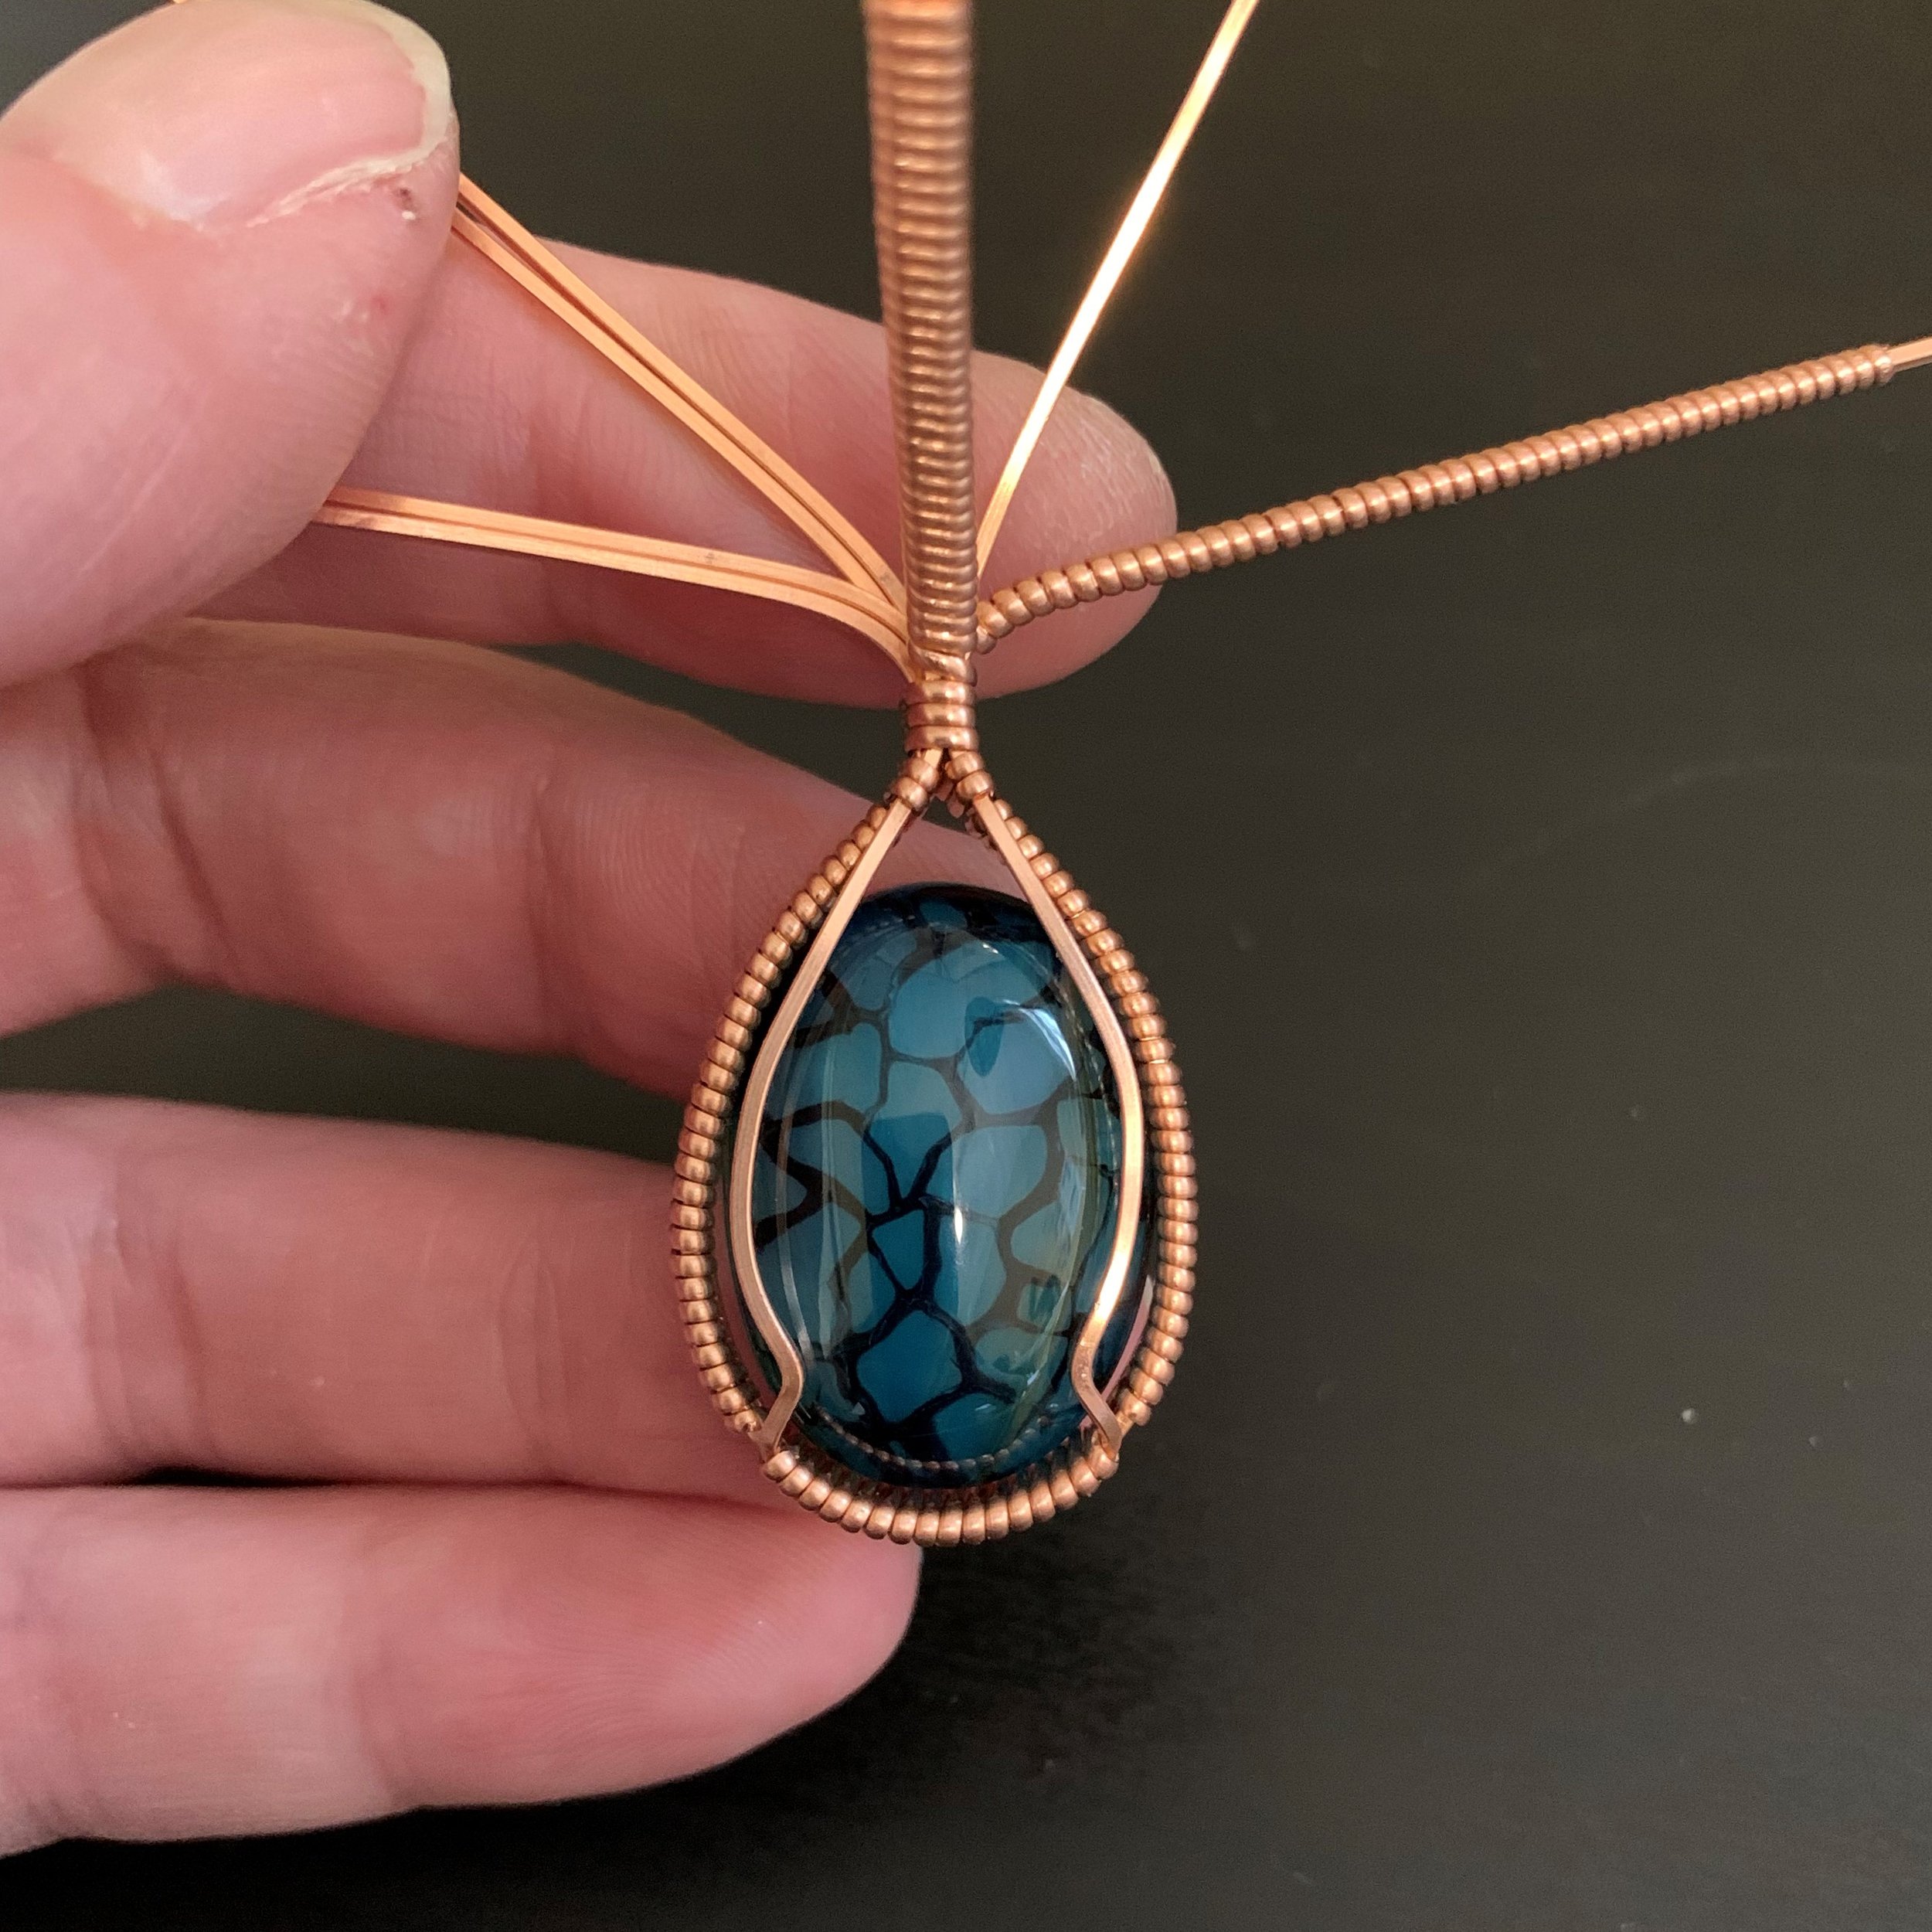
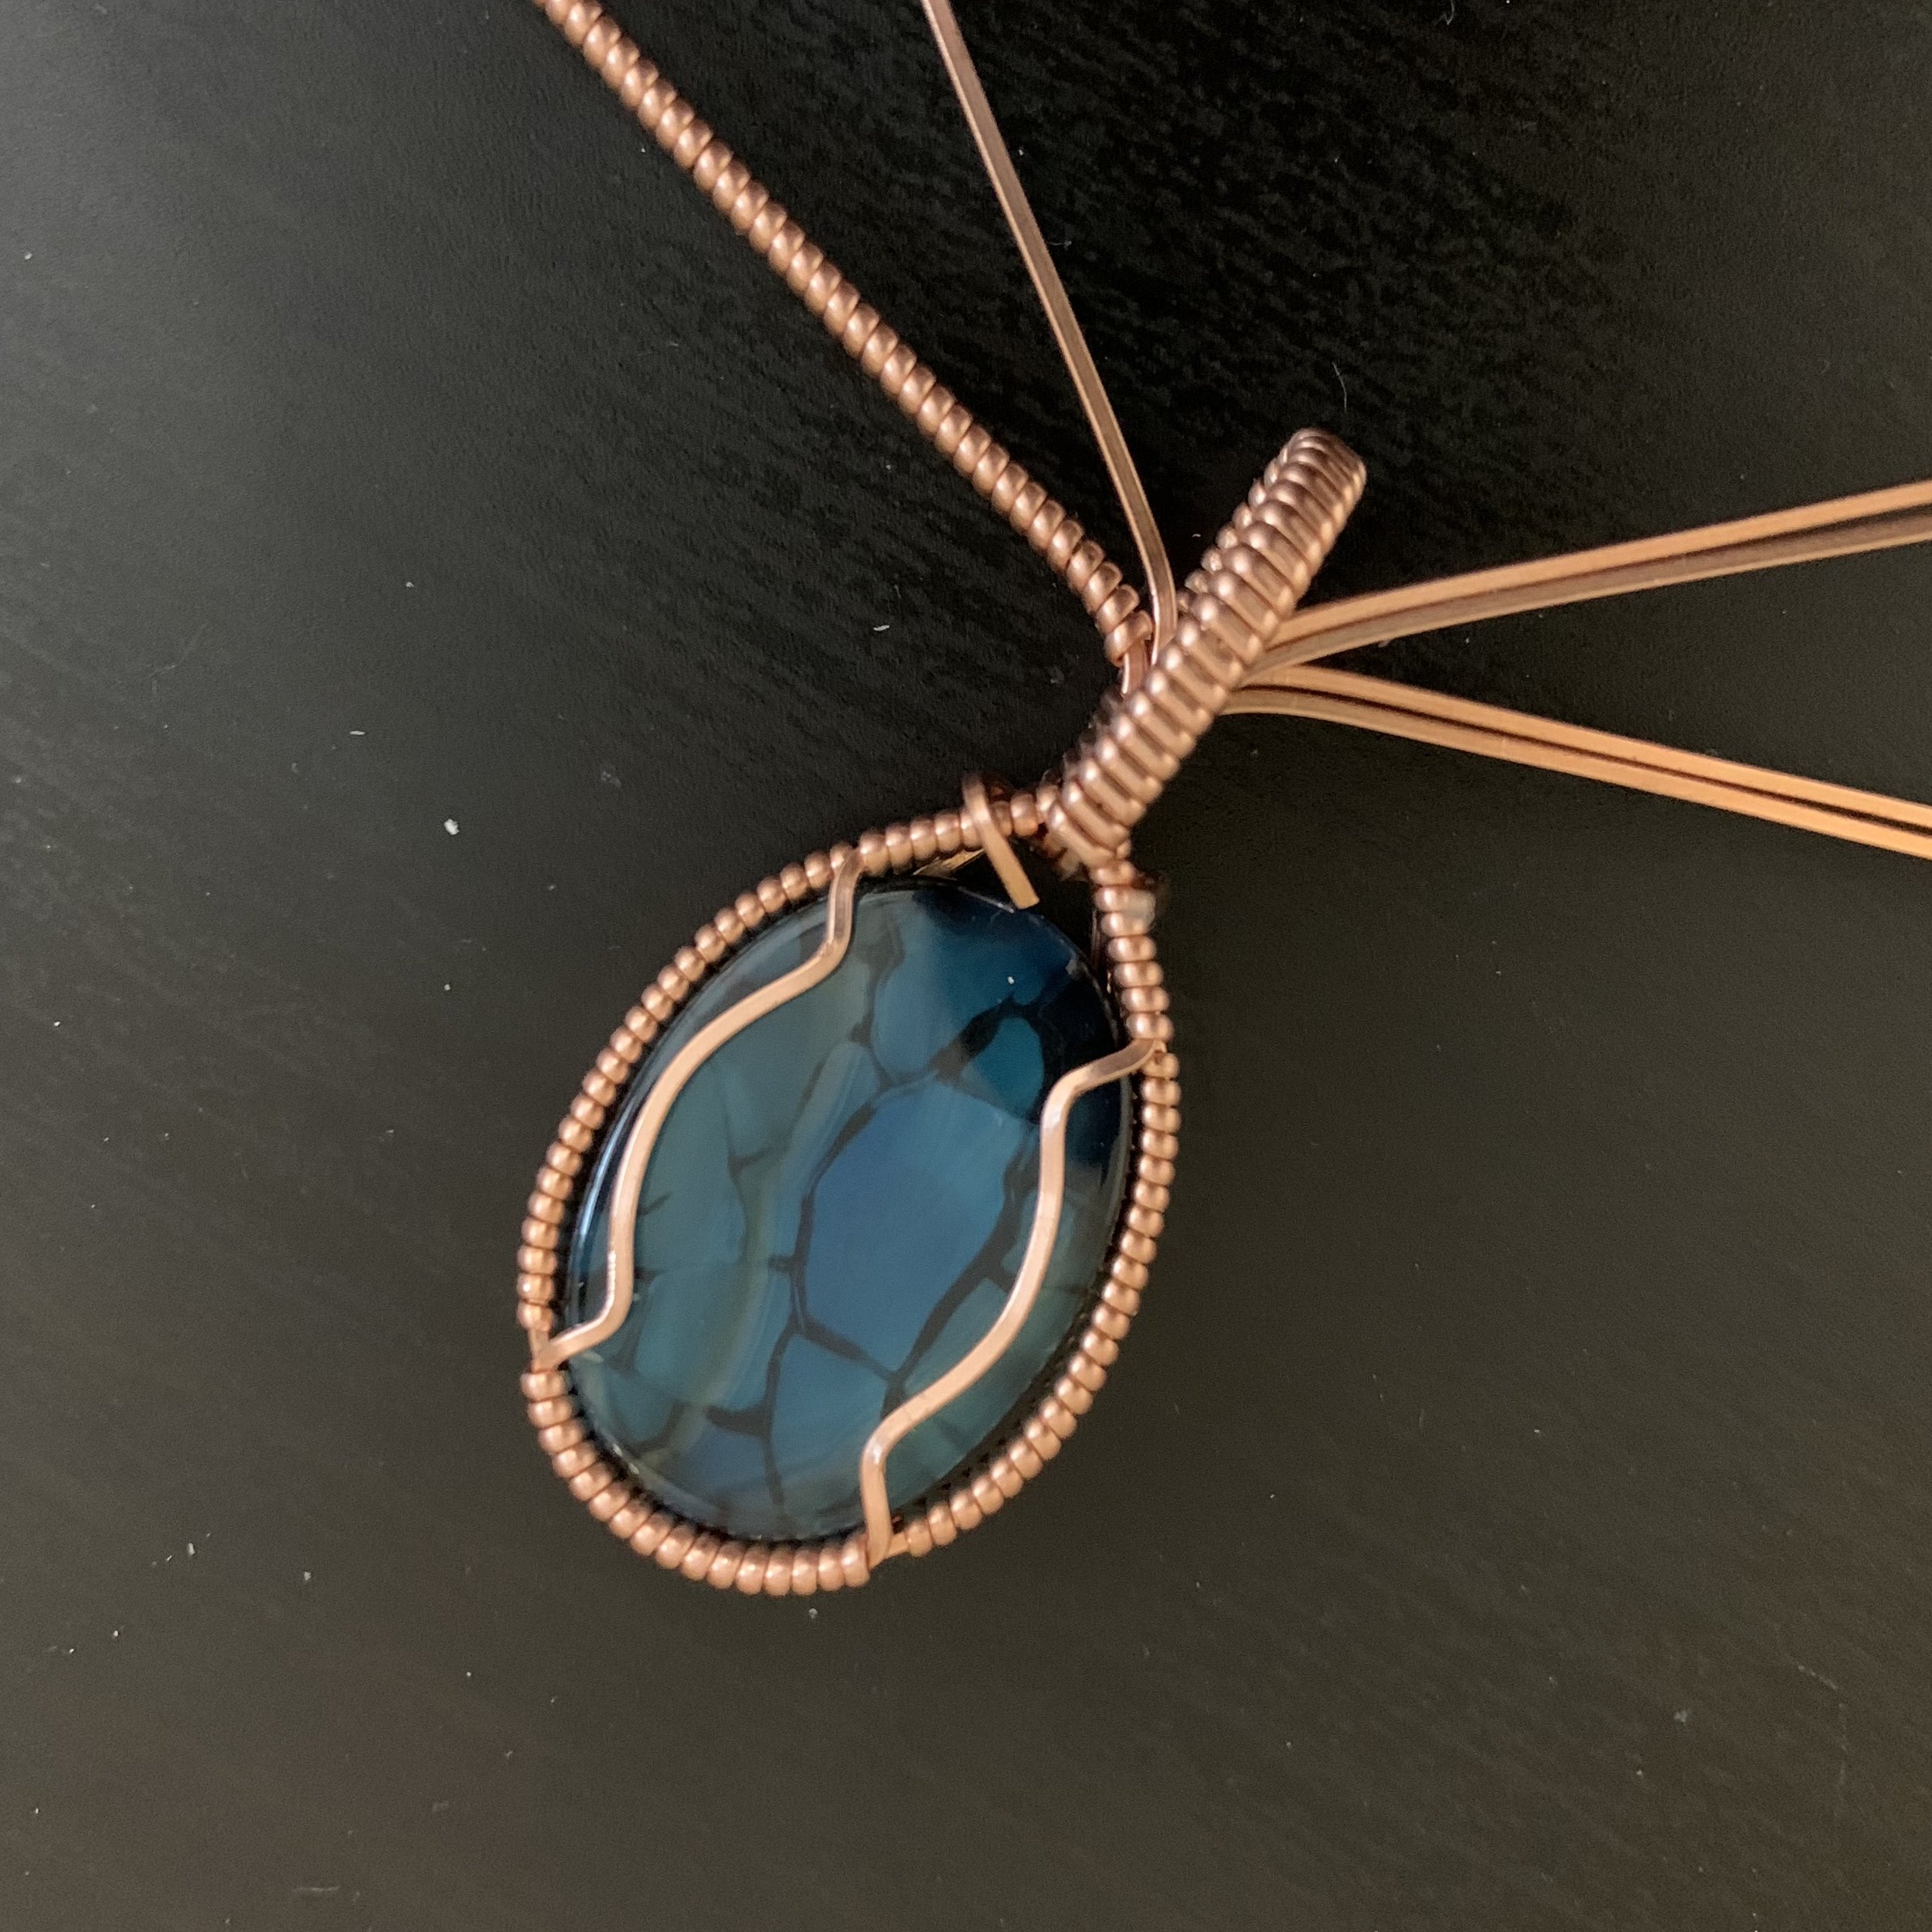
Step Five: Set the Stone
One caveat about this step is that depending on your choice of stone and how you plan to finish the piece, you may want to set the stone last. You will still want to fit the stone and bend the front setting wires at this stage, but don’t set the stone and bend the back setting wires yet if you plan to antique or tumble the frame and have chosen a stone that will not tolerate those steps. In this case, I am using a glass cabochon and will not be tumbling, so I have elected to set the stone now and gain the benefits of completing the piece with the greater stability provided by a placed stone.
Fit the cabochon into the setting by pressing it into the back of the frame, with the rounded side of the stone to the front and flat side to the back. Use your fingers for this step.
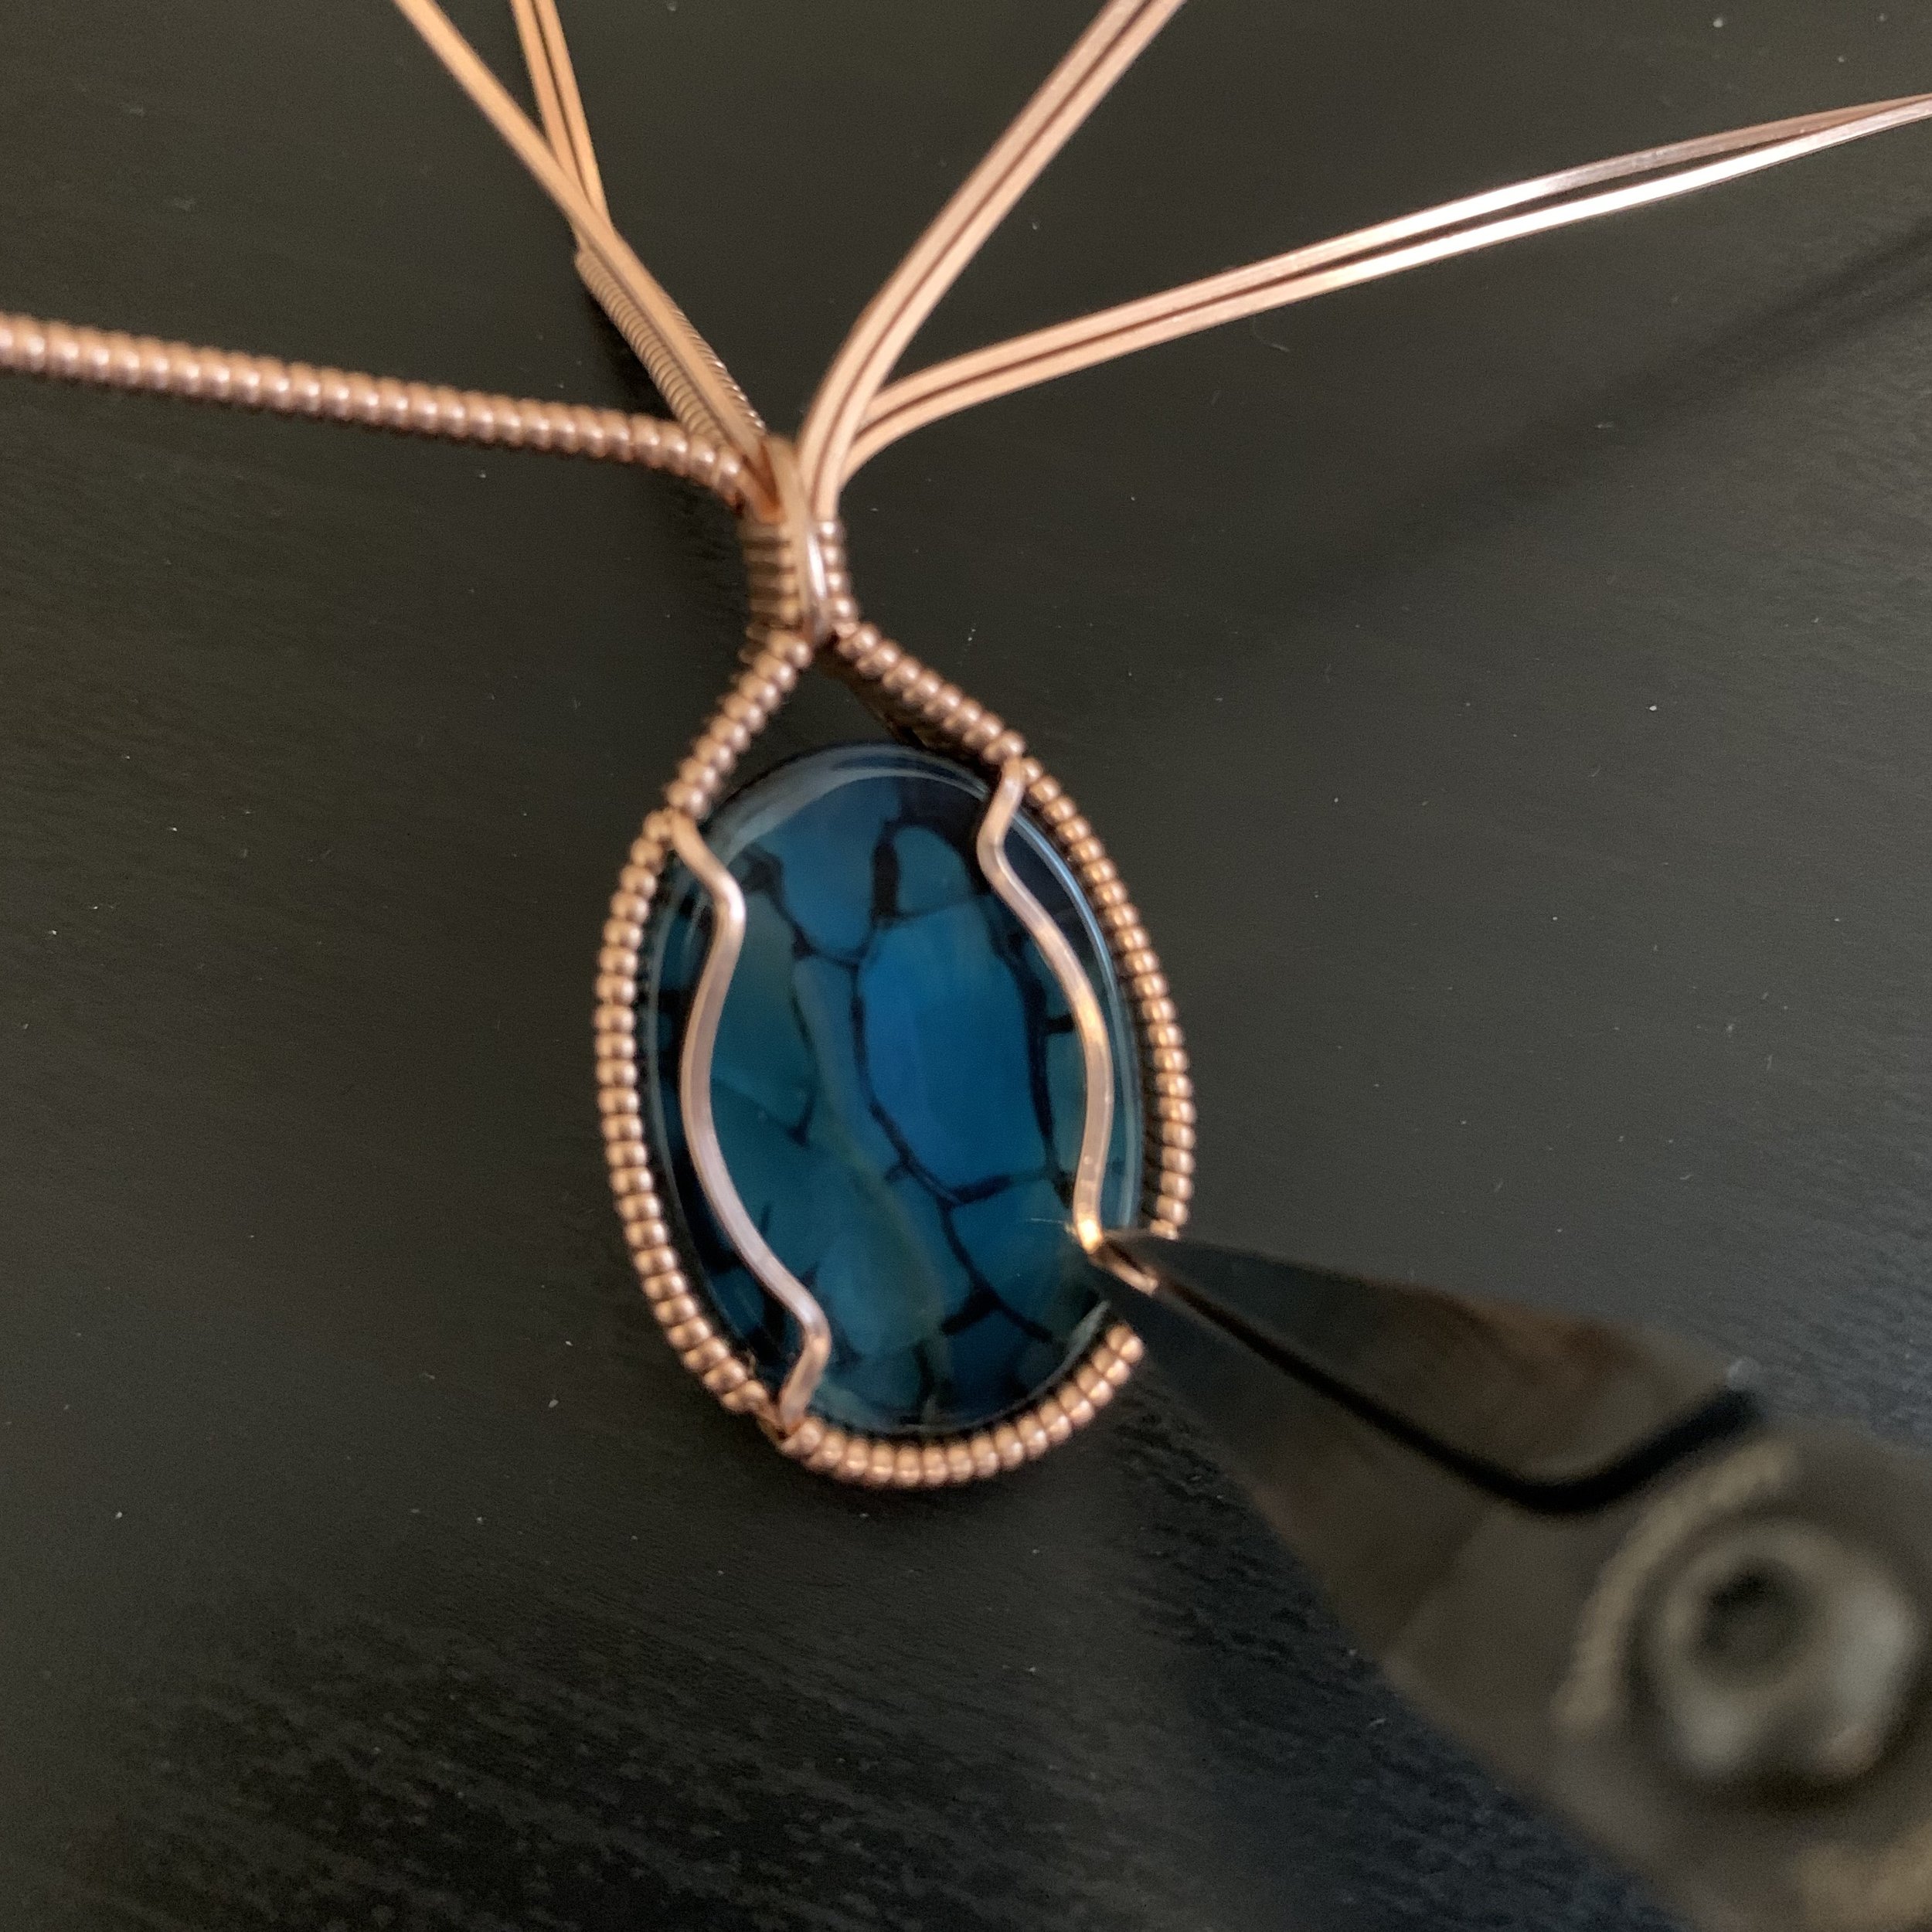
Now that your frame is the appropriate shape for the cabochon, bend the front setting wires into place. Do this by grasping the bottom end of only the top base wire with your flat-nose pliers and rotating inward.
Press the cabochon in again from the back. This time there should be little danger of it popping out the front side.
Use the same approach on the back side of the pendant, bending both the top and bottom ends of each setting wire on the back side of the piece. This creates a flat seat that the cabochon will rest on, and your stone is now secure from both front and back.
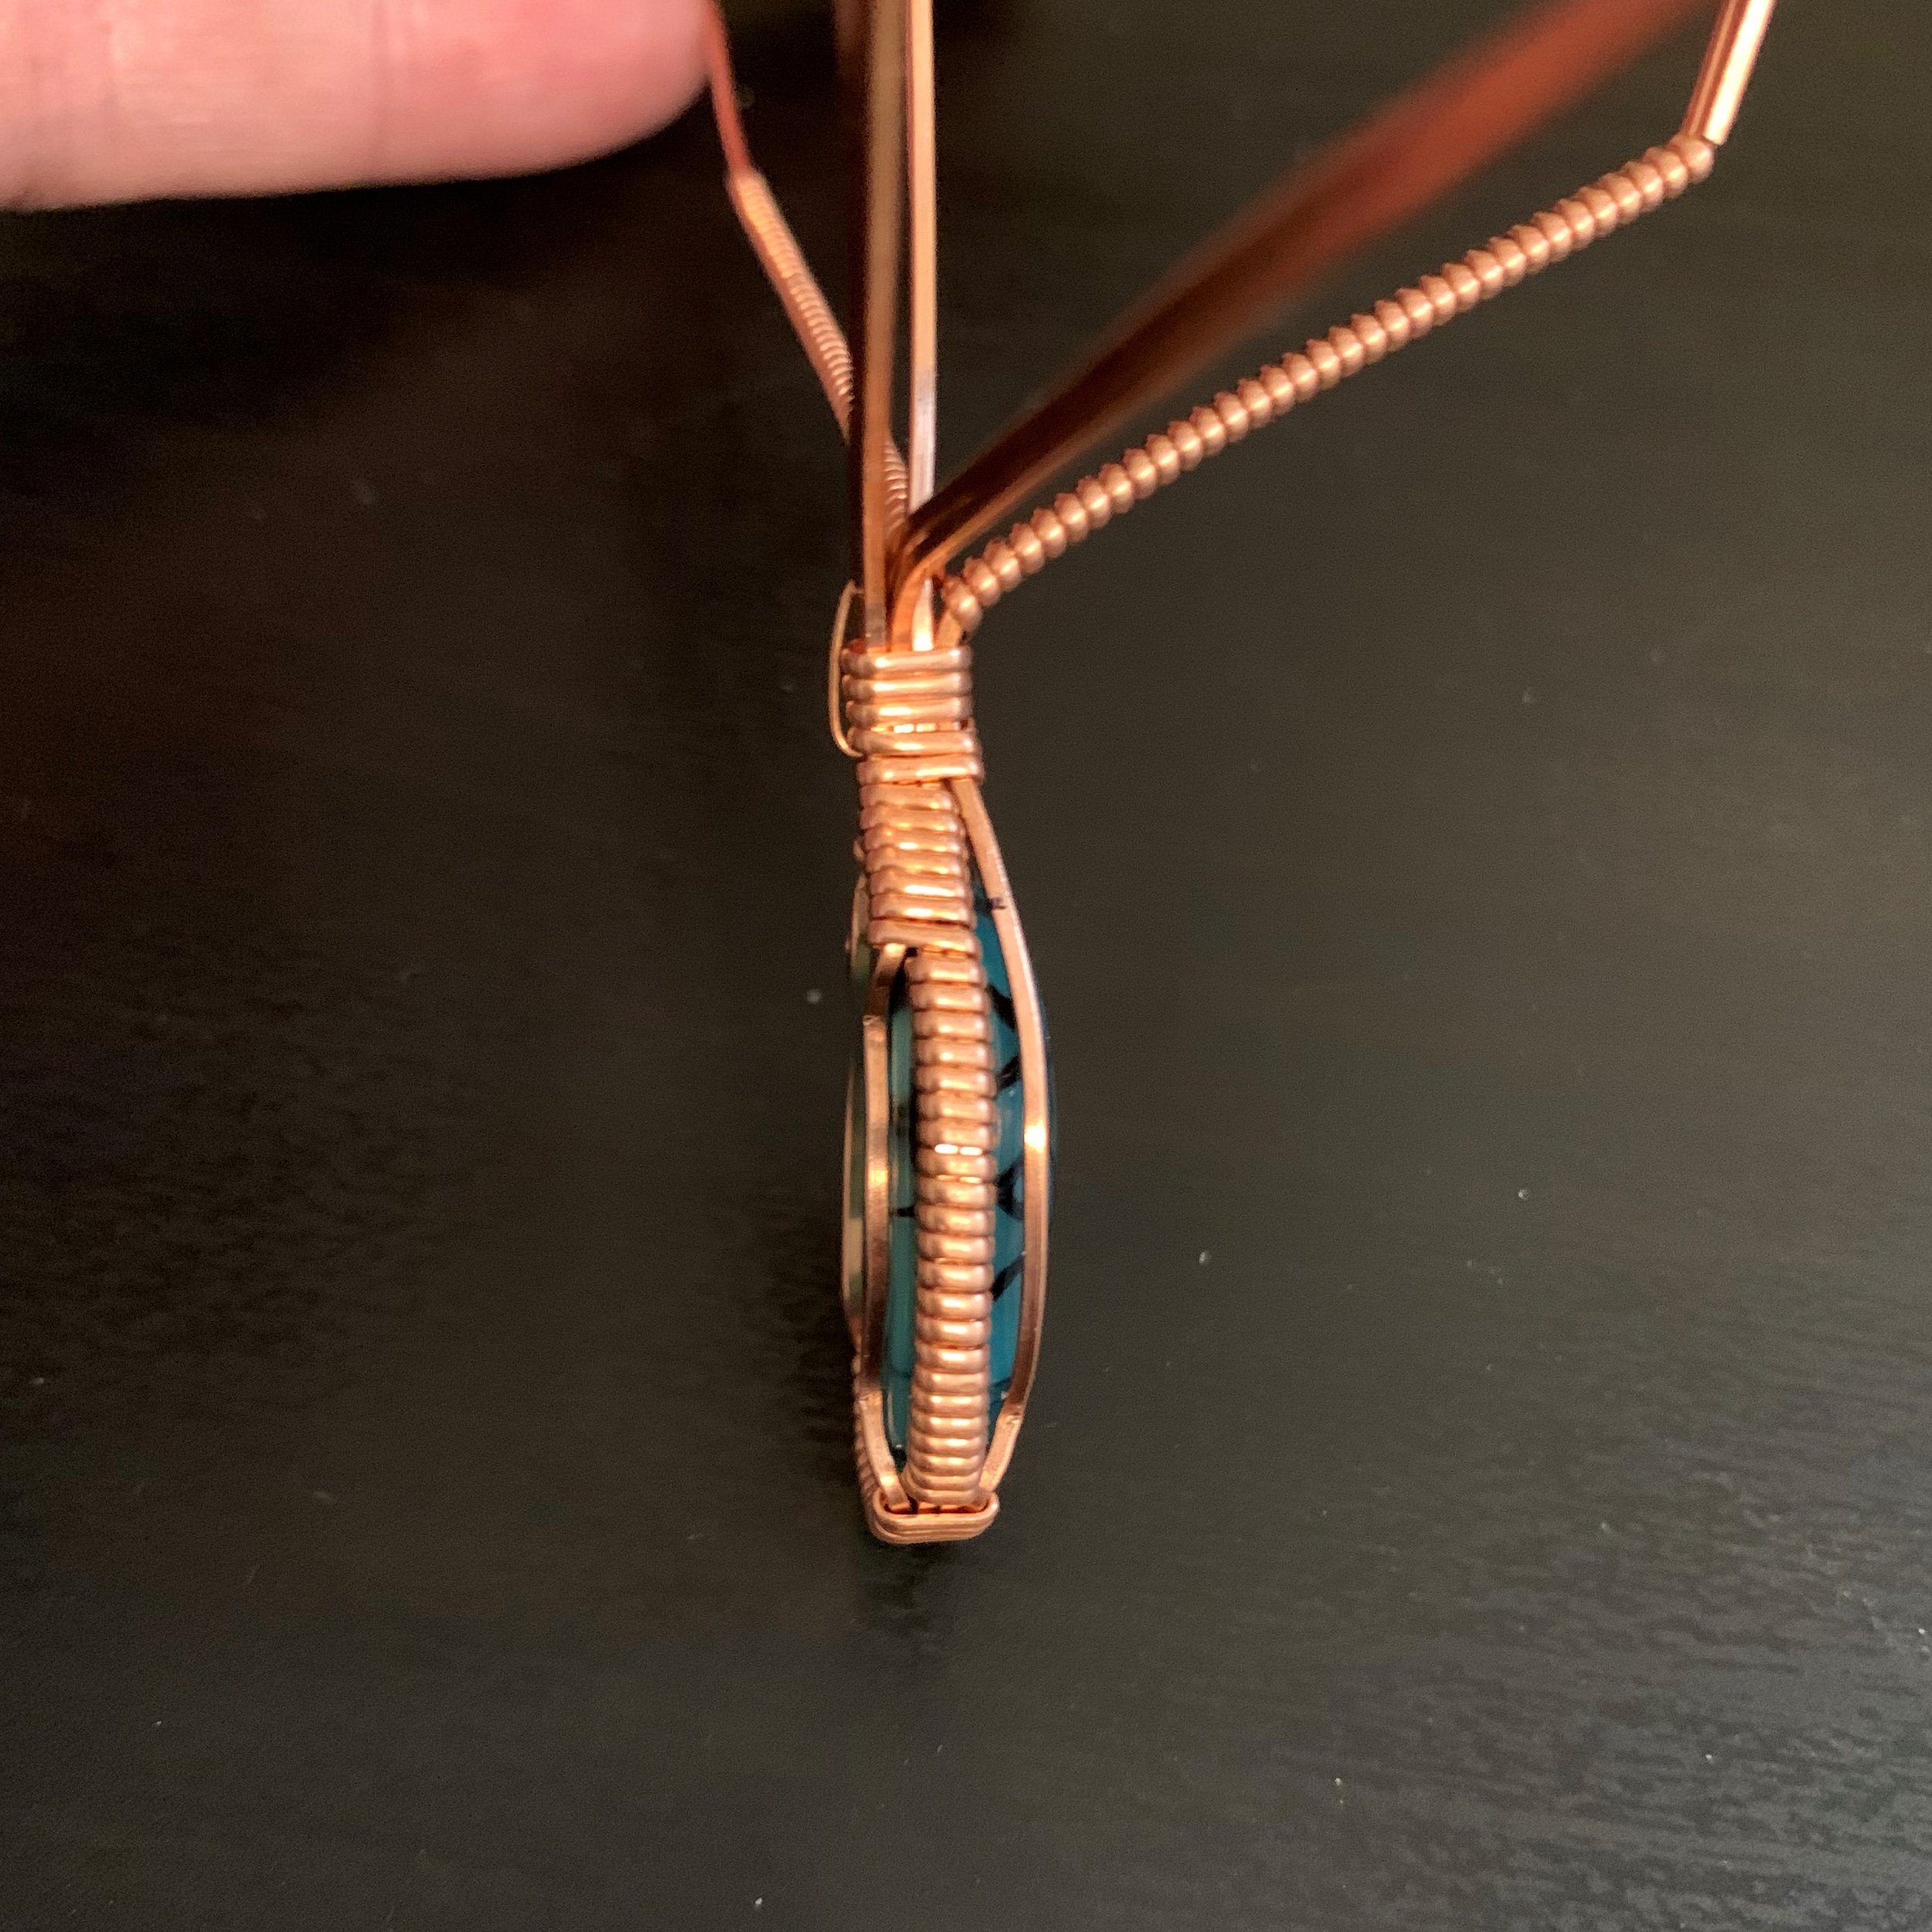
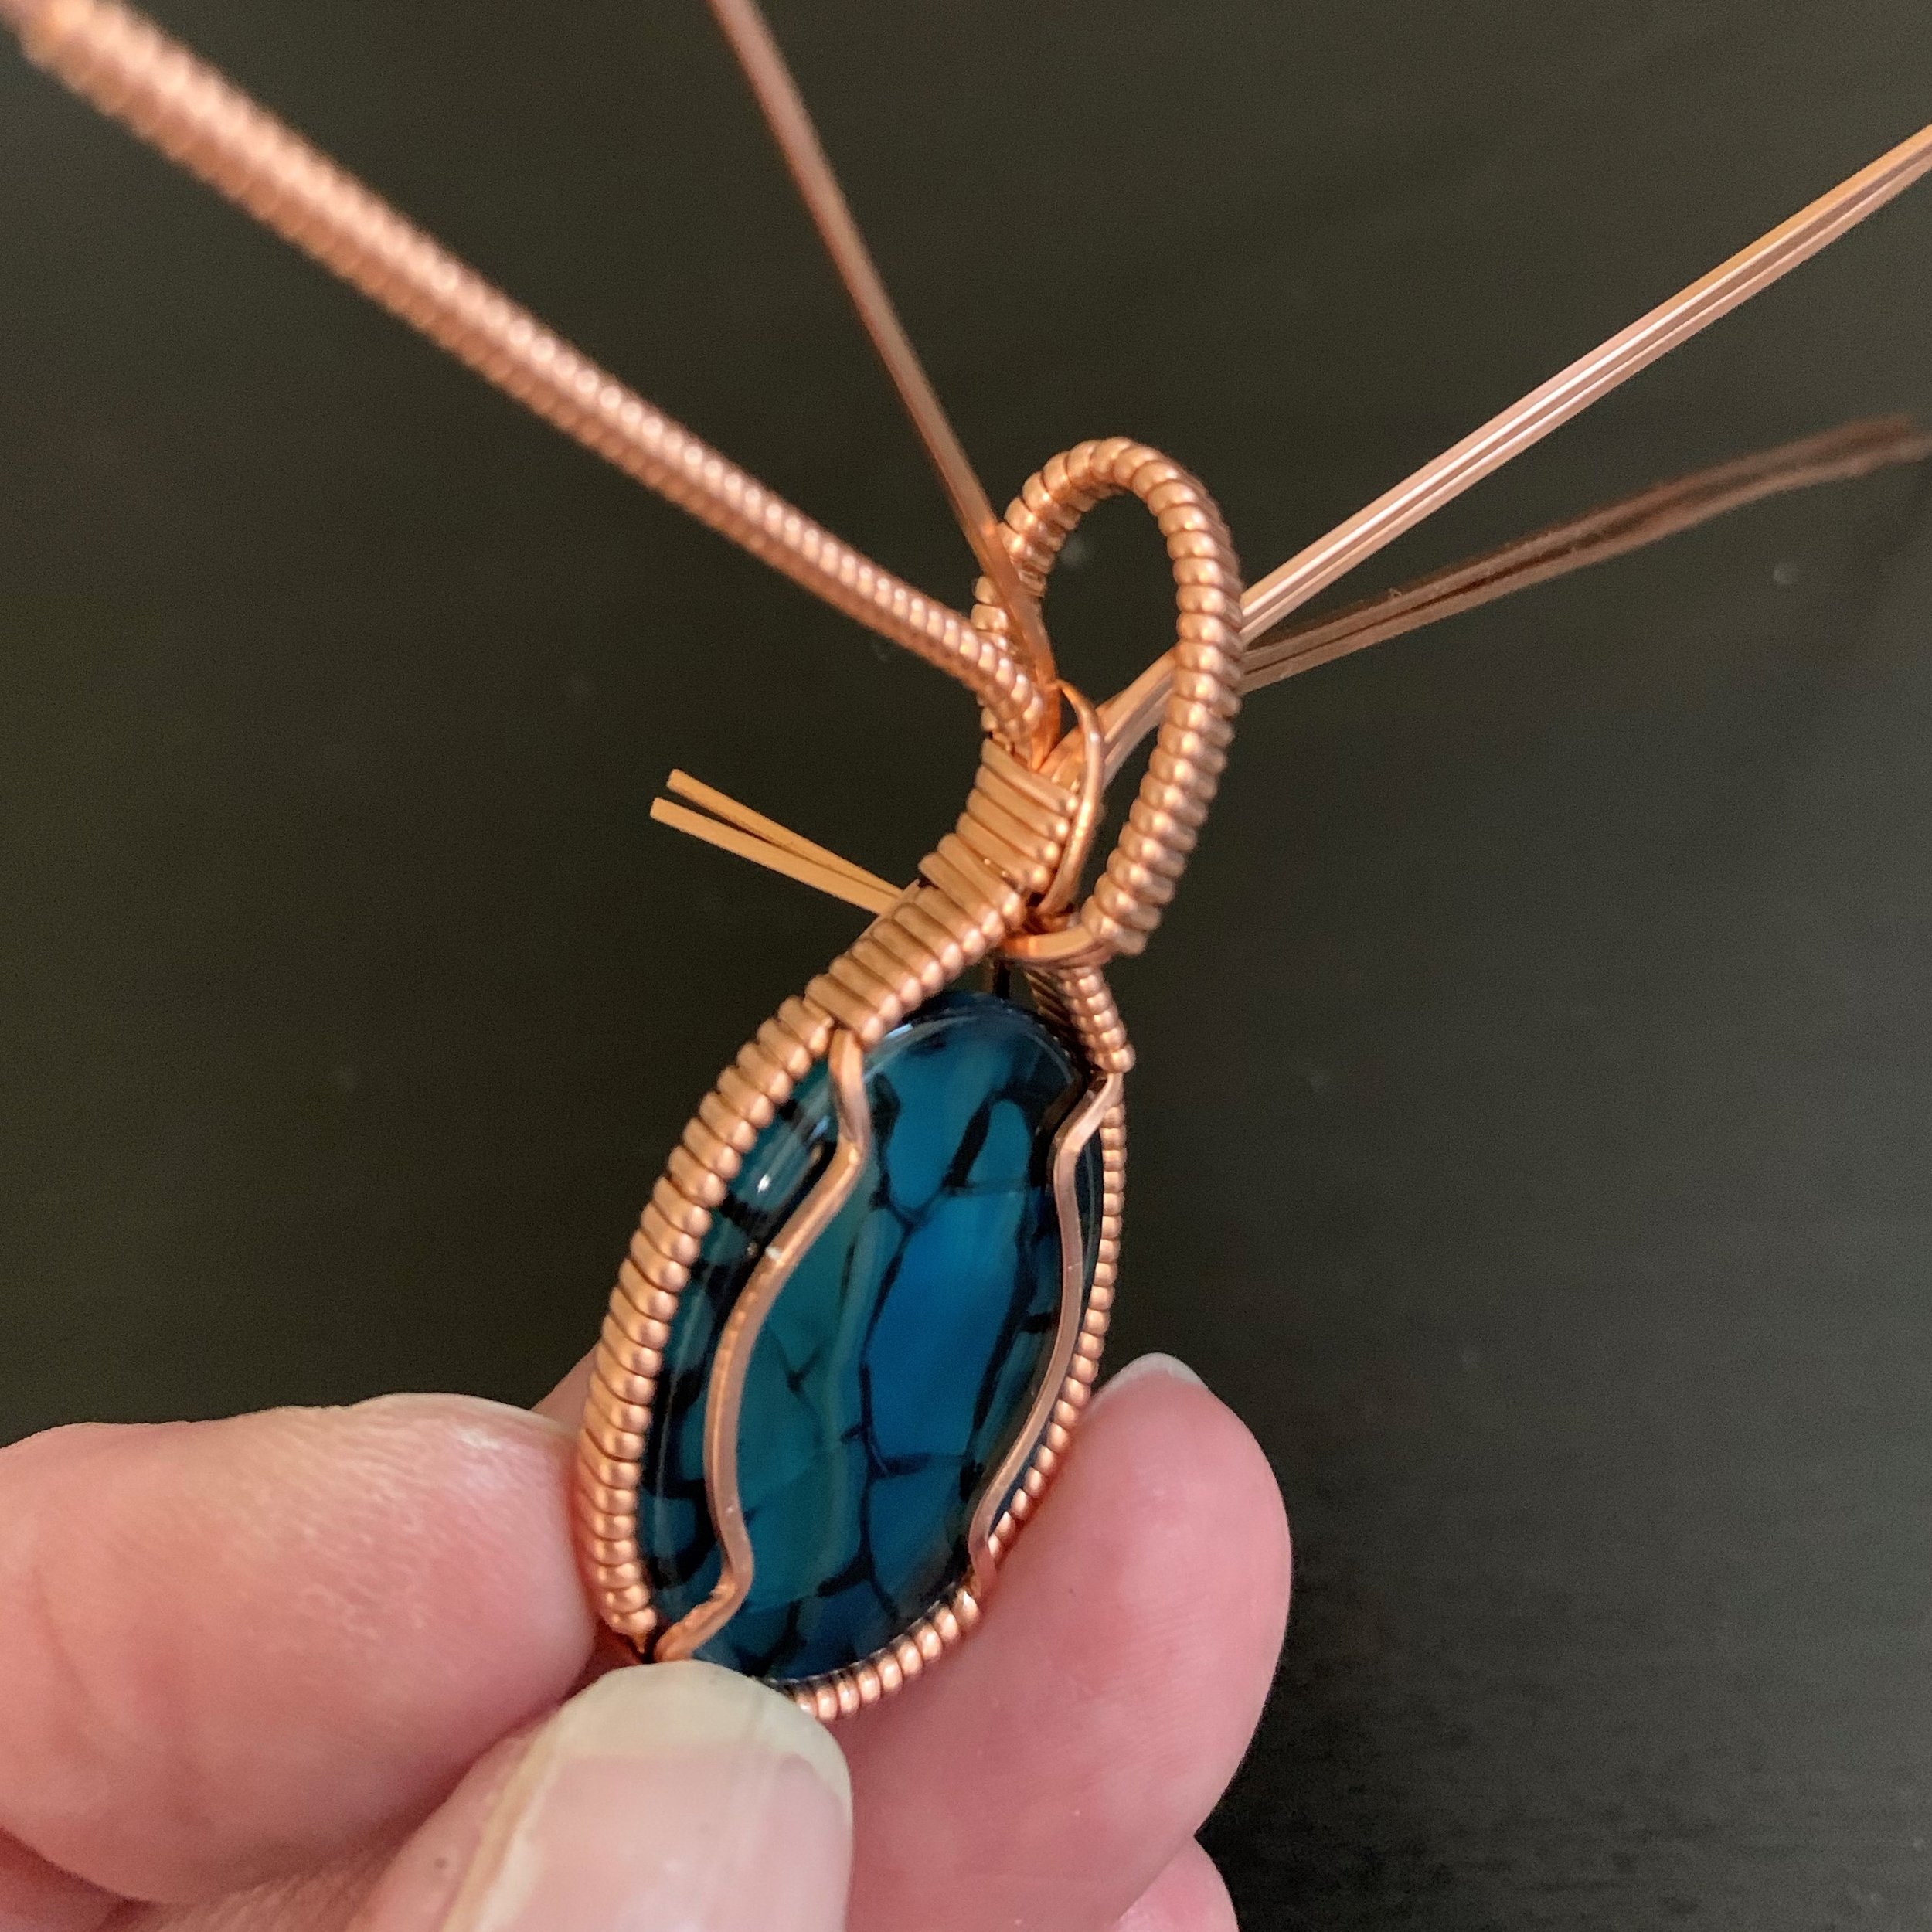
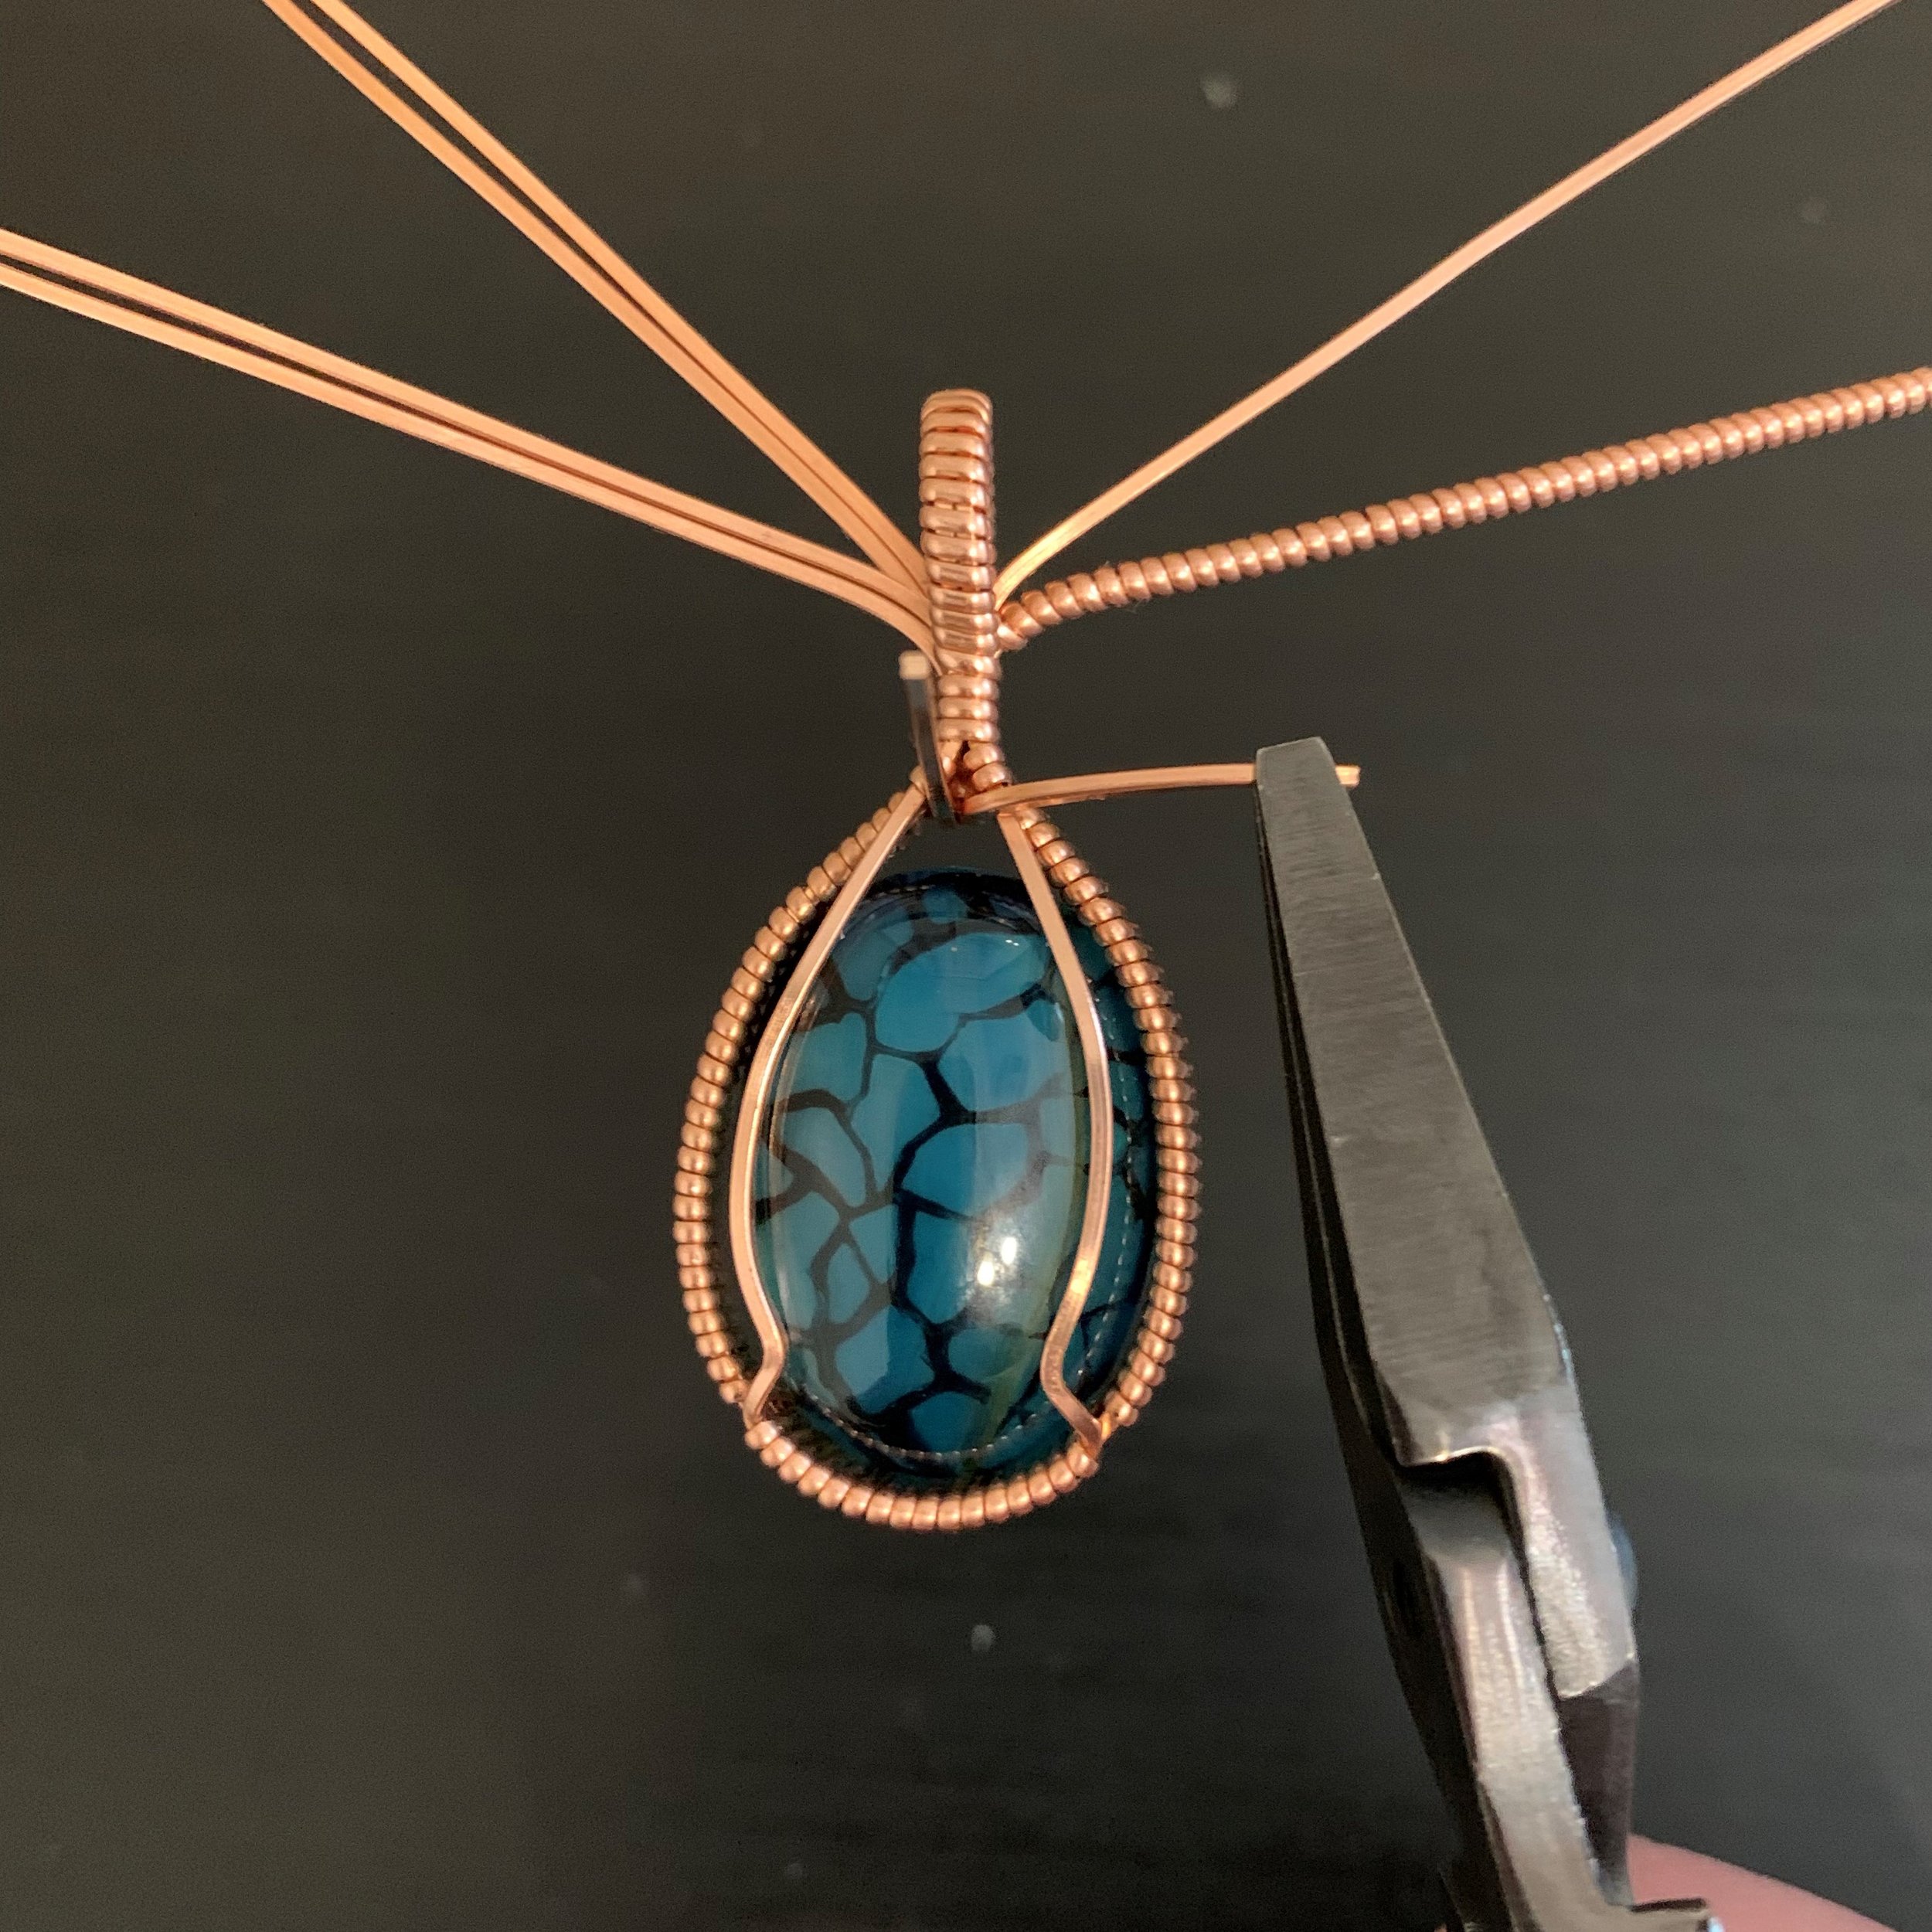
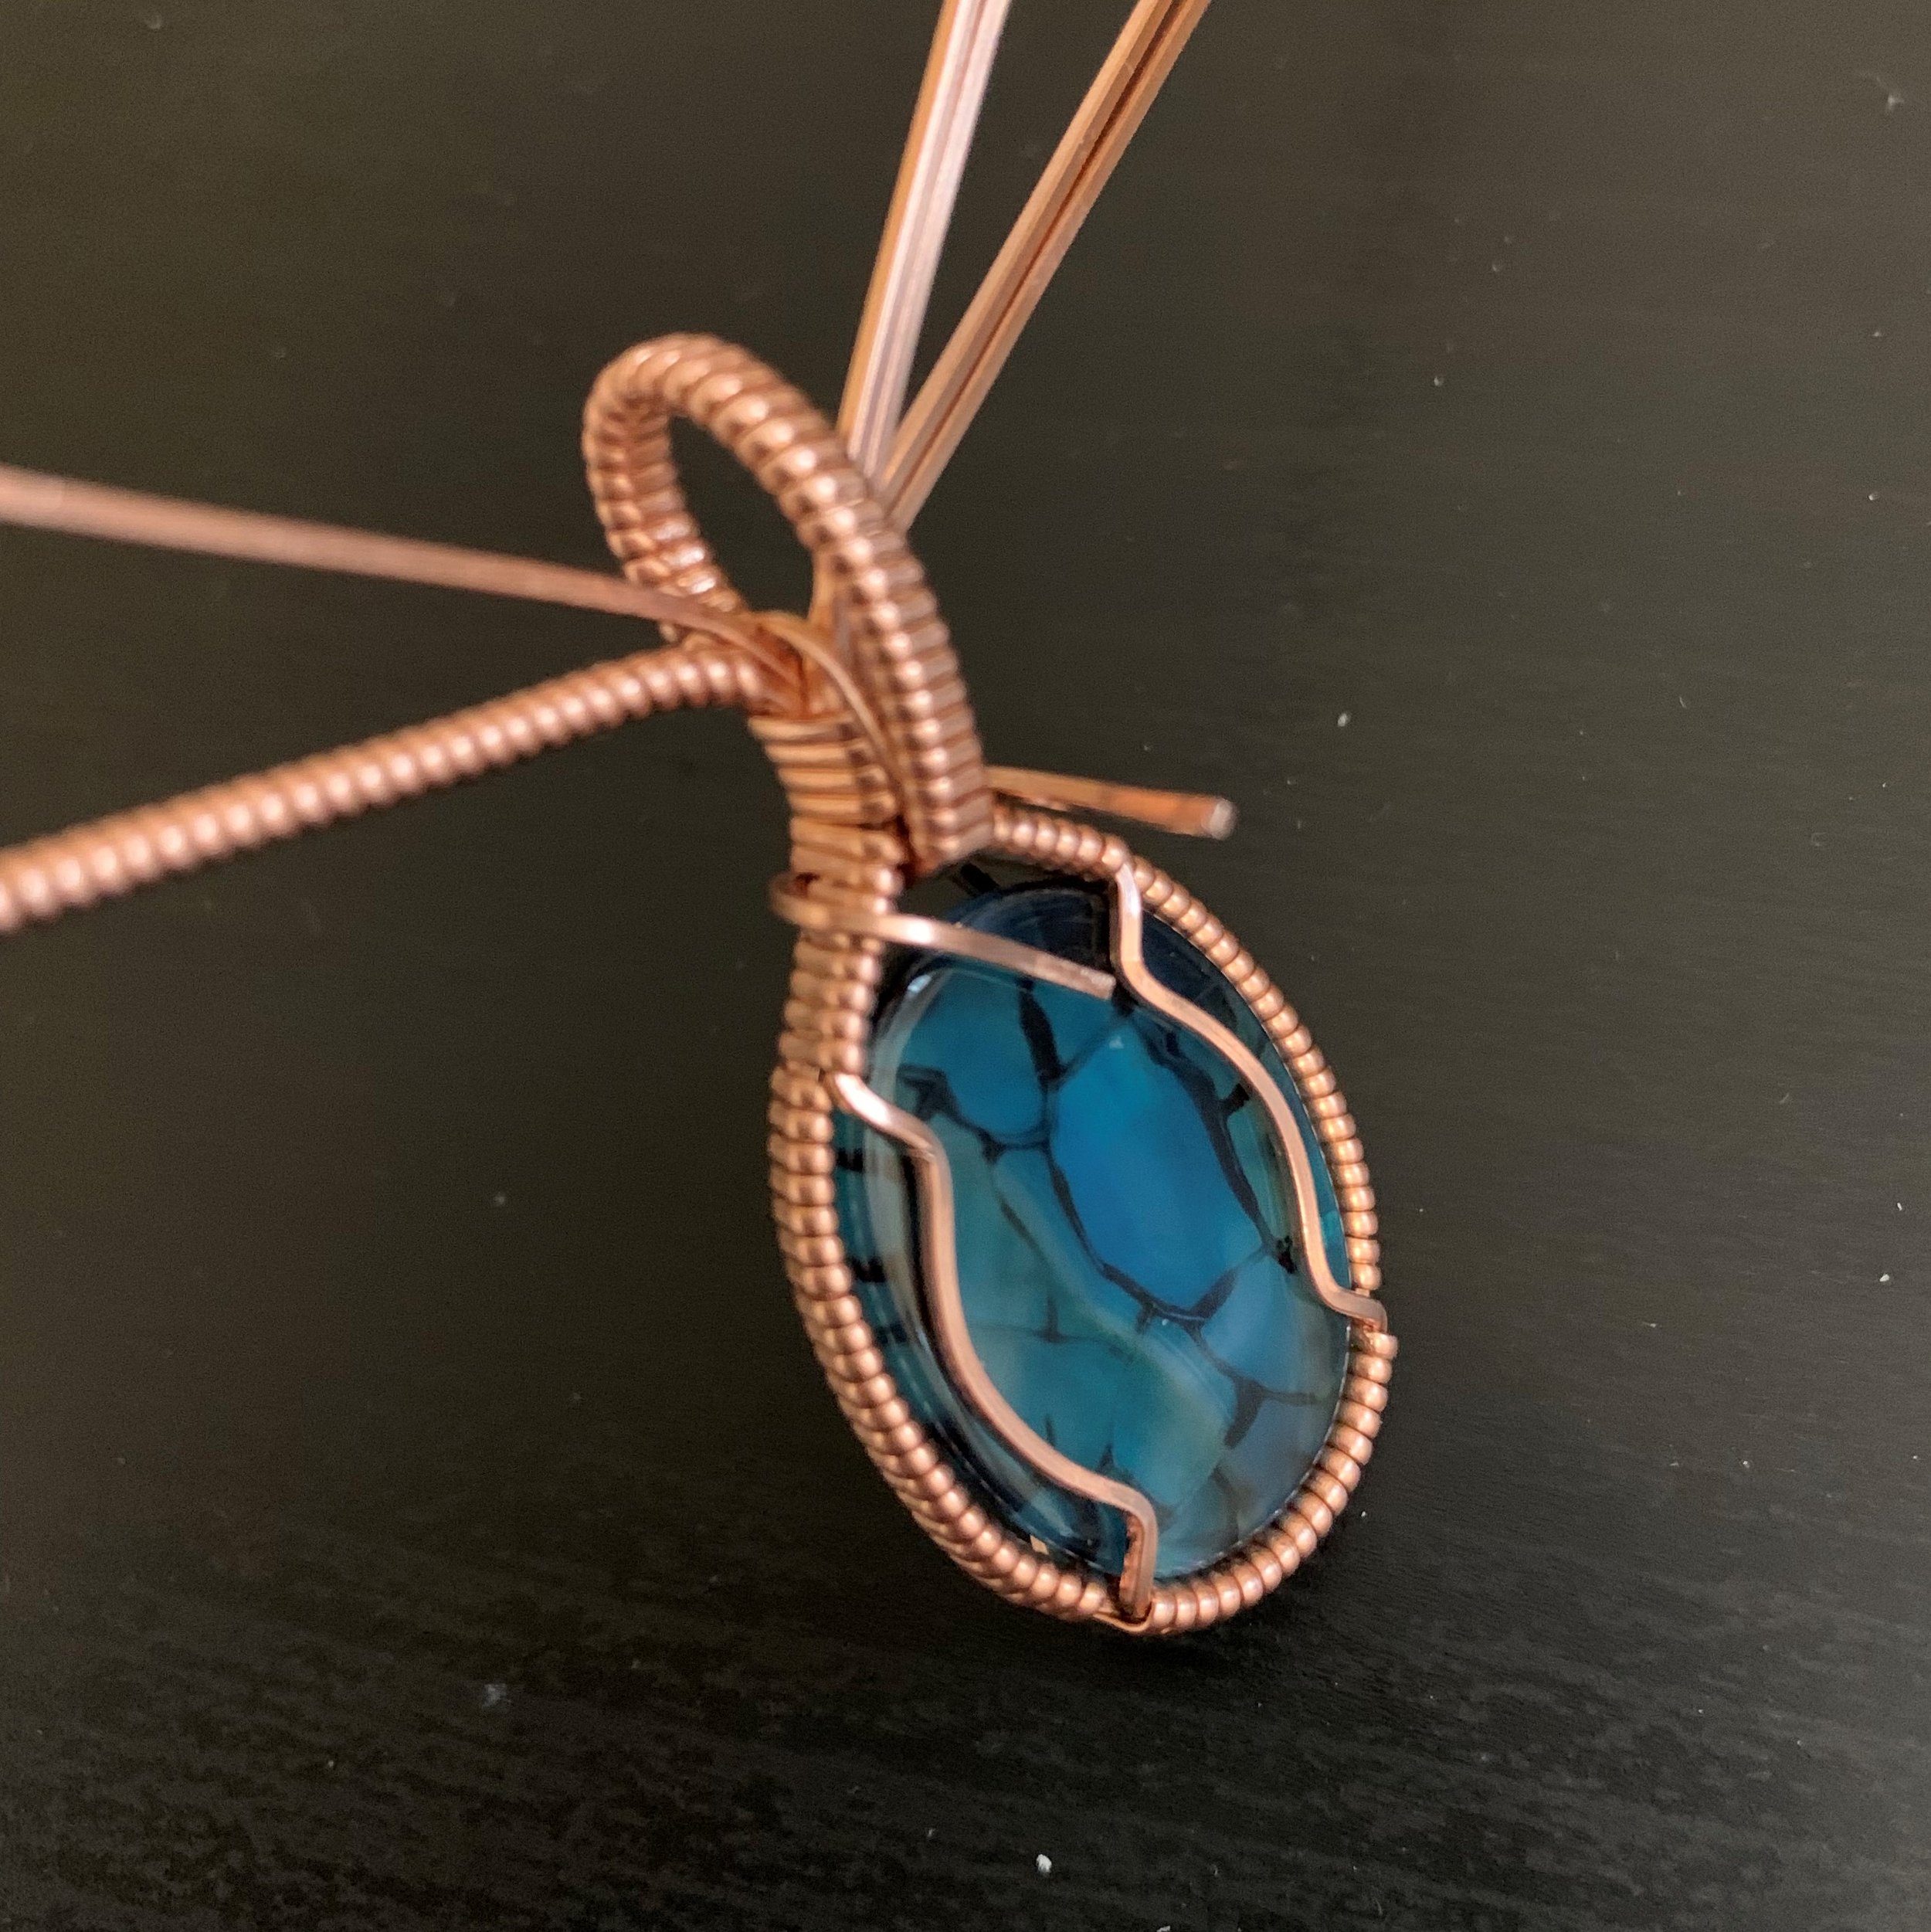
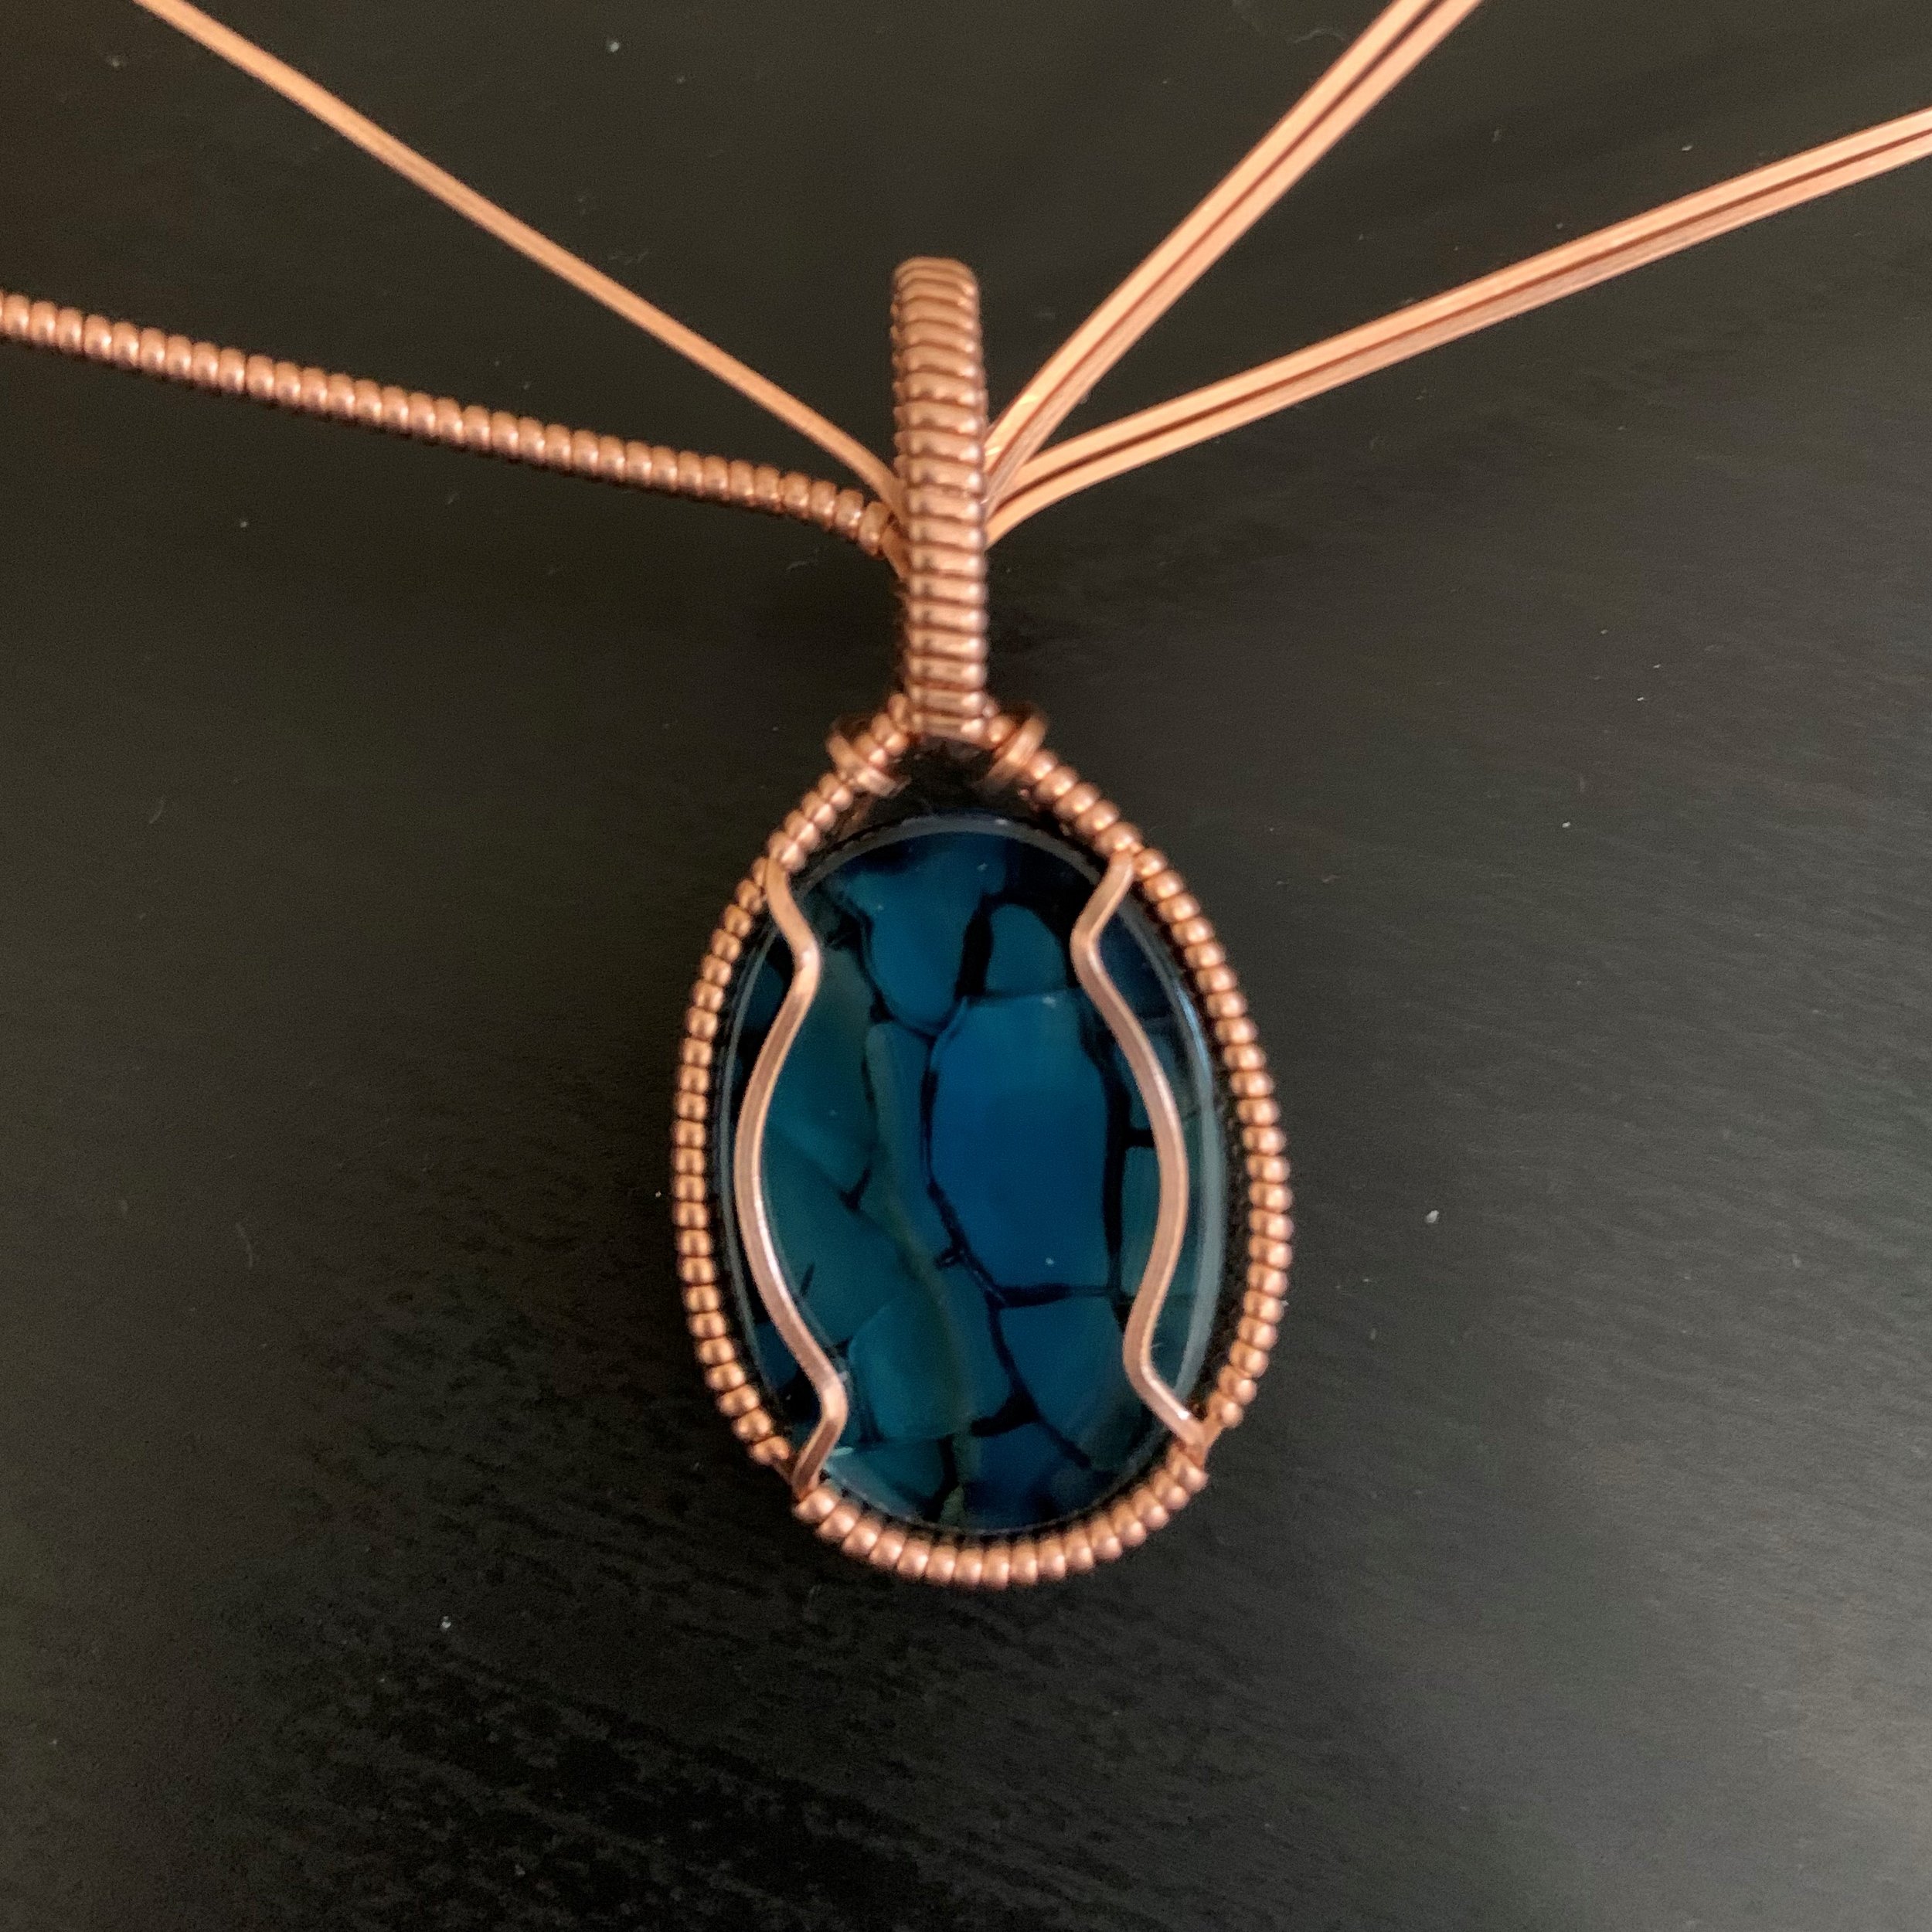
Step Six: Finish the Bail
Using your fingers, gently form the bail into a curve that goes up and over top of the separated base wires. The bend that you previously placed in the bail wires should start to point toward the front of the piece, and you should easily be able to guide them through the empty space between the stone and the bail.
From the front of the pendant, pull the bail wires firmly so that the bail is snug against the piece, then separate the bail wires and bend each one outward and around the back of the pendant. Use your flat-nose pliers or needle-nose pliers to tighten and flatten, ensuring a close wrap.
Trim the ends of the bail wires short and tuck them into the space above the top of the stone. Whenever you are wire wrapping, ending a wrap with the wire pointing inward is critical to ensure there are no loose ends to snag clothing or scratch skin. Needle-nose pliers are perfect for getting into small spaces like this to secure wire ends.

Step Seven: Place the Front Decorative Swirls
Placing swirls is an area where you can take a lot of artistic license. If you are a beginner, you may wish to continue following this tutorial closely, but if you’ve been wrapping for a while and want to try out some other swirl placements, now is the time. The possibilities are endless.
Start by bending the left front two wires forward and down, then swoop up and around to make the first swirl. Your fingers are the best tool for this job.
Now that your middle swirl is placed, bend the right wires up and around it one by one, placing them carefully where you want them.
Arrange your swirl wires as desired, then start to lock them into place by folding the wires around toward the back of the pendant. Since you have placed these wires carefully, try not to pull them around, but rather bend or fold. You don’t want to deform the font of your pendant while you work on the back of it.
Trim and finish the top two wires first, using the same approach you used for the bail wires. Trim the ends long enough that there is a tail that can be tucked in and crimped tightly inside the piece.
Do the same process with the bottom two wires. If your space above the stone isn’t very big, you may want to leave extra tail length in case your ends need to travel up and over the upper wires and end in the middle of the empty space. If you left yourself a little more empty space, then the four wires may be able to sit neatly next to each other.

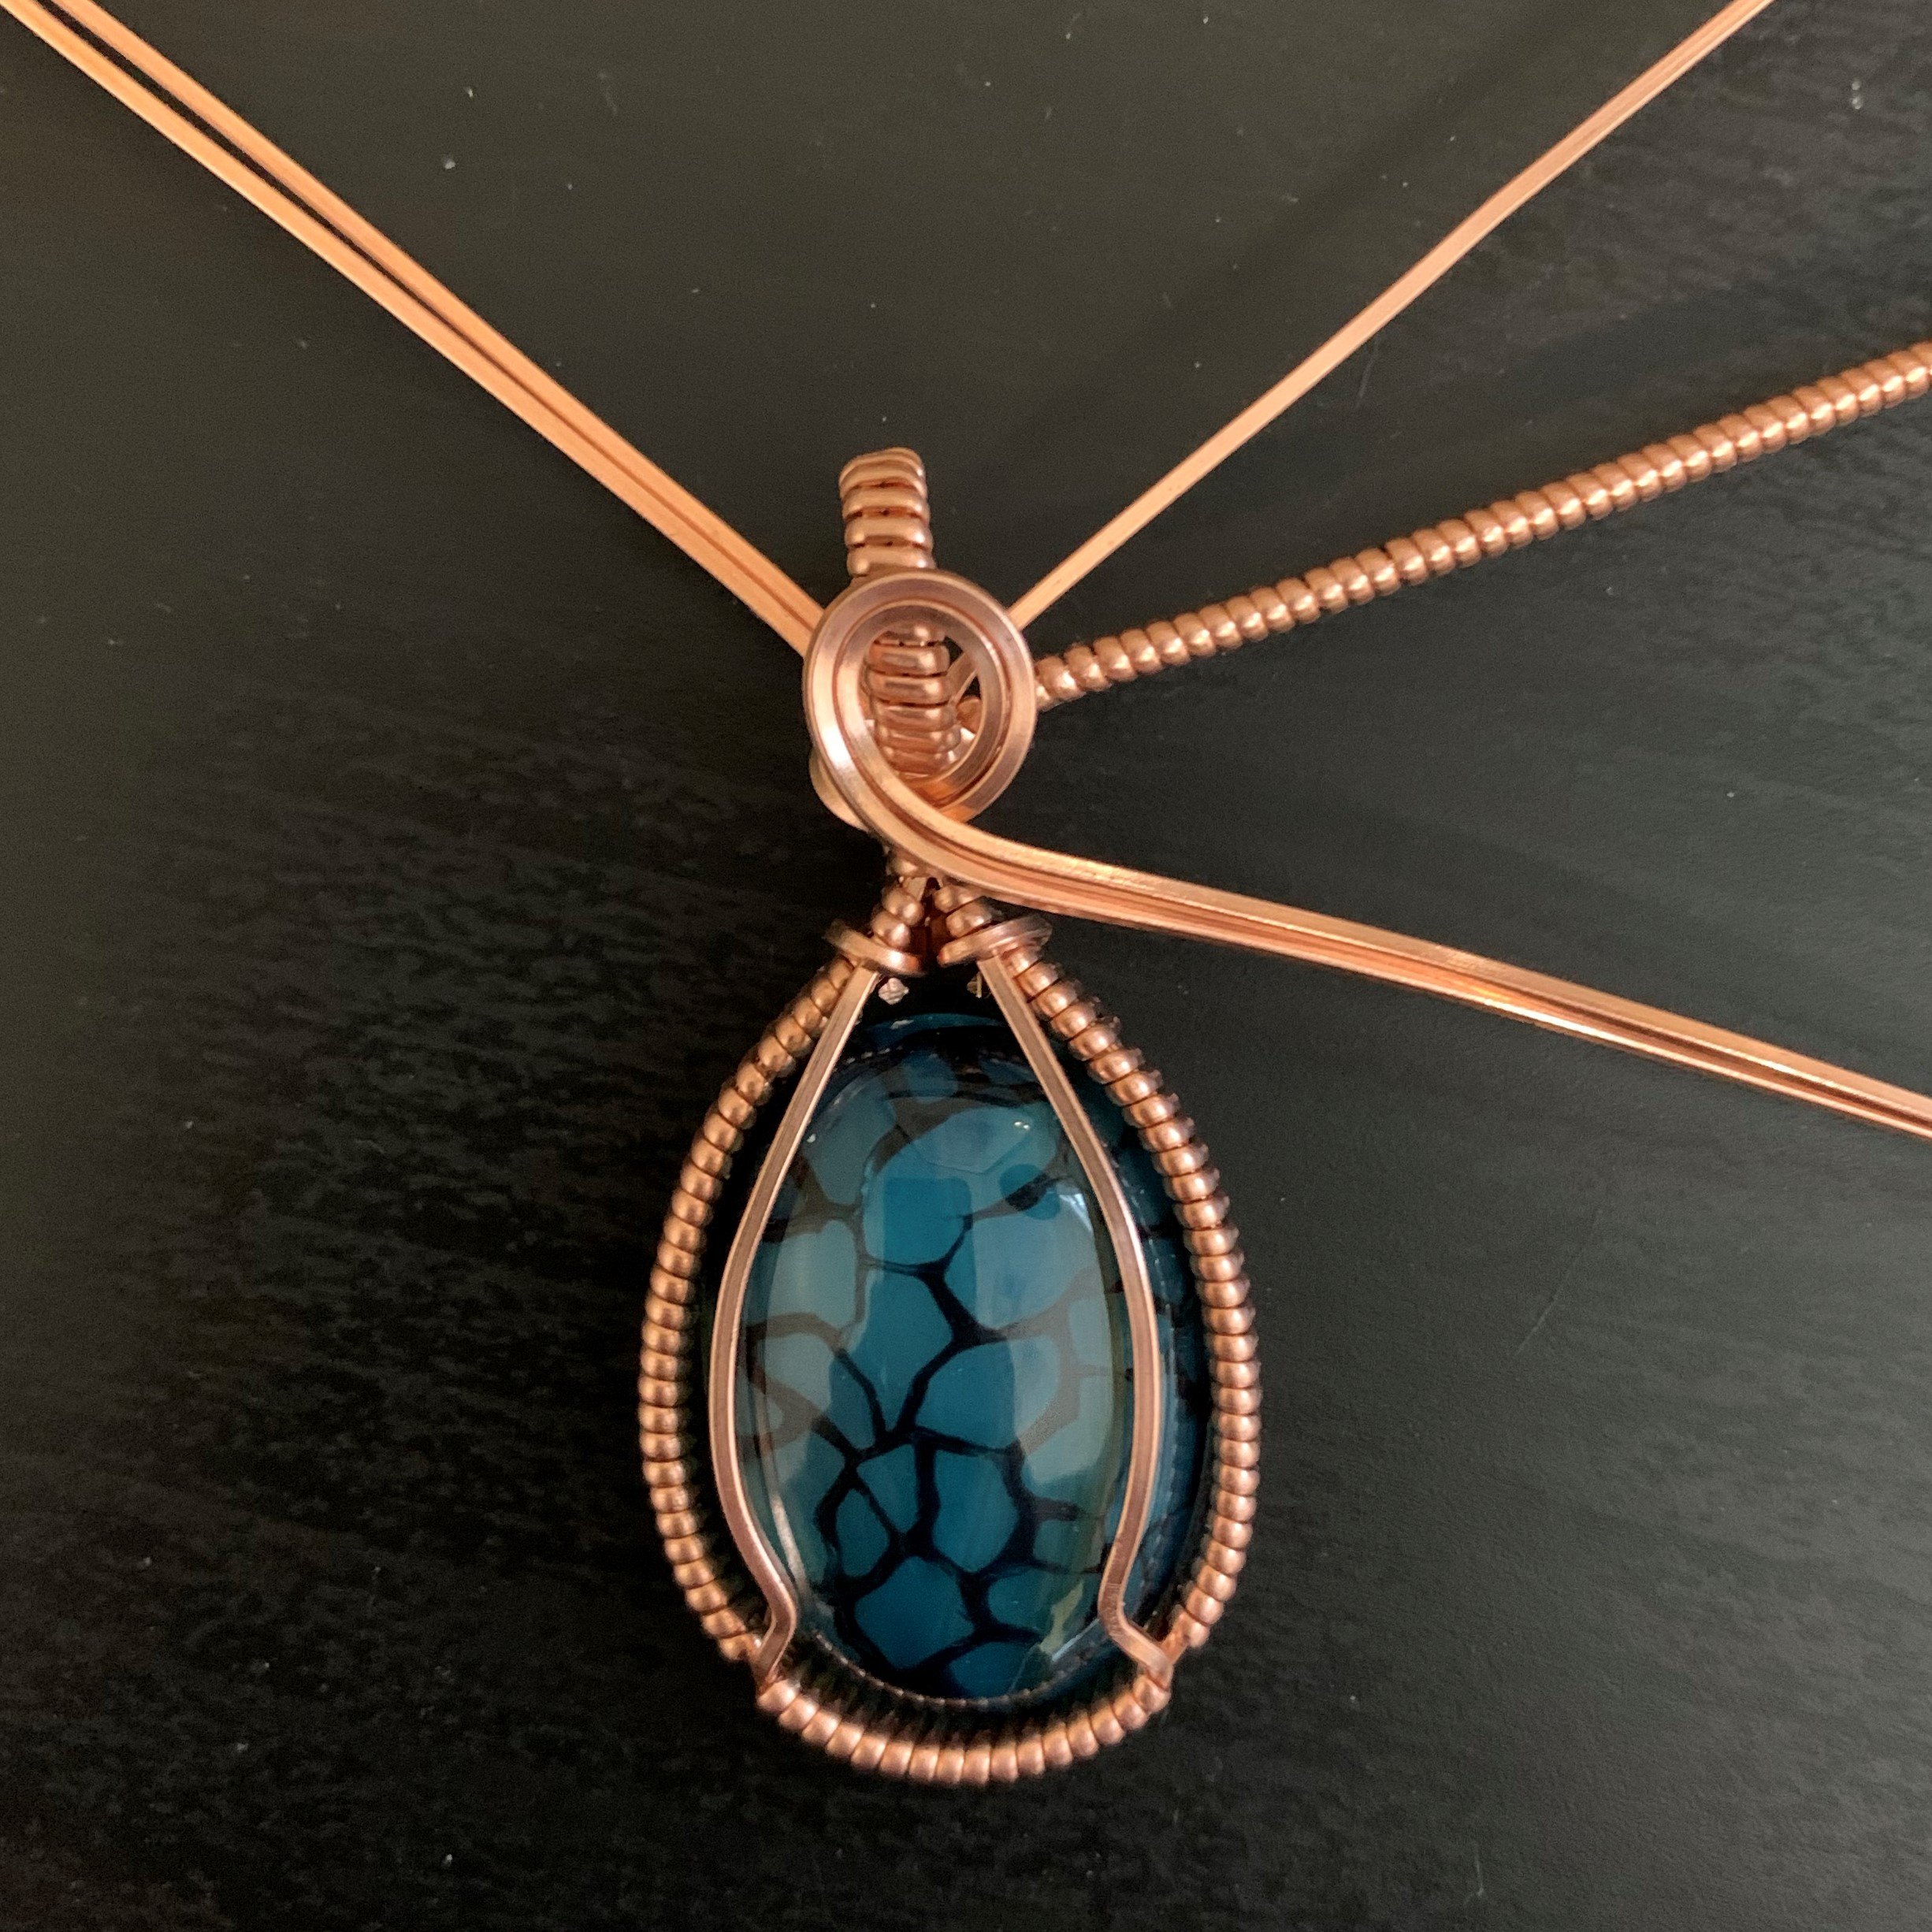
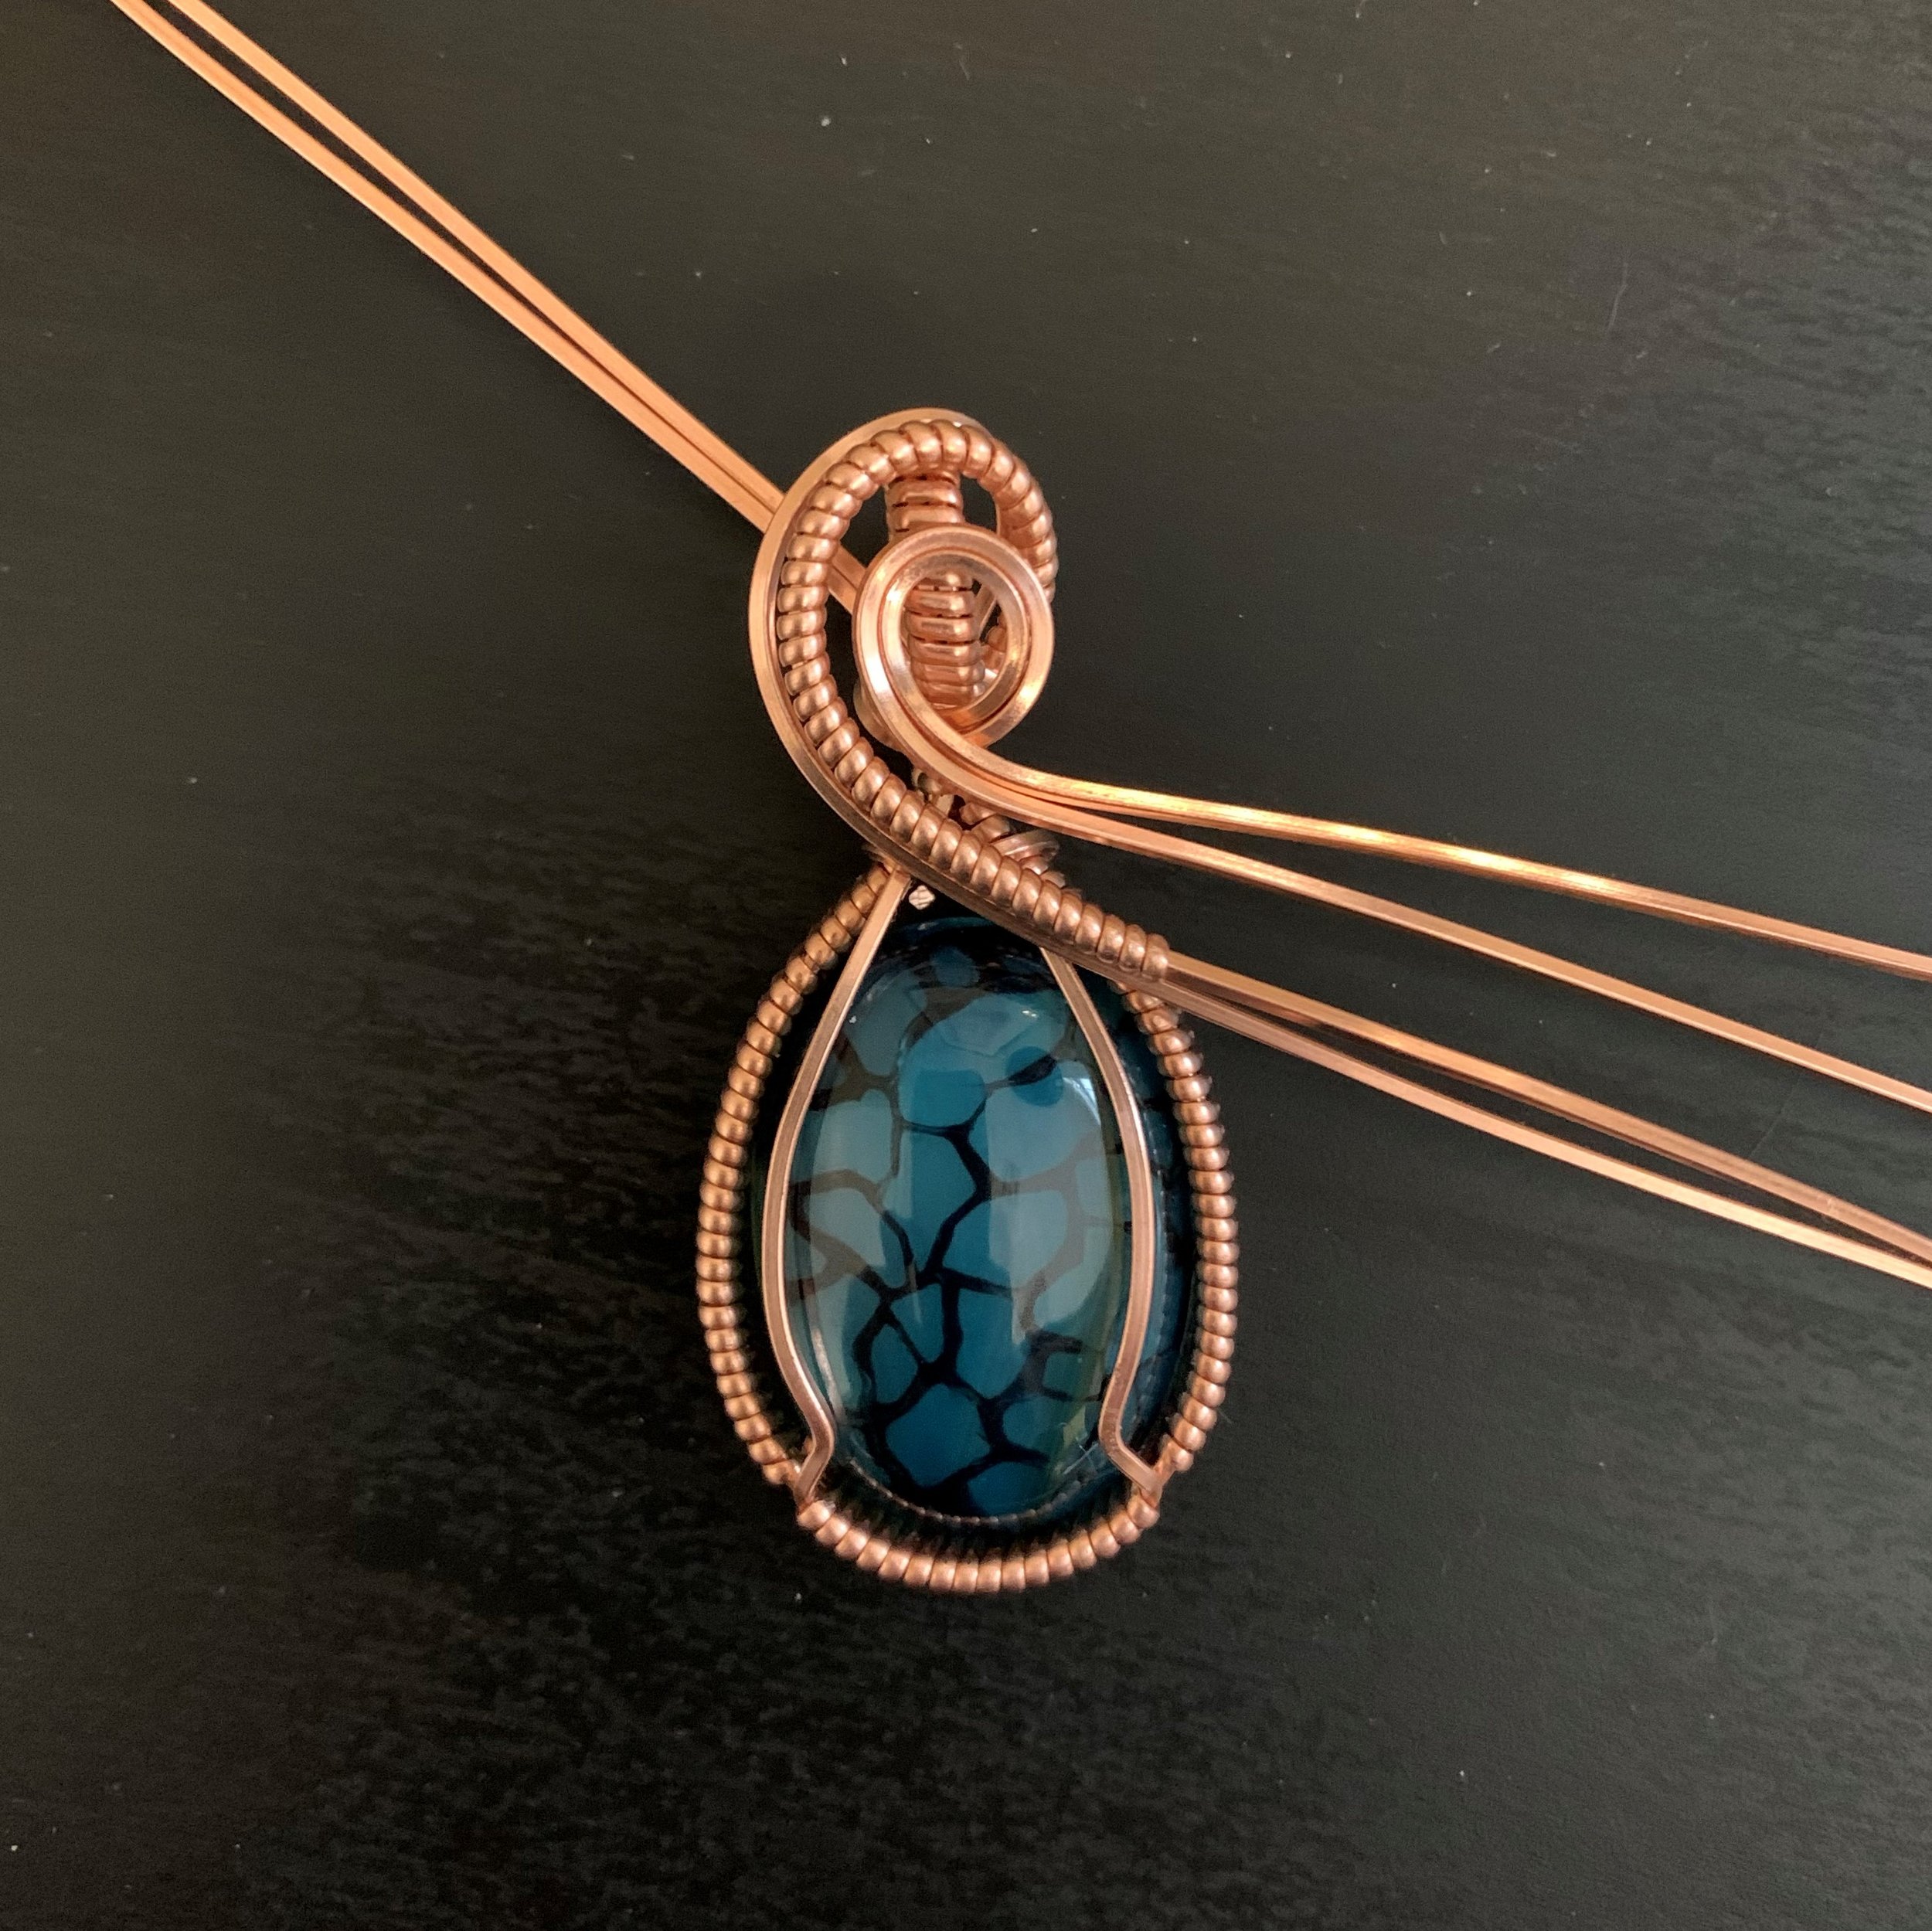

Step Eight: Place the Back Swirl
You should have one more pair of base wires to place at this point. Instead of swirling on the front side of the bail, bend these wires up and around the back side. This is of course another area where you are able to take creative license and do something a little different if desired.
The natural direction of the wires should now allow you to wrap them around the front of the piece and follow the curve of the right side front setting wire.
Trim the two wires, leaving the outer wire longer than the inner wire by about 5mm. When trimming wires that will be front-facing curls, I like to cut the ends at an angle so the ends of the loops taper slightly rather than being blunt ends.
Loops like these are where I get a lot of mileage out of my bail-making pliers with a 2mm tip and a 3mm tip. The smaller loop is made with the 2mm side and the larger loop is made with the 3mm side. I might then adjust the curve using the tips of standard round-nose pliers, but this is optional. Using the bail-making pliers means I don’t need to pull my wires away from the piece in order to curl them around the middle of my round-nose pliers to get a larger curl, which means cleaner lines and fewer tool marks on the finished piece.
Step Nine: Secure the Front Loops
Using the short length of 22-gauge half-round wire, first wrap it three times around only the right front setting wire.
Next, wrap it around all three wires (setting wire and two loops), securing the front loops in place.
Finally, wrap three more times around just the right front setting wire.
Trim the 22-gauge wrapping wire so that the ends point inward toward the piece, then use your needle-nose pliers to press the ends down.
You are ready to antique, polish or otherwise finish your piece as desired, put it on a chain or cord, and wear it proudly!

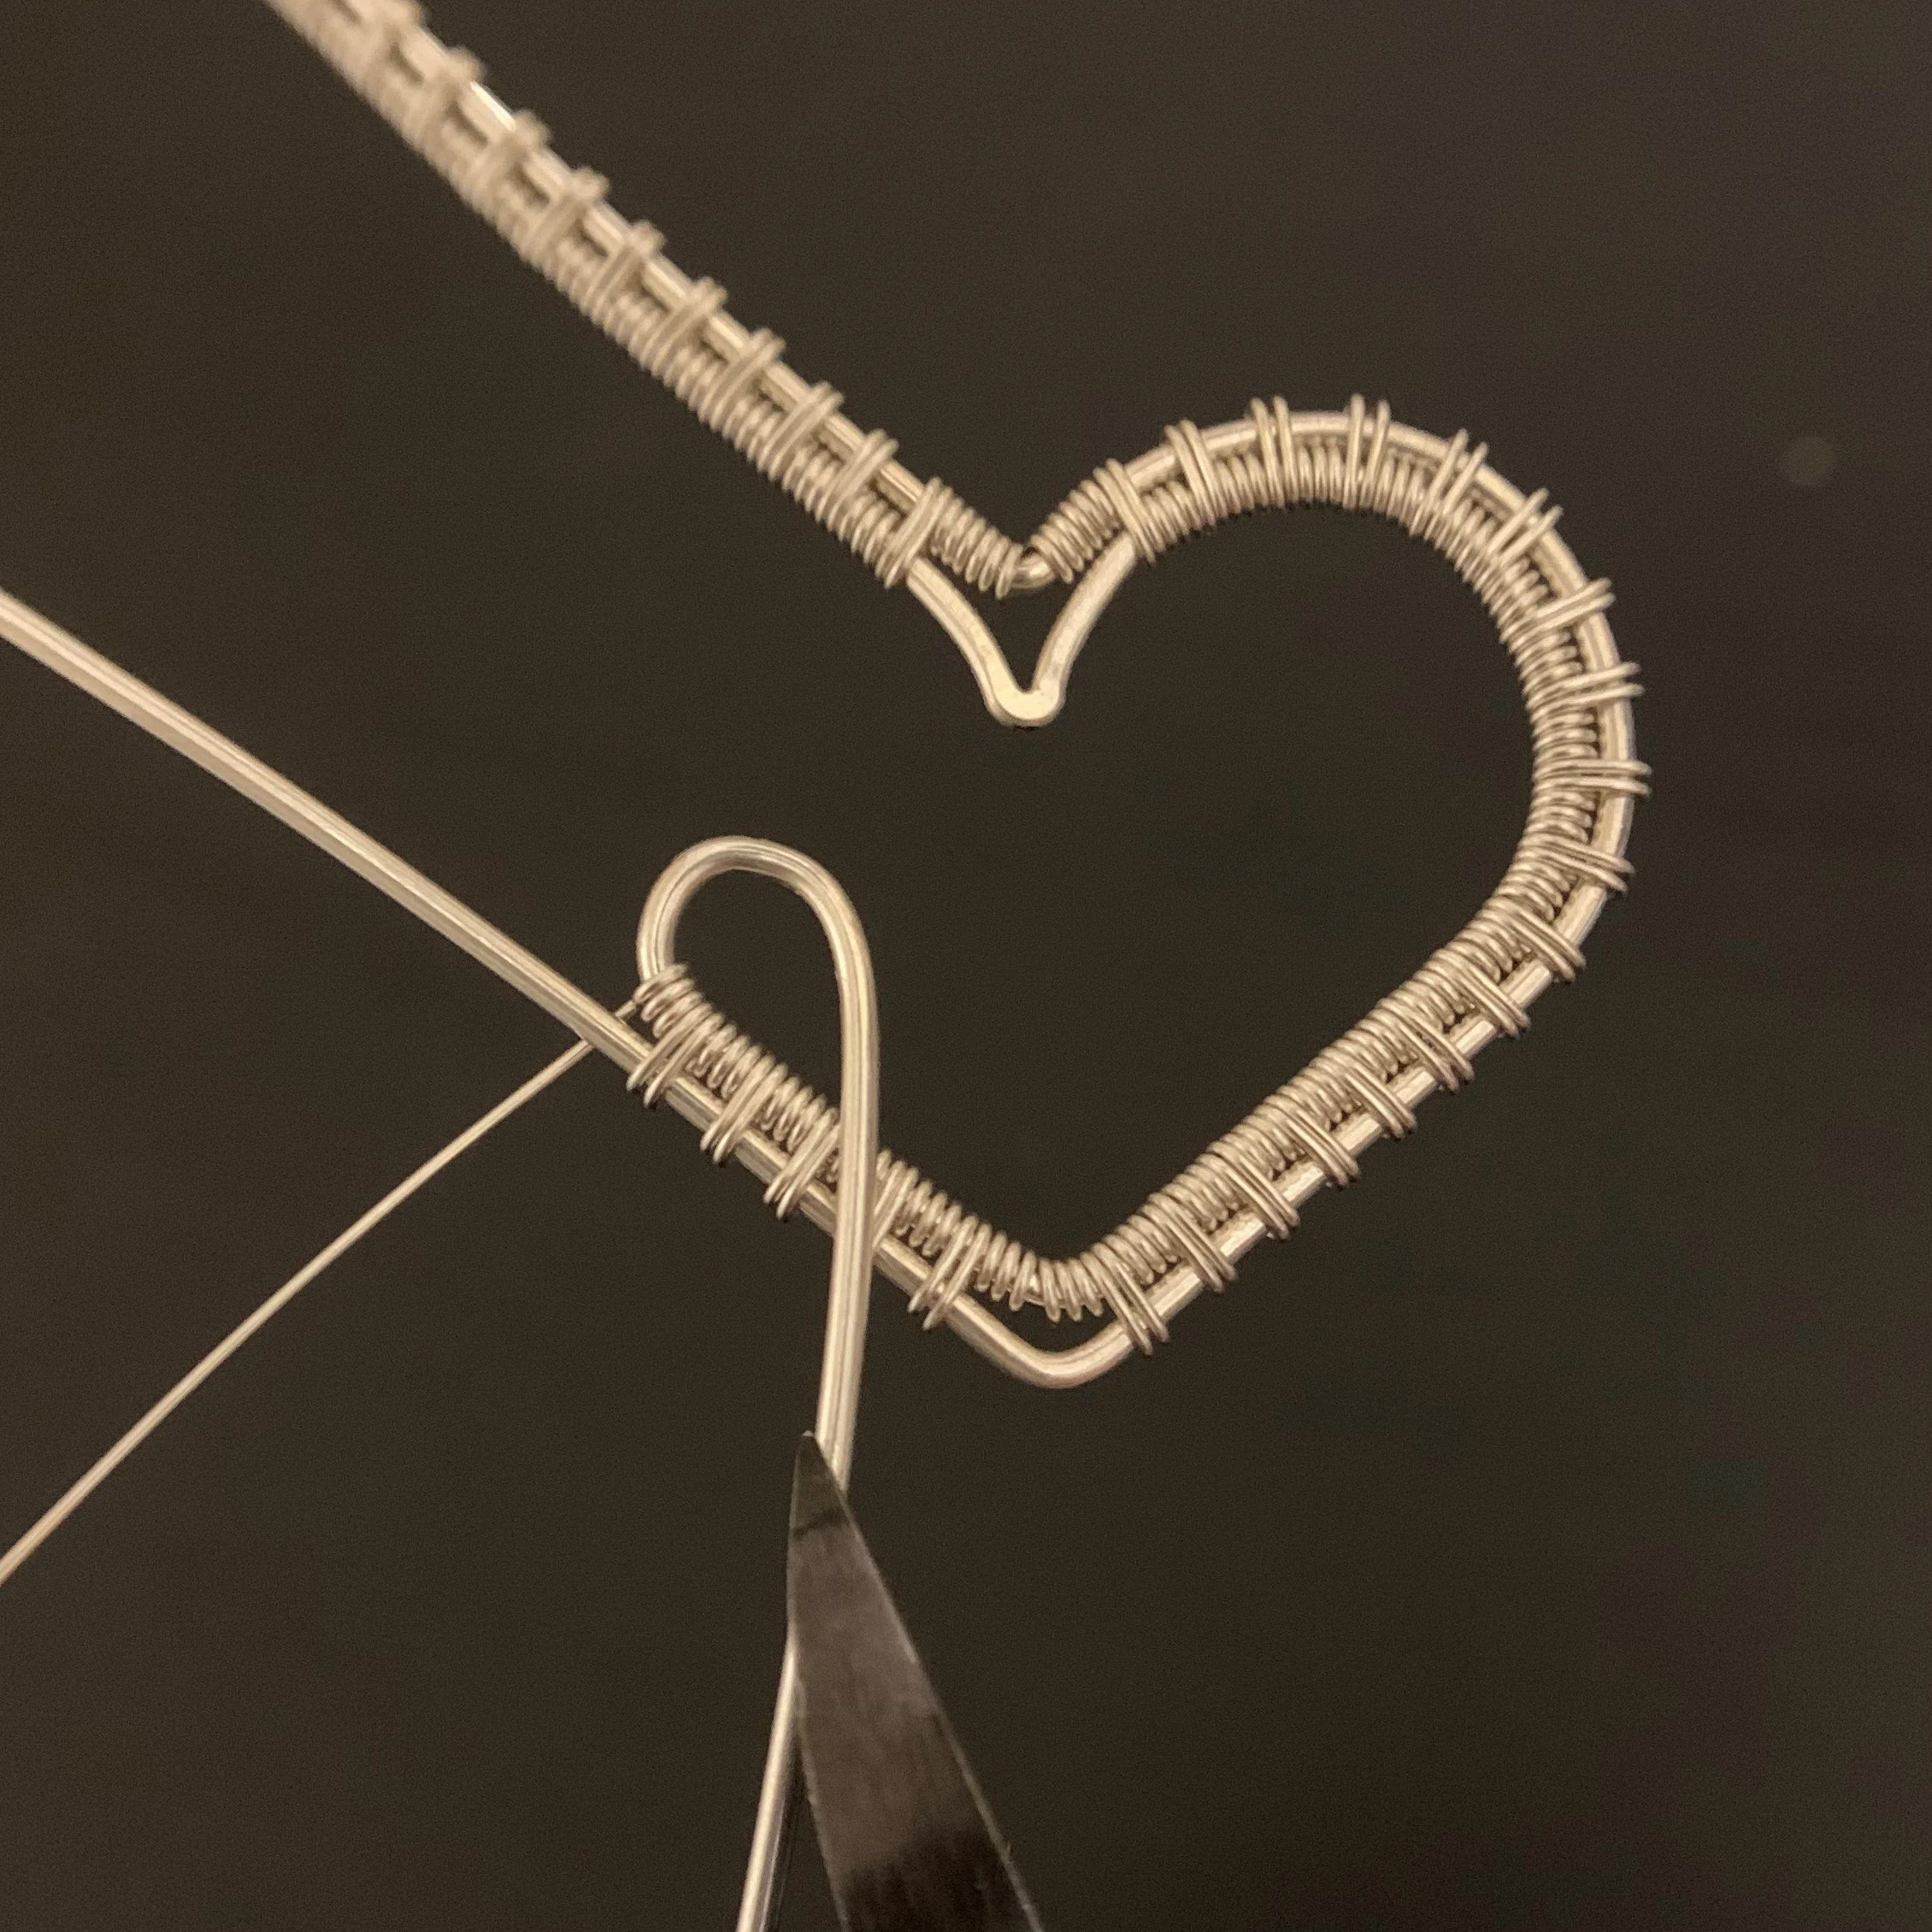
Filigree Heart Pendant

Filigree Heart Pendant
This heart pendant makes a beautiful gift. You can adorn the design with beads or pearls to make it your own.

Tools & Materials
- 60” 26 gauge round wire
- 2x 8” 18 gauge round wire
- Large jump ring (6mm 16 gauge works well)
- Ruler/tape measure & Sharpie
- Ring or other clamp
- Cutters & nylon-tipped pliers
- Flat-nose & round-nose pliers
- Ring mandrel or dowel for shaping the heart.
- (Optional) steel block and ball peen hammer
Step One: Shape the First Point
Measure and mark 3” from the left side of both 8” wires.
Make a 90-degree bend in the first wire, using flat-nose pliers.
For the second wire, bend the wire all the way in half, pressing the two wires together fully.
(Optional step) Use a steel block and ball-peen hammer to flatten the folded end of the second wire. This helps provide a finished look in the final piece.
Un-bend the second wire so that it fits nicely under the first wire’s 90-degree bend. You can decide how much of a point you leave in the second wire, depending on the shape you want for your finished heart.


Step Two: Start the Weave
Bend the 26-gauge weaving wire so that 20” is on the left and 40” is on the right. You will need more weaving wire on the right side of the heart than on the left. Wrap six times around the first heart wire, to the left of the 90-degree bend.
Continue by wrapping the weaving wire six times around the other side of the 90-degree bend.
Place the second wire under the first, ready to start integrating it into the weave.
Start the weave on both sides, following a pattern of two wraps around both wires, then three wraps around the inner (second) wire. This pattern of two, then three wraps make up one set of five wraps.
Use a ring clamp or other clamp of choice to hold the wires while you weave. This will save your fingers and help you create a more even weave.
Weave 18 sets on the right side of the bend and 12 sets on the left side. Use your nylon-tipped pliers to tighten and flatten your weave as you go.


Step Three: Shape the Heart
Use the smallest end of a ring mandrel to shape the right side of the heart. Do this slowly, being careful to keep the inner and outer heart wires next to each other. Use your nylon-tipped pliers to help with this, but your fingers are your best primary tool for shaping at this step.
Bend the inner heart wire 90 degrees, starting the bottom point of the heart.
Add three more wraps to the inner wire.
Bend the outer heart wire 90 degrees, placing the flat-nose pliers somewhat below the end of the weave, leaving space for the bottom point to be created. Once this bend is placed, the two 18-gauge wires should once again be parallel.
Continue the weave up the bottom left side of the heart with five additional weave sets.


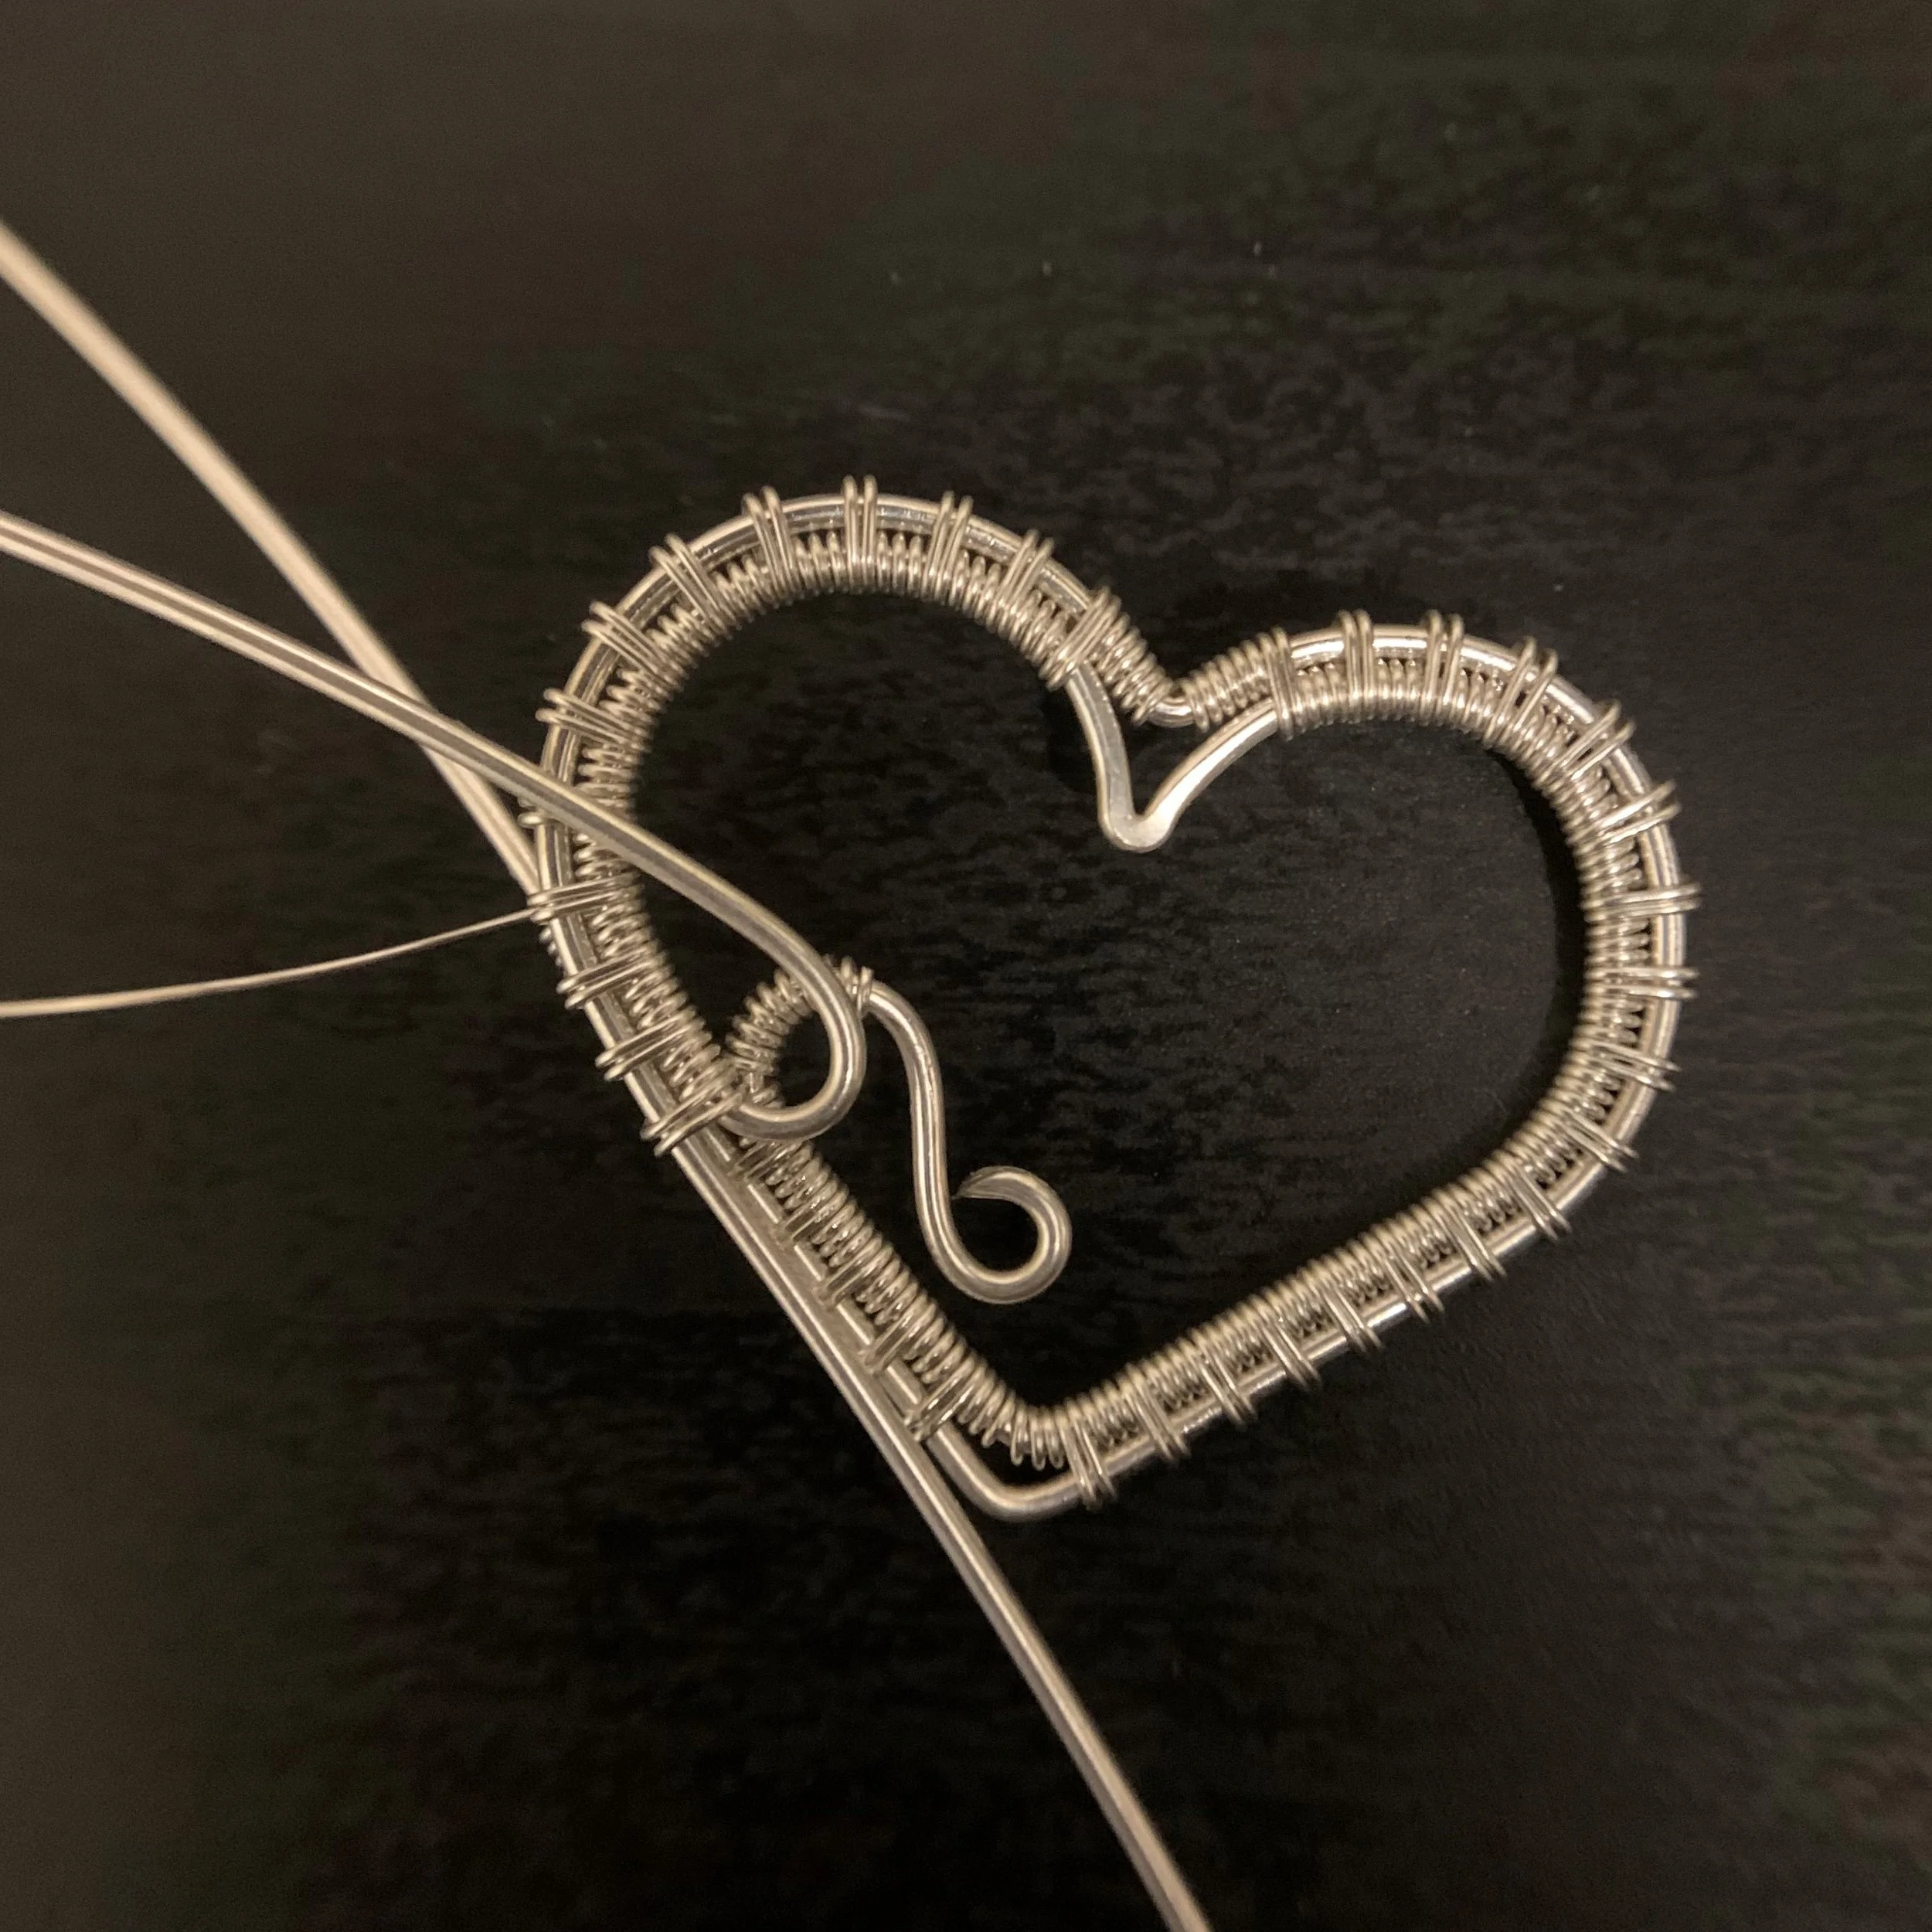
Step Four: Finish the Heart Shape
Bend the inner wire of the bottom side around your round-nose pliers, creating about a 3mm curve.
Cut the wire about 1cm past the curve you just created. If you cut the wire at an angle rather than a blunt end, then your end curls will look more finished and elegant.
Make a curl in the end of this wire that is roughly 2mm diameter.
Shape the top left side of the heart around the small end of a ring mandrel, just like you did for the right side. These wires should go on top of the bottom wires.


Step Five: Attach the Top to the Bottom
The weaving wire from the top of the heart should be used to wrap around the curled wire from the bottom side. You can continue this wrap for as few as 5 wraps to secure it or all the way down the curl, depending on your desired look. When you cut this wire, ensure the end is on the top of the pendant so that it doesn’t poke the wearer or get snagged on clothing from the back.
The bottom weaving wire is going to be wrapped twice around all wires to continue the 2-3-2 pattern of the rest of the weave.
The bottom weaving wire should end up on the back side of the pendant.
Wrap the bottom weaving wire around the remaining bottom wire, again at least 5 times but as many times as you want for the effect you wish to achieve. When cutting off this wire, finish it toward the front of the pendant.


Step Six: Finish the Filigree
Bend the inner top wire into an approximately 2-3mm curve using your fingers and round-nose pliers.
Cut this wire about 1cm past the end of the curve.
Curl the end using your round-nose pliers.
Bend the remaining outer wire from the upper side of the heart inward, toward the middle of the heart shape. Trim it to approximately 2cm length.
Make a 3mm curl in the end of this wire, then tuck the curl behind the first lower curl.
Flip the pendant over and do the same thing to the lower outer wire: bend it inward then trim it to approx. 2cm.
Make the same 3mm curl in the end of this wire, then tuck it behind the first upper curl.
Finish the pendant by adding the jump ring and adding a chain.


Faceted Gem Earrings
Faceted gems set in a classic prong setting, hung from a timeless ear wire, will never go out of style. Learn how to wire wrap these dainty, sophisticated earrings in three ways.
Making Hoop Earrings

Hoop Earrings
Hoops are timeless classics, and this simple design is easy to make but so versatile. You can create small, medium, large or even extra-large size hoop earrings with this guide.

Tools
- Tape measure or ruler, and a Sharpie
- Flush cutters
- Nylon pliers, half round pliers, and needle nose pliers
- Ring holder or other clamp
- Sandpaper and binding wire
Materials: Small/Medium/Large Earrings
Ear Wire (x2, 20 ga. round): 6cm / 8cm / 10cm
Square Sides (x4, square): 5cm 22ga. / 7cm 22ga. / 9cm 20ga.
Rib (x2, 1/2 round): 6cm + a smidge 20 ga / 7cm + a smidge 20ga. / 9cm + a smidge 18 ga. or 16 ga.
Rib Sides (x4, 1/2 round): 6cm 22 ga. / 7cm 22 ga. / 9cm 20 ga.
Wrap (x2, 1/2 round): 16” 22 ga. / 20” 22 ga. / 24” 20 ga.
Number of Wrap Patterns: 6 / 8 / 8*
*Add 2” to the wrap wire length and 1/2 cm to all other measurements for each extra wrap pattern you wish to add to create larger hoops.
Making the Earrings
Bind the Ear Wire between two Square Side wires to form the base of the earring. The ear wire is longer than the square sides, and the entire extra length should stick out one end, leaving the three wires even at one end of the bundle.
Make a mark about 12mm from the even end of the bundle.
Next, arrange 3 half-round wires, a Rib in the middle and two Rib Sides on either side, and place them on top of the base wires with some overhang off the end.
Clamp all six wires together at the 12mm mark.
With about 4” of tail, wrap the wrap wire 3 times around all 6 wires to start the wrap.


6. Lift the rib wire up 90 degrees from the base and wrap 5 more times. Bend it down and wrap twice. Continue the pattern until you have n-1 wrap patterns (so 5 for a small hoop earring or 7 for medium and large. 7 for medium pictured in this tutorial). End with 5 wraps under the rib.
7. Now you’ll finish the bottom of the hoop, which is the end that was originally clamped. If you still have three wraps at the bottom, unwrap once to ensure you’re continuing the 5x2 pattern. Lift the rib wire up 90 degrees.
8. Wrap 5x under the rib wire, continuing the pattern.
9. Press the rib wire down. Don’t wrap twice over top yet.
10. Flip the piece over to measure and mark 4mm past the end of the last wrap.
11. Trim the three base wires at your mark.
12. Fold your three half-round wires over the trimmed end and press them down with pliers.
13. Trim the three half-rounds. The ends should not extend past the last wrap that is already in place.
14. Wrap five times around all wires.
15. Trim the wrap wire at the back of the piece and press down.
16. Repeat for both earrings.


17. Starting at the bottom (finished end) of the earring and working your way up, use half-round pliers to form the hoop shape. Do this slowly. Do both earrings at this point and ensure that their shapes match each other. Shaping the earring at this point in the process allows the wires to shift into place before you finish the top of the earrings. Be careful to keep the design square during bending. Don’t let the decorative rib wire slide to one side or the other; try to keep it right in the middle.
18. Now you’ll finish the top of the earring. From the underside of the earring, measure and mark 3mm from the last wrap.
19. Trim only the two square side wires at that marked location.
20. Bend the two rib sides over the trimmed square wires.
21. Flatten and trim the rib sides.
22. On the front side of the earring, flatten the rib wire down.
23. Trim the rib wire to just shorter than the folded-over rib sides.
24. Wrap 3-4 times around all wires. Just make sure it’s the same number of wraps on both earrings.
25. Trim the wrap wire on the underside of the earring and flatten. Repeat for both earrings. They should look mostly like earrings by now.


26. Now measure 1.5-2cm for the ear wire.
27. Trim to length.
28. Sand the ends so that they are rounded and comfortable going into someone’s ears.
29. Shape the ear wire with your half-round pliers. Alternatively, you may prefer to cut the ear wire shorter and leave it straight. I prefer to curve my ear wires for comfort.
30. Your earrings are finished! I tumble my finished earrings in a rock tumbler with steel shot to harden and polish the piece.


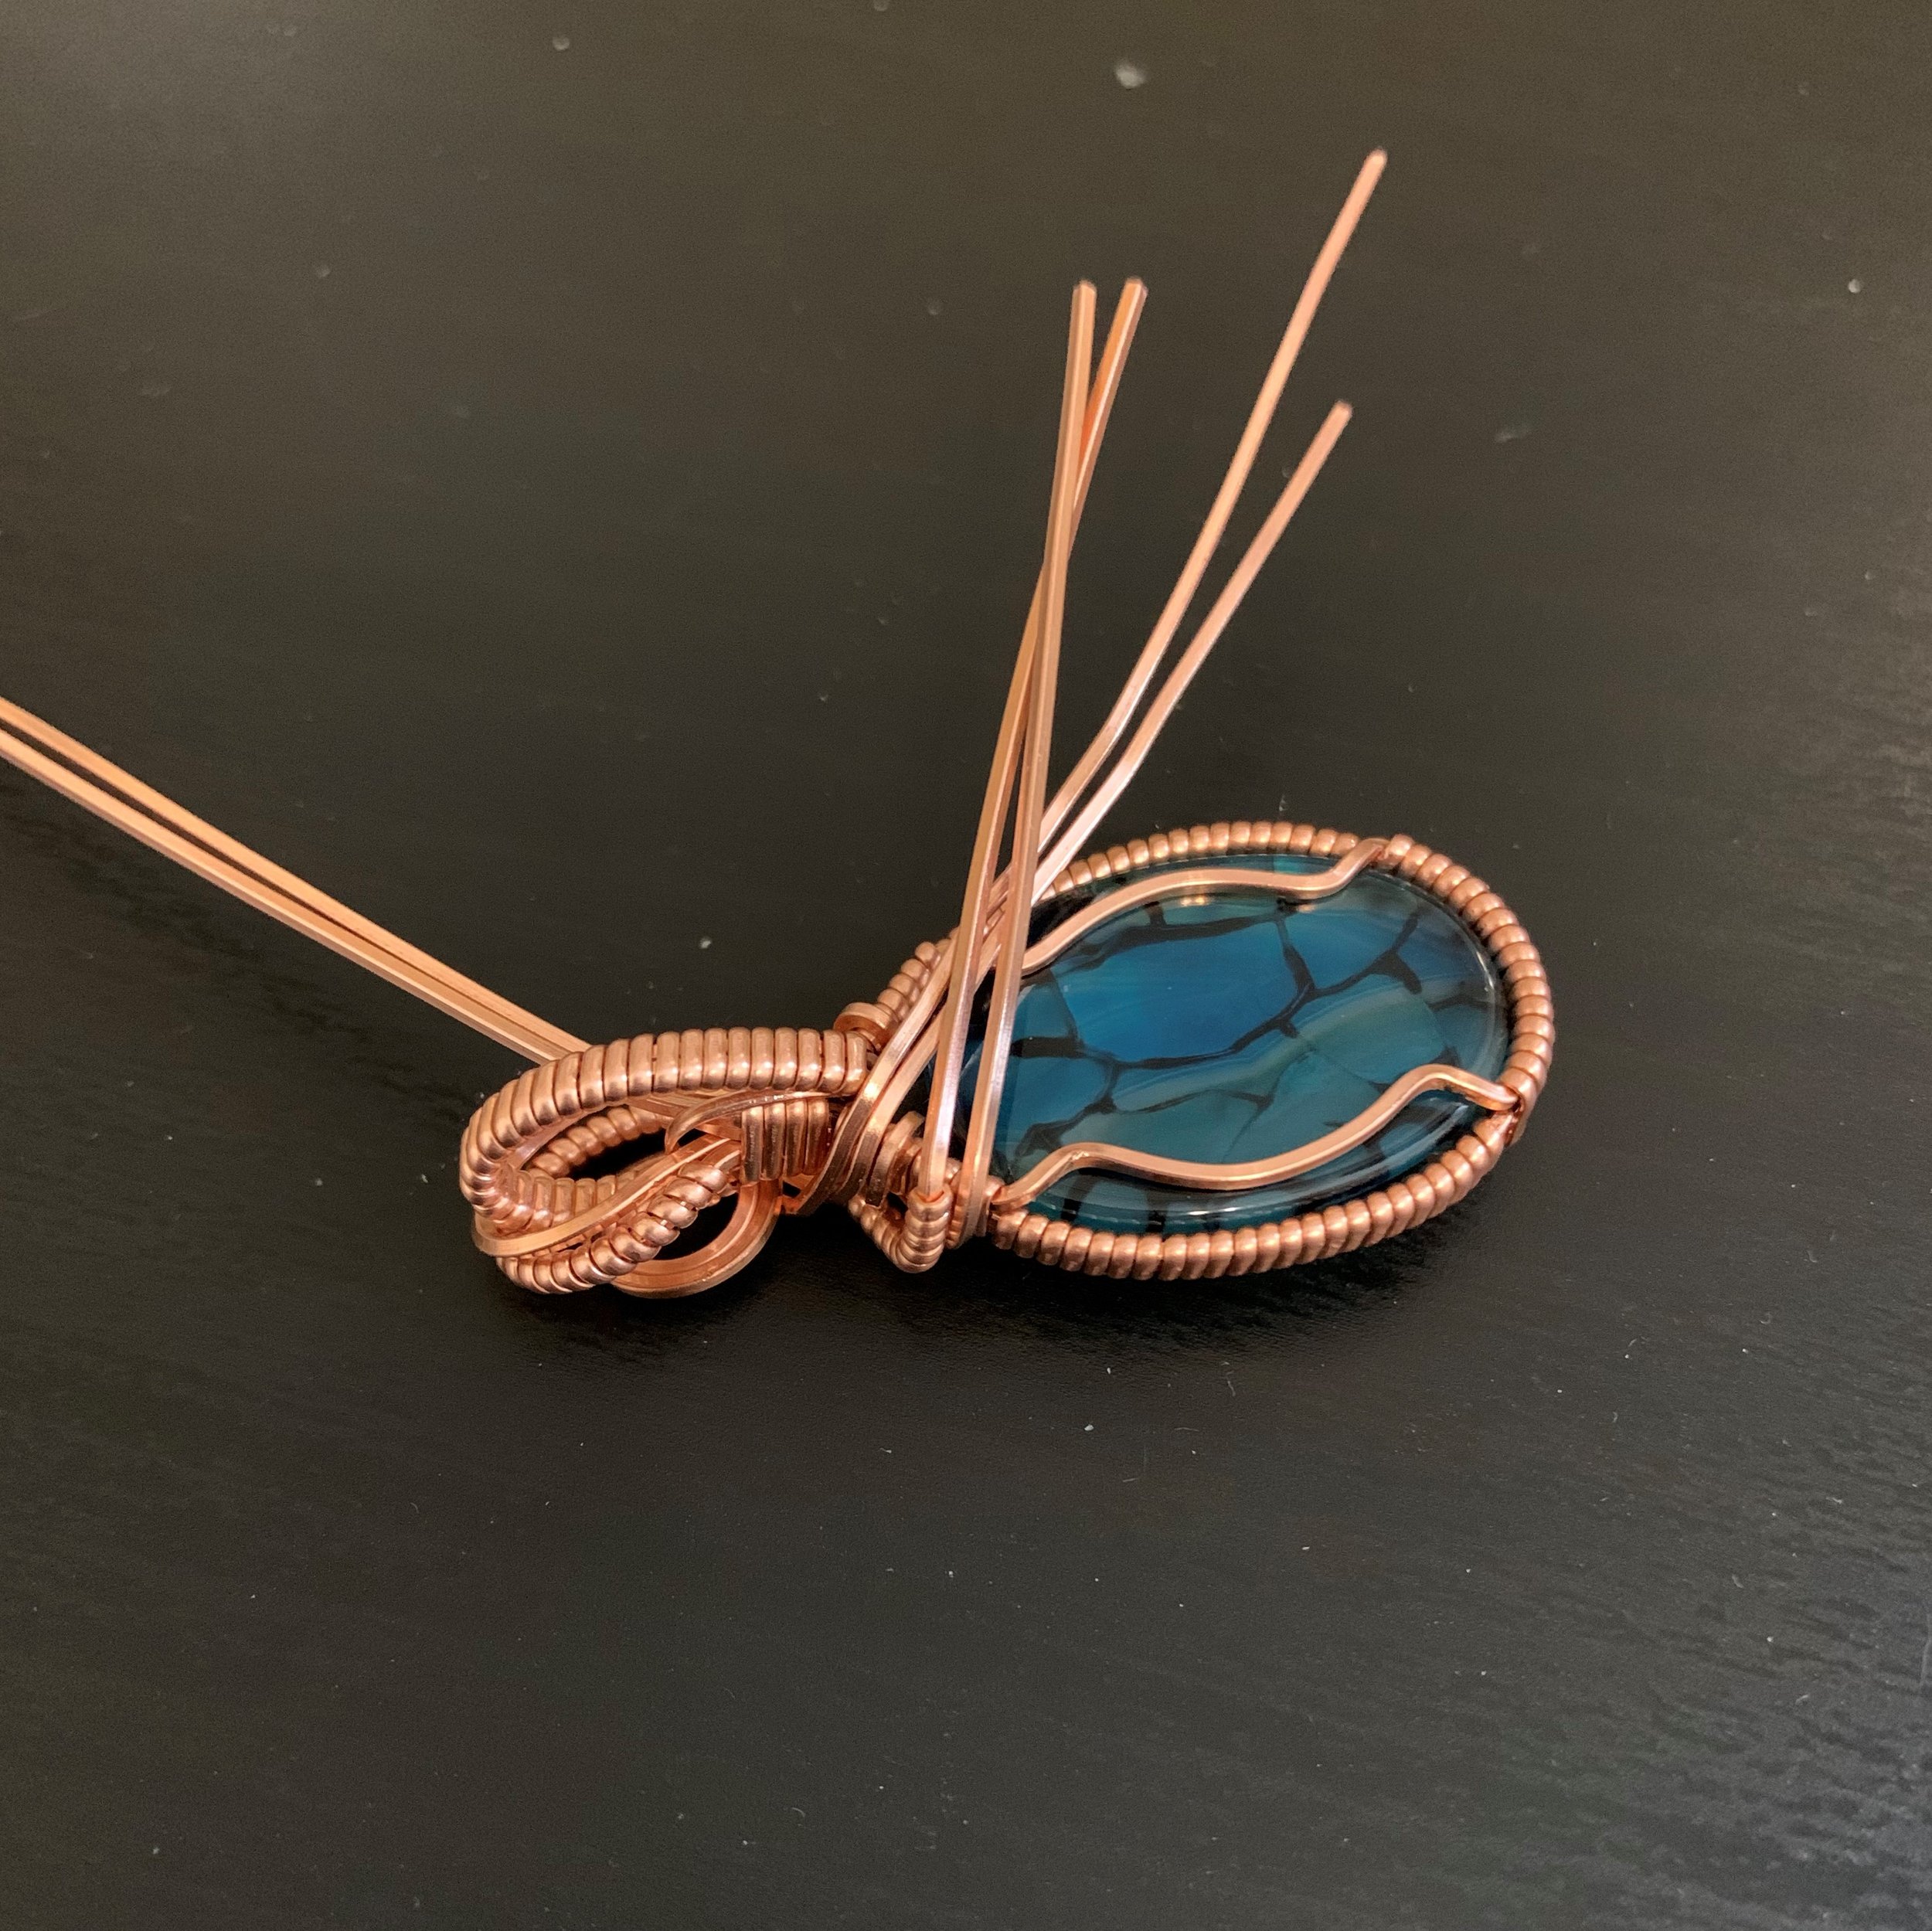
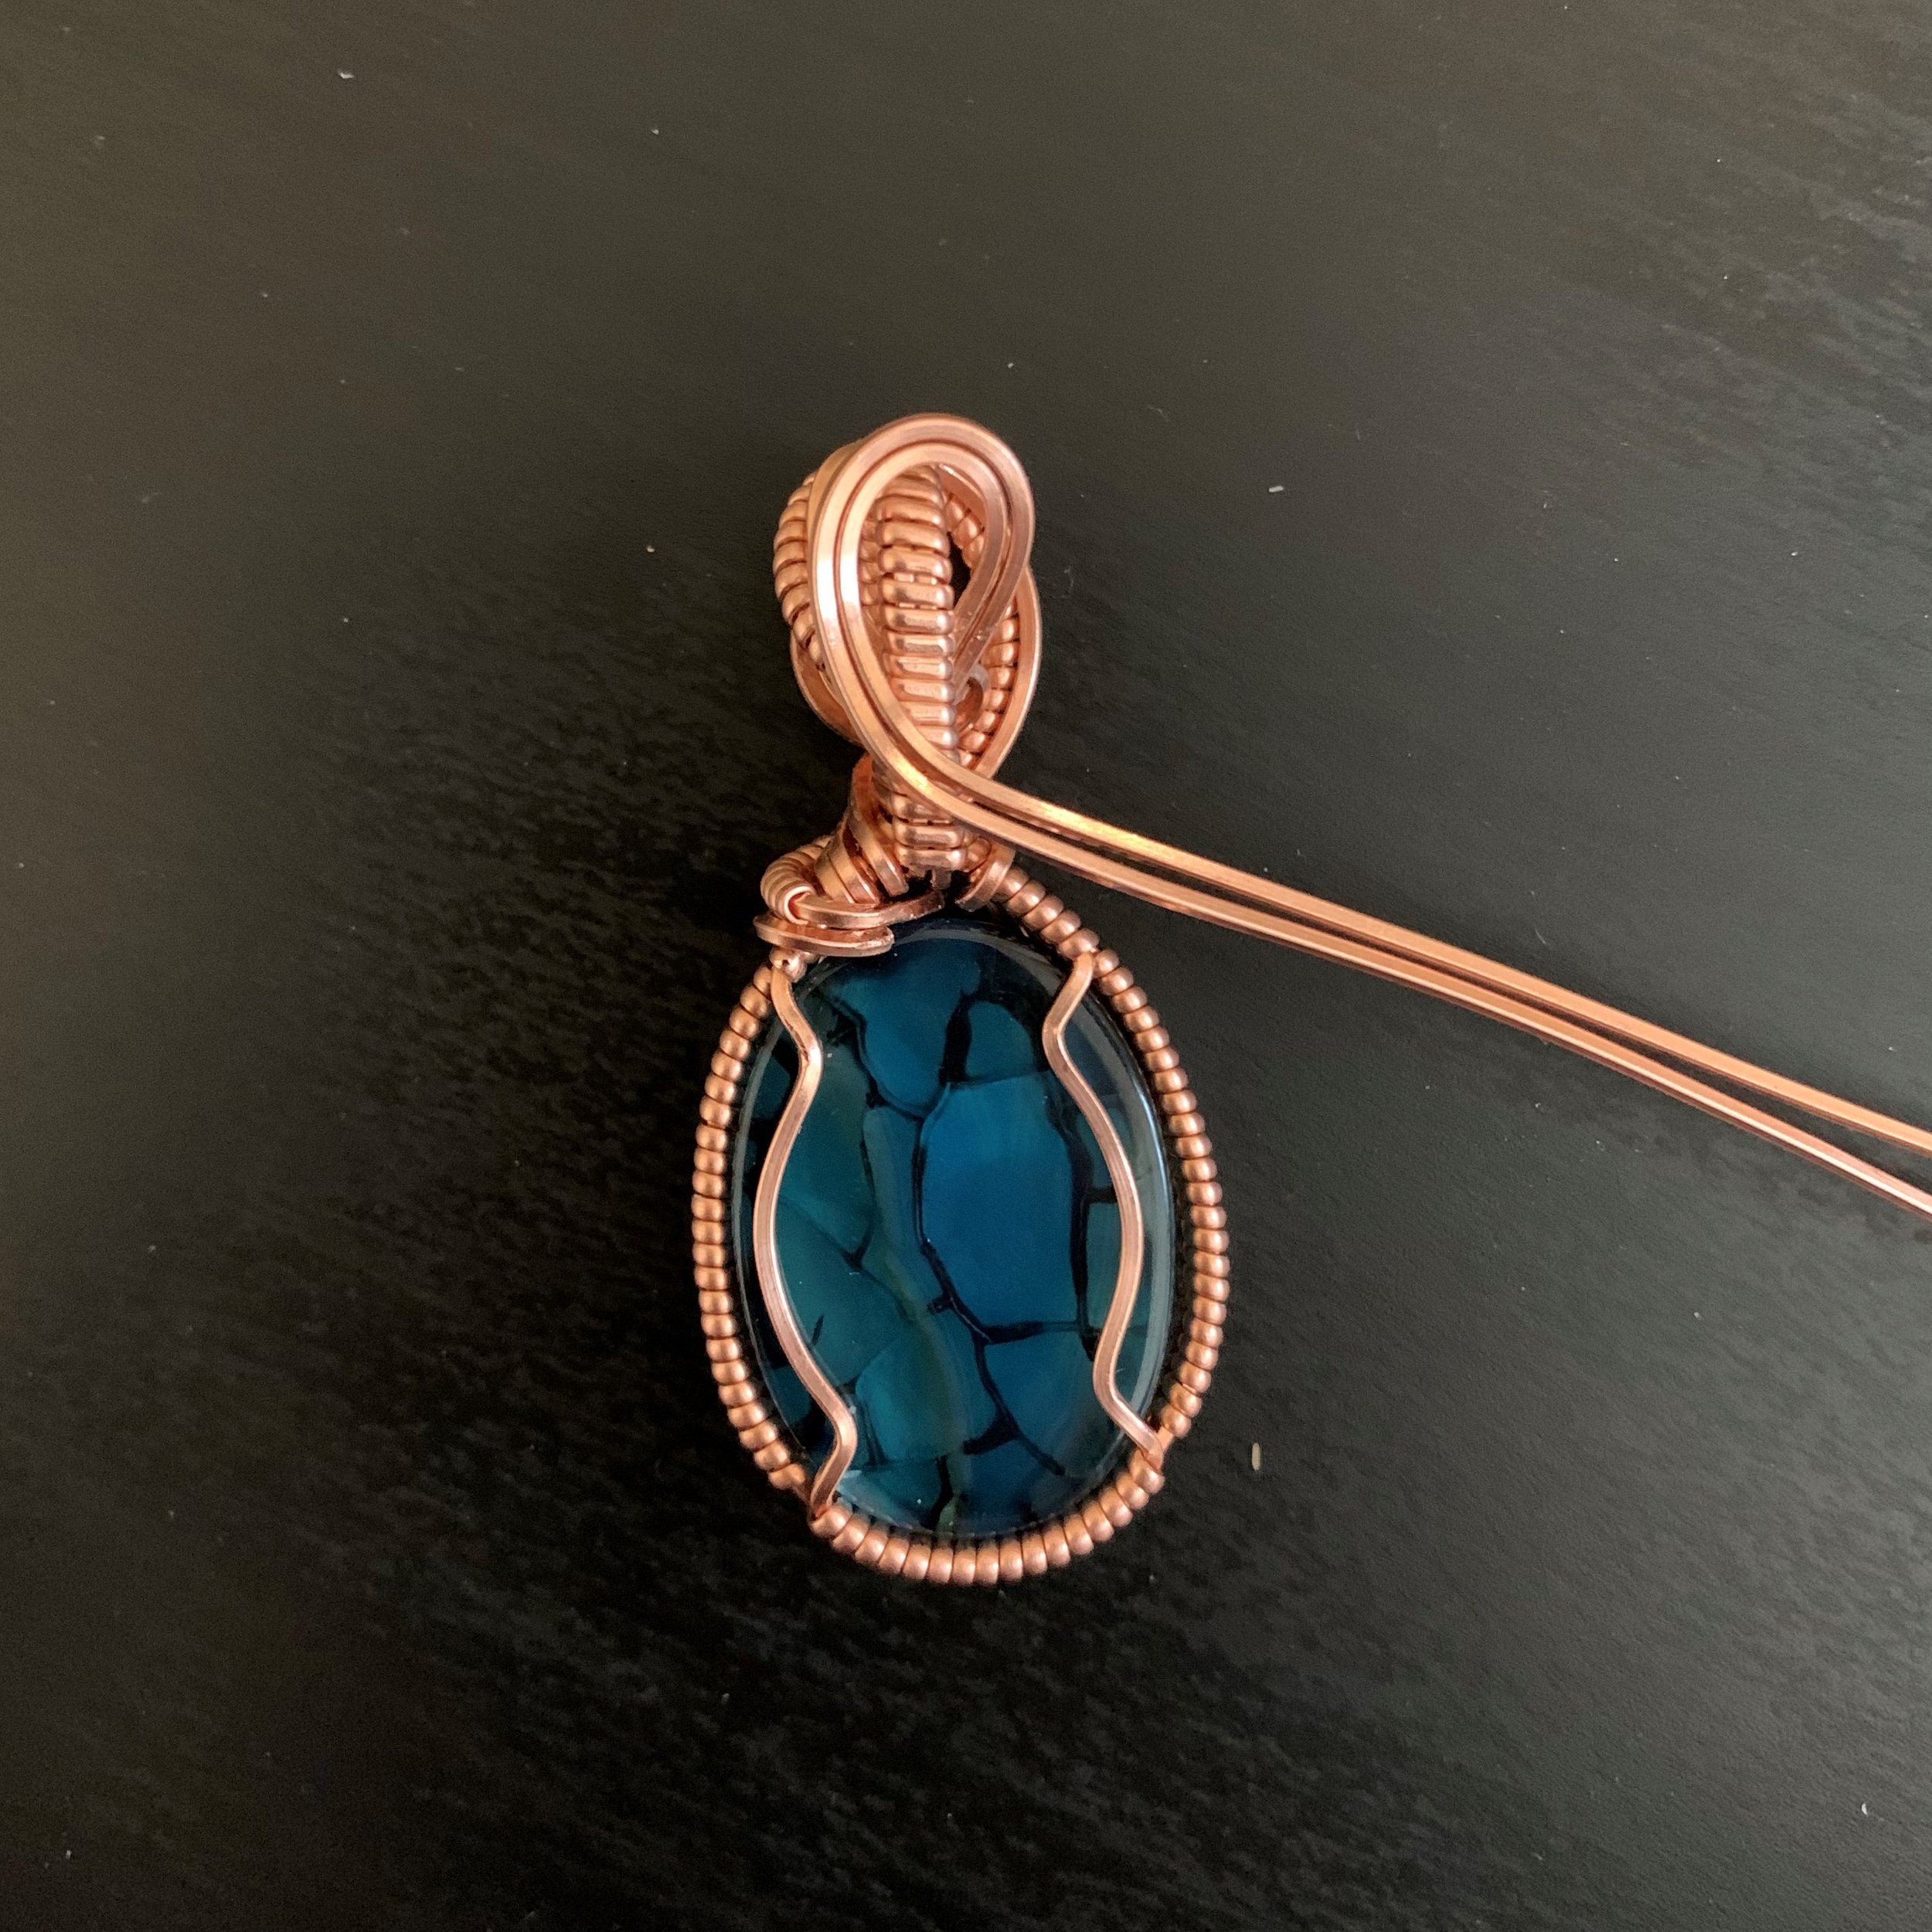
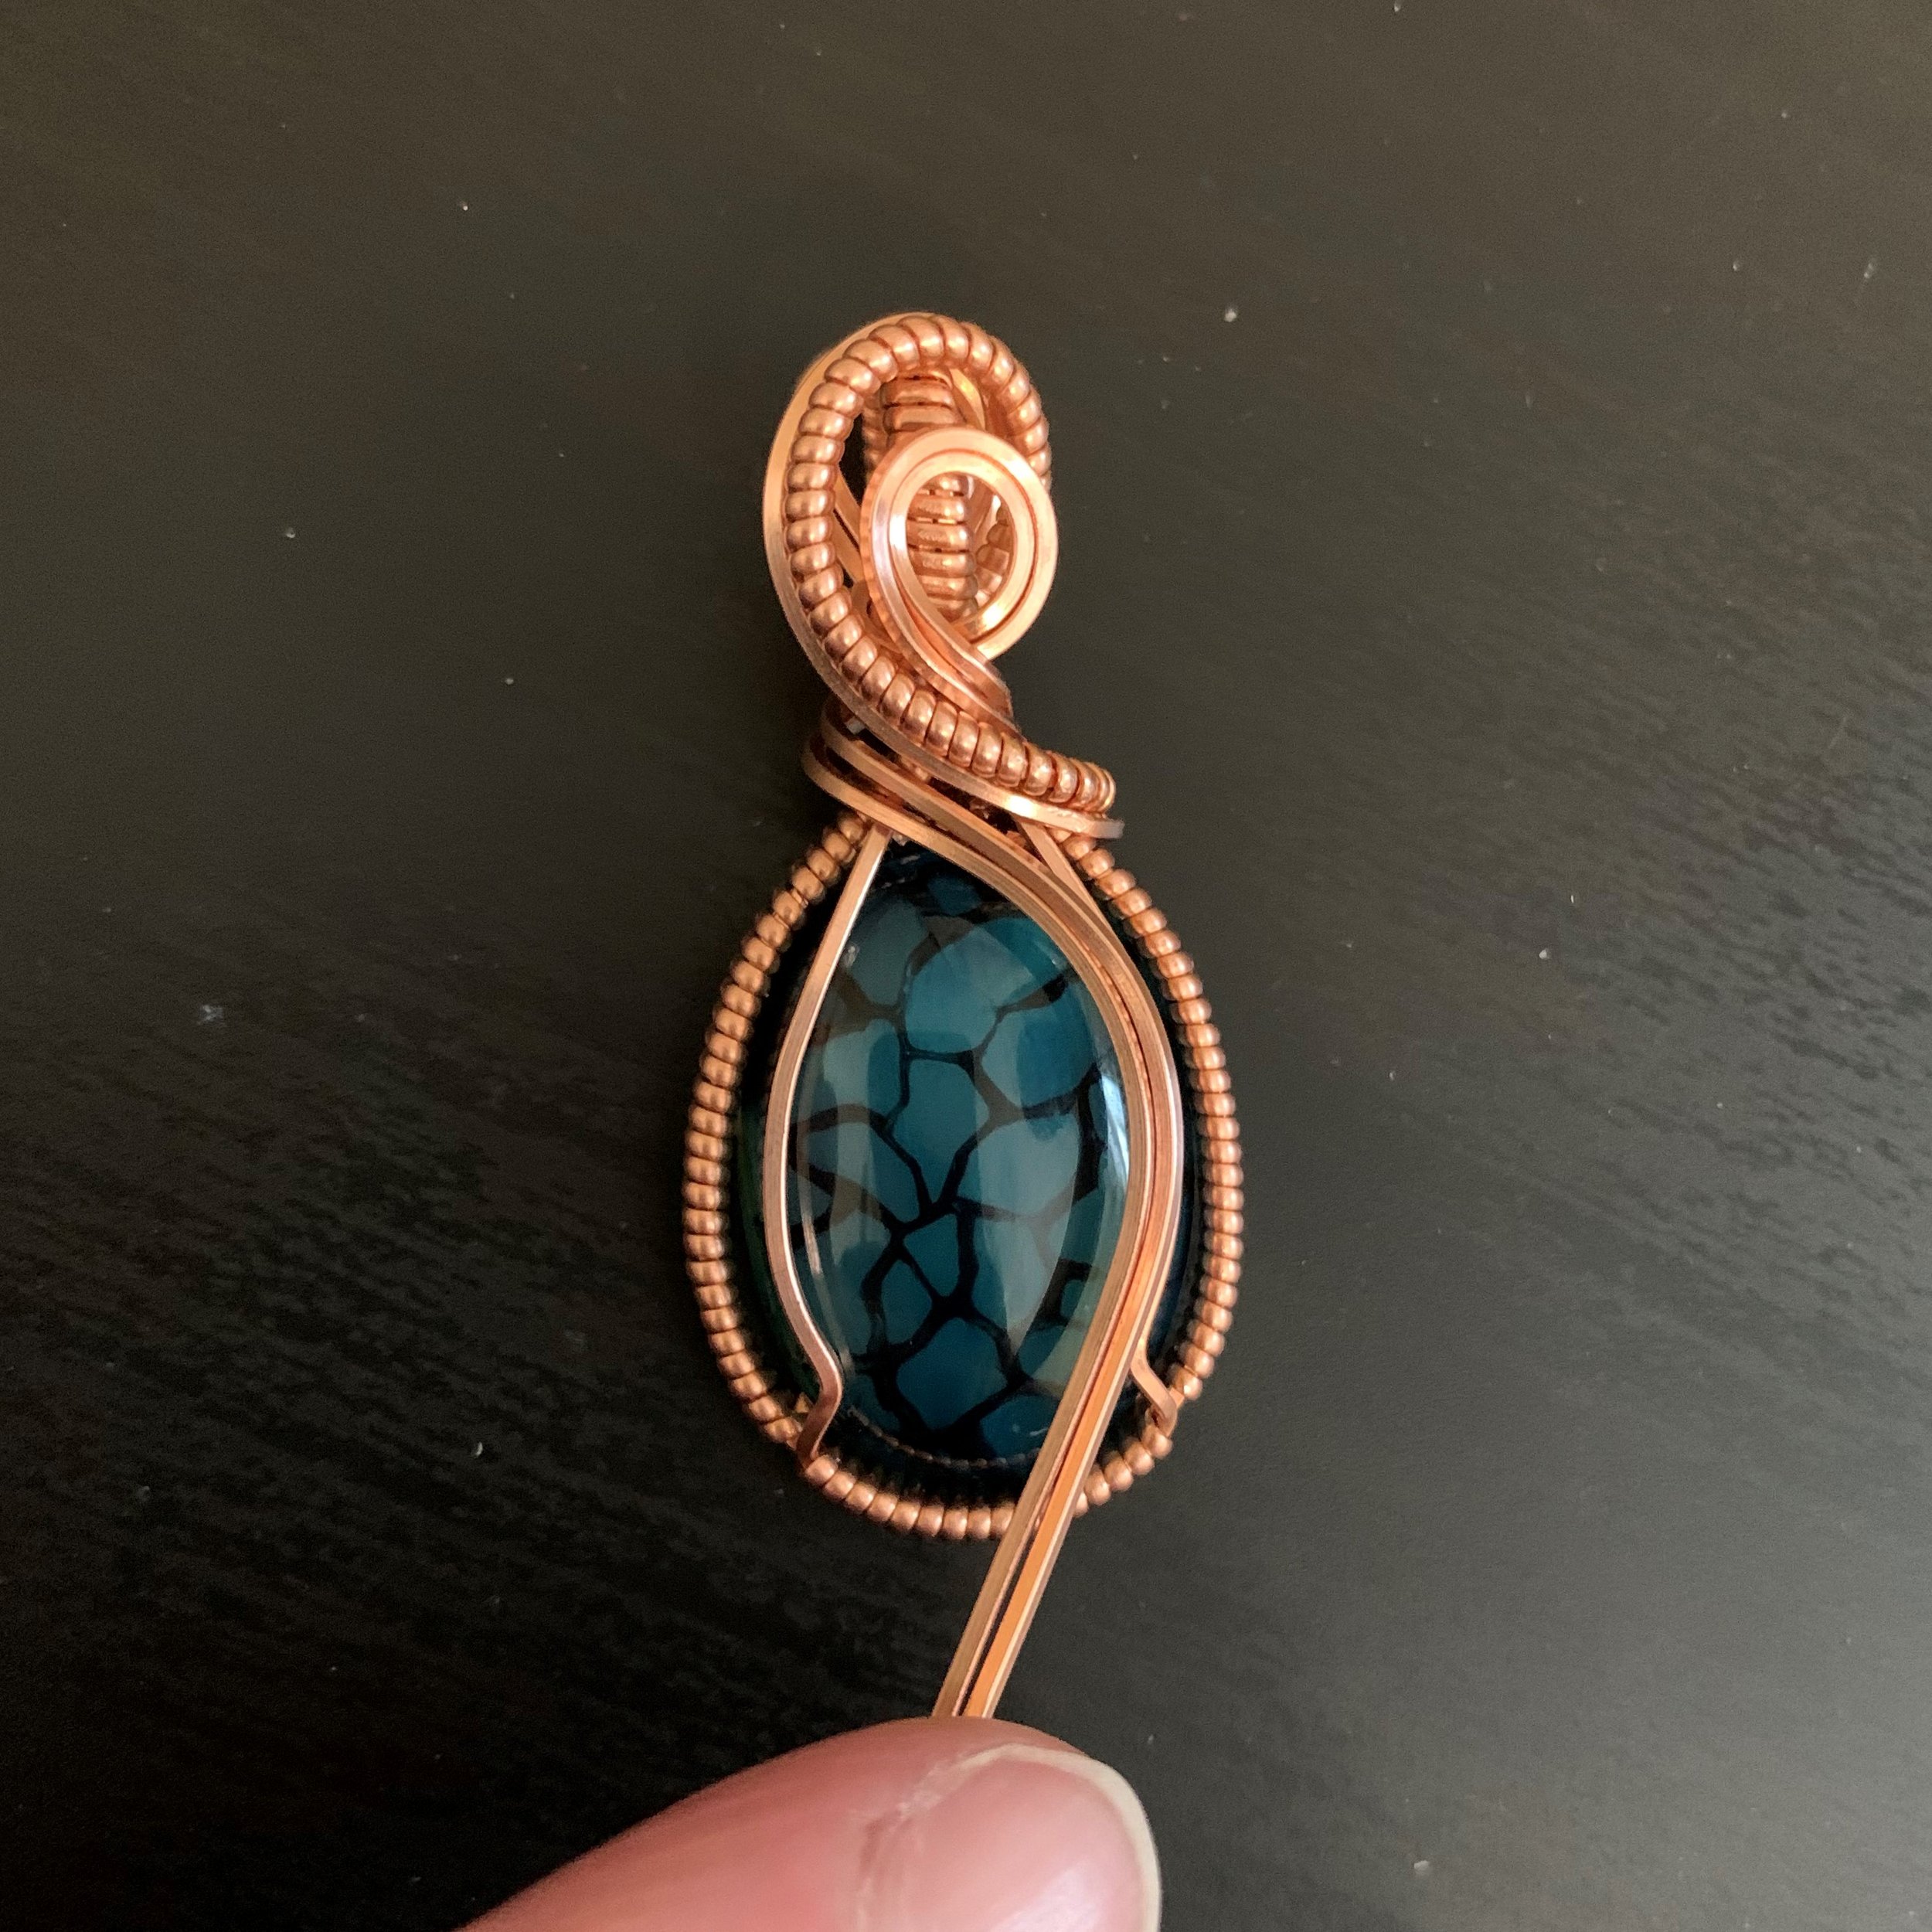
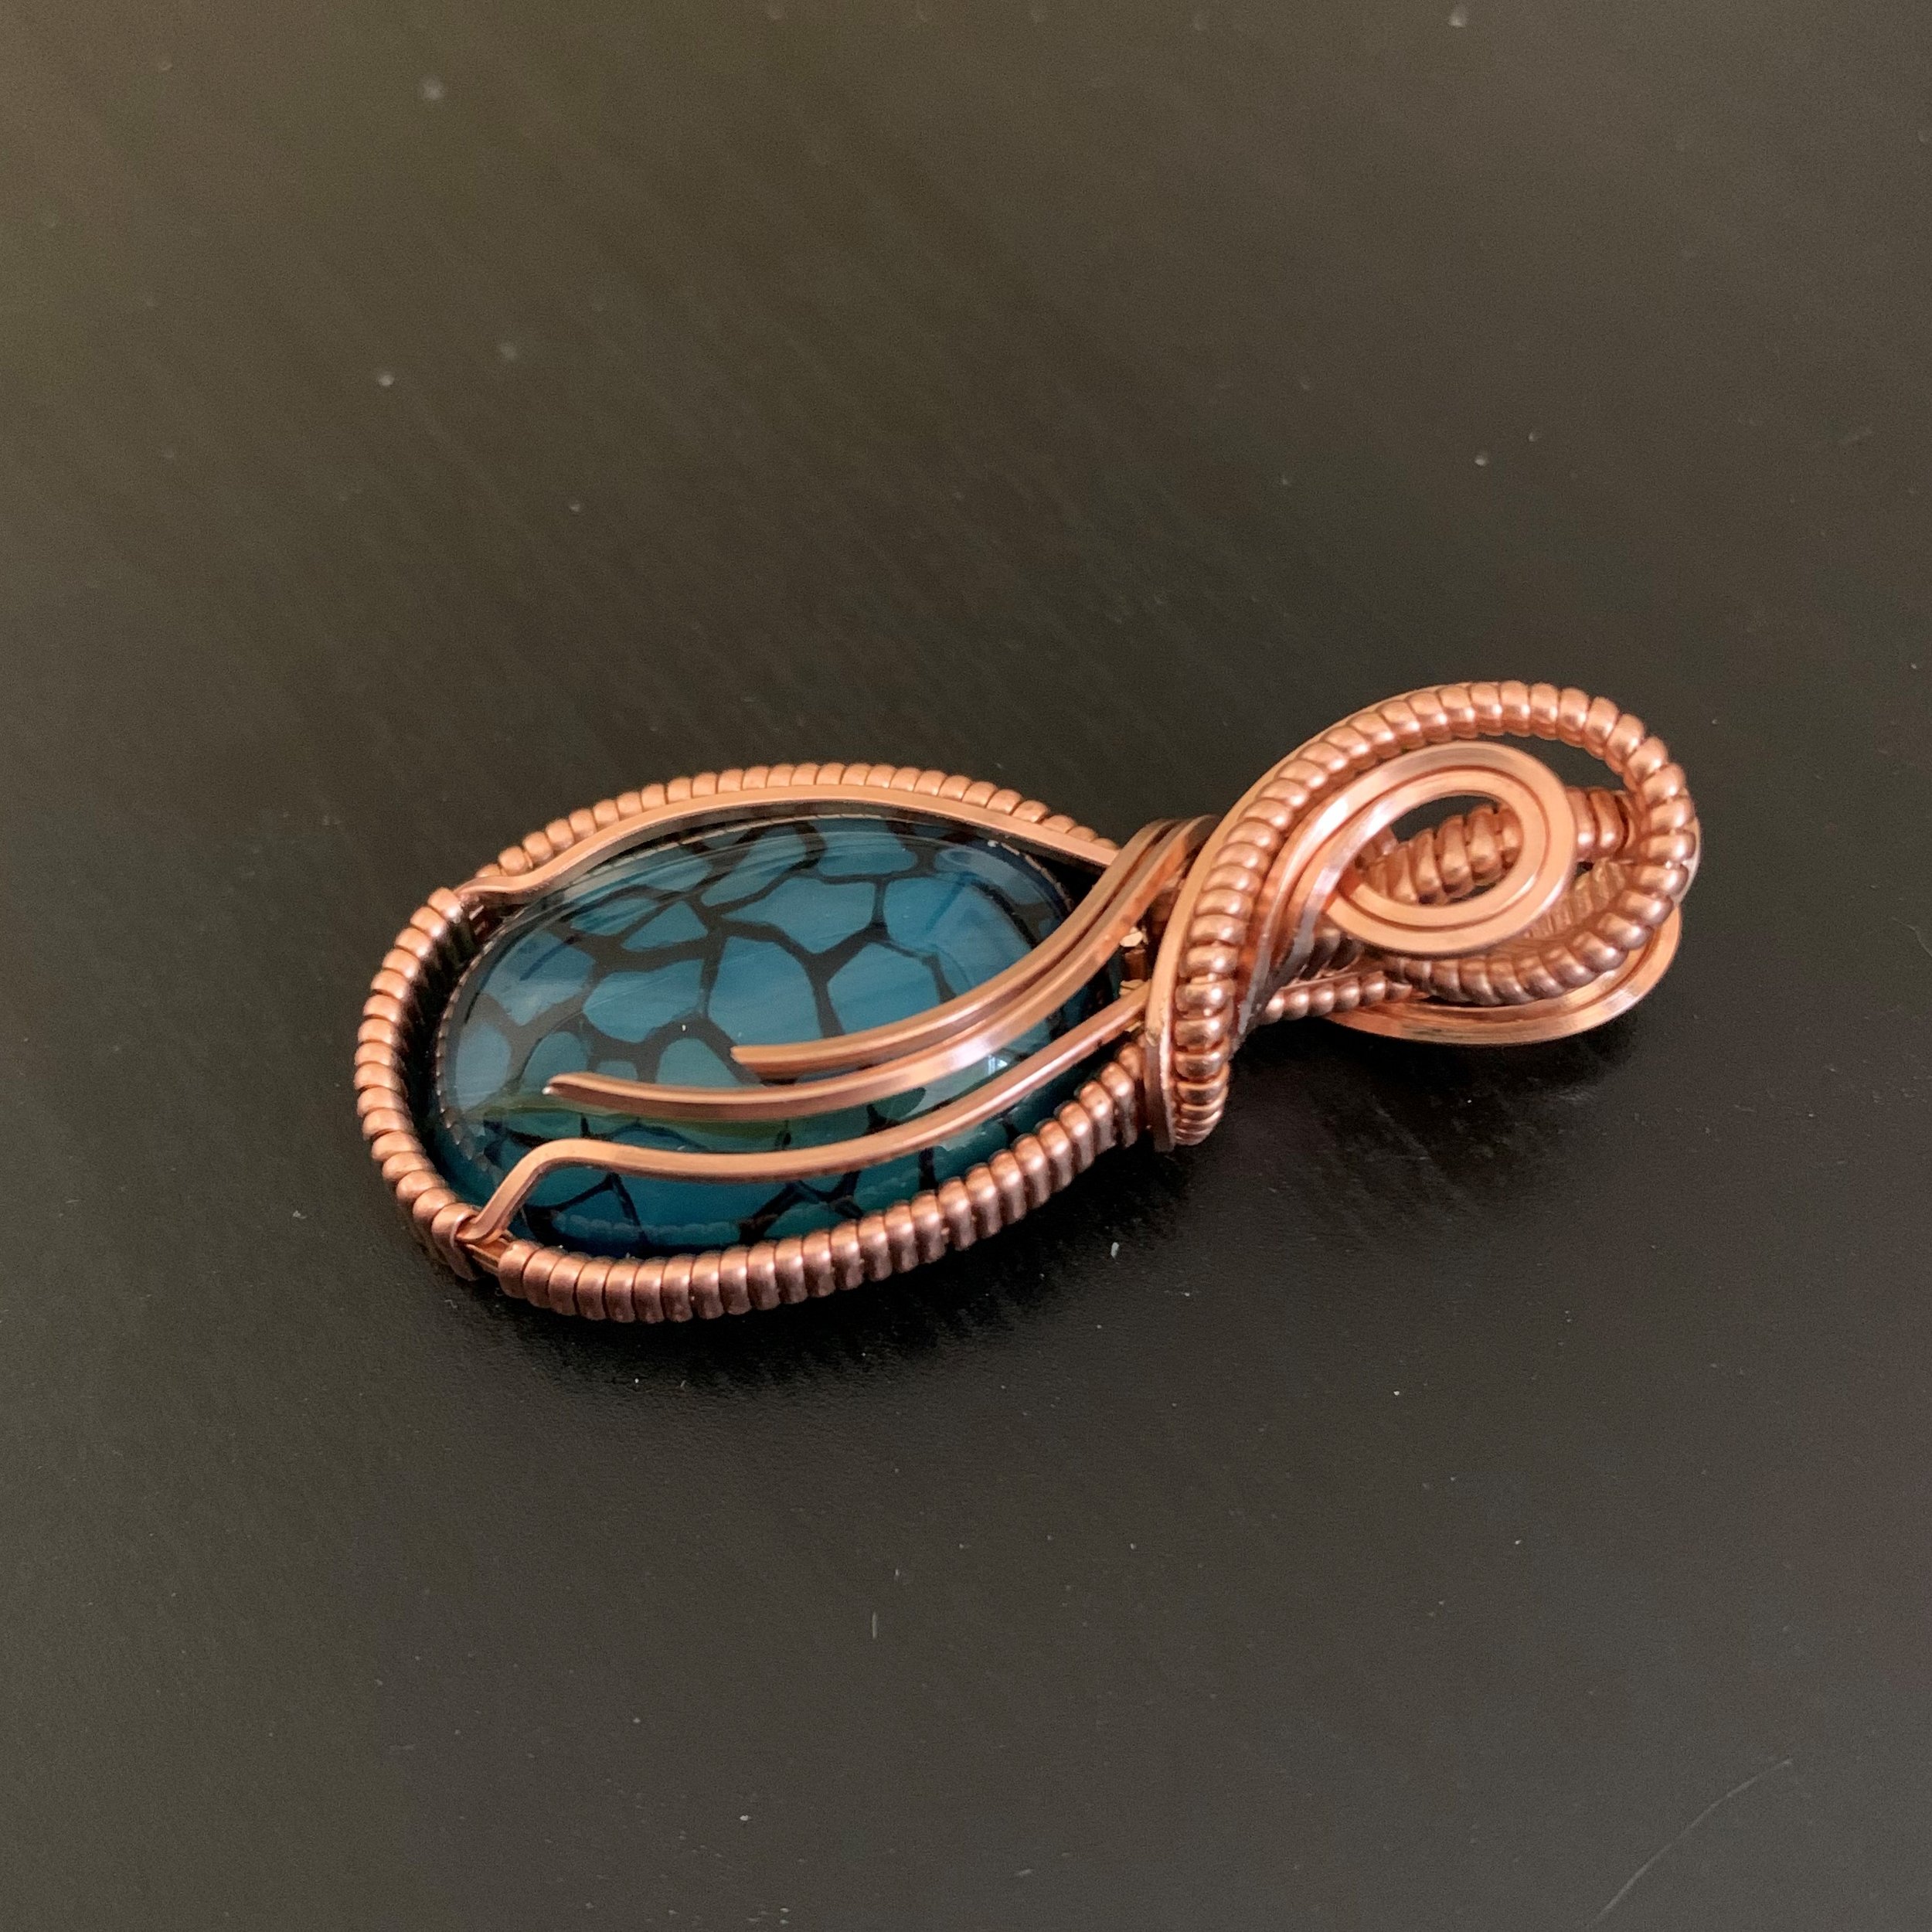
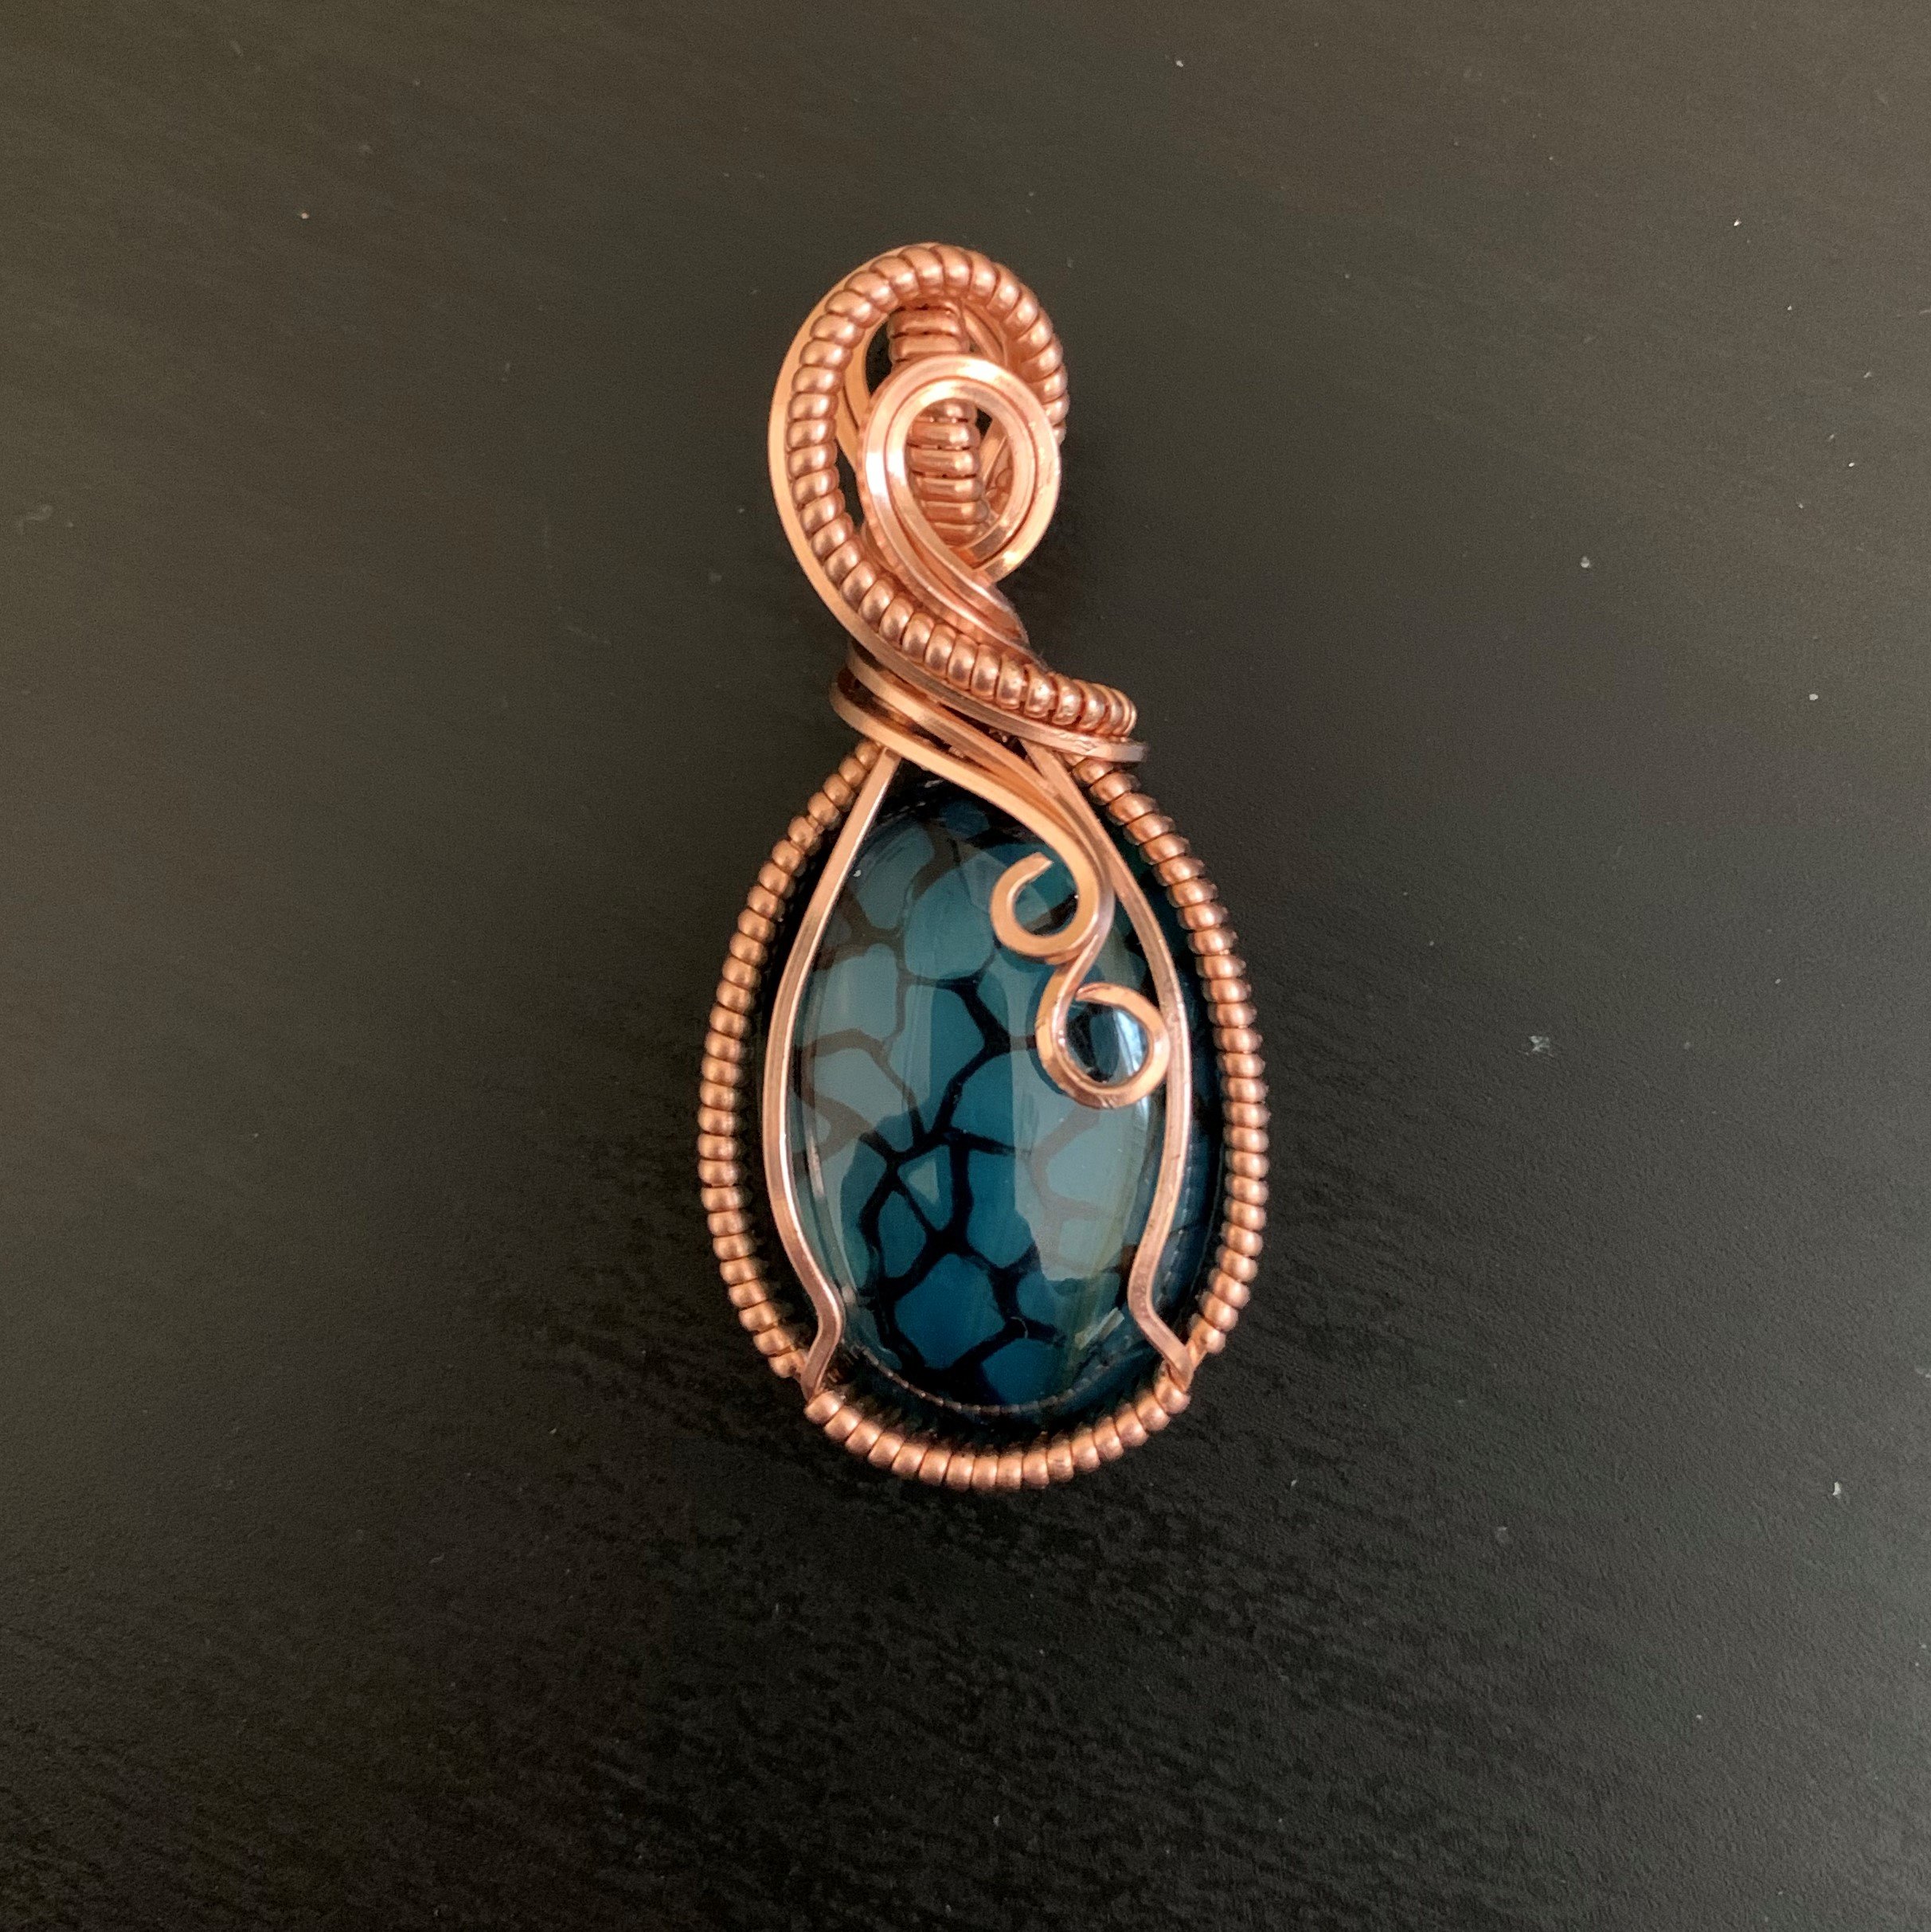
Making a Bookmark

Wire Bookmarks
These techniques can be adjusted to produce endless designs. See the bookmarks area of the shop for examples.
Tools you will need: the usual suspects.
Pliers: flat-nosed, round-nosed, rubber, and bale-making pliers are helpful
Flush cutters
Ball peen hammer and steel block
Round mandrel (ring mandrel works well)
Ruler

Materials
Stone of choice. Labradorite pictured.
3 lengths of 20 ga square wire, about 18” each
1 length 16ga or 18ga round wire, between 18”-25”, depending on bookmark size.
Various lengths of 20 ga half-round wire: 12”, 9”, and 6”
The first step is to create the anchor that goes inside the pages of the book. Start with your 18ga or 16 ga round wire. 18 ga works well for a smaller, simpler bookmark as pictured here. 16ga round wire works best for more hearty designs.
Create some swirls using bale-making pliers and a graduated round mandrel, like a ring mandrel. Pictured here is a smaller bookmark with four loops. For a larger bookmark I typically do five loops using 16ga wire.
hammer the pattern flat using your ball peen hammer and steel block. This part of the bookmark will go between the pages of a book.
Use 20 or 22 ga half-round wire to secure the loops together. flatten the bindings with pliers.
use a ruler and a sharpie to measure 4” (18ga smaller bookmark) or 5” (16ga larger bookmark) from the bottom of the loop pattern up the length of the frame wire. Mark that spot and a spot 1” higher. This one-inch space will become the top of the bookmark that spans the spine of the book.


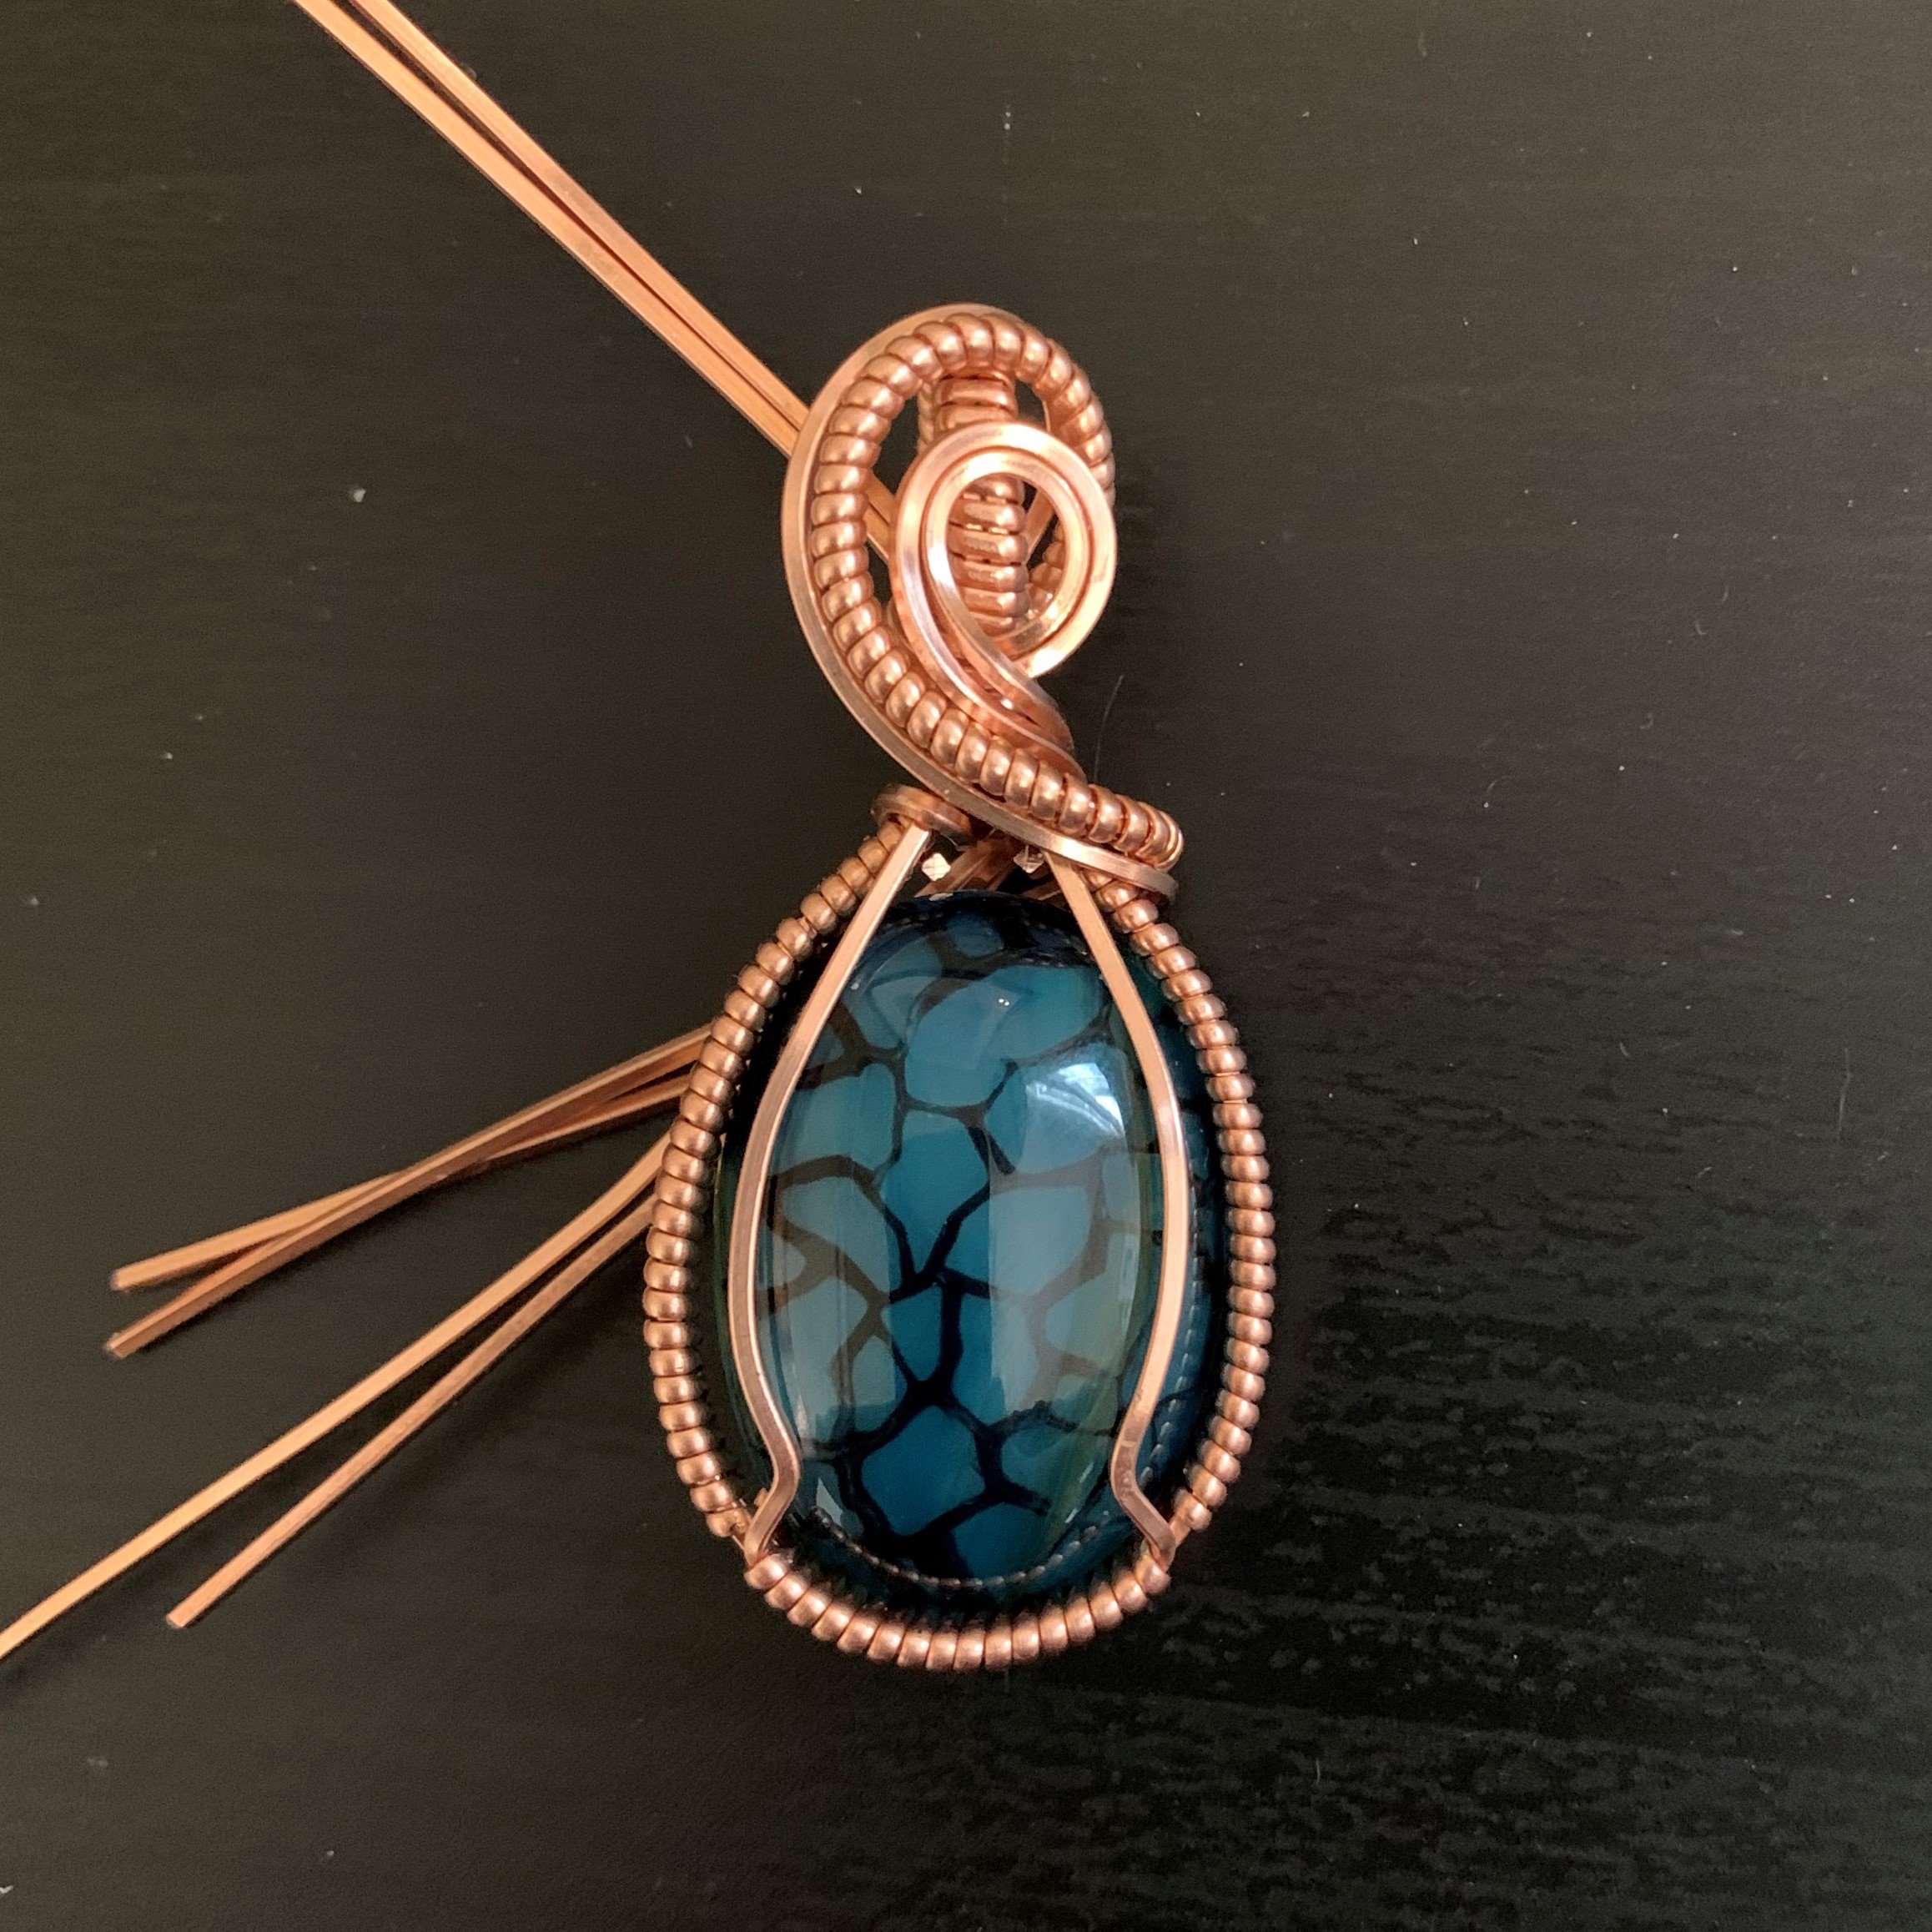
Now that you have created the anchor, you will create the frame for the stone. The top of the frame, where the stone will sit, should be oriented so that the anchor loops are pointing straight upward. See the photos below.
5. Leave some space below the 1” space you marked with the sharpie and make a bend in the frame wire. This space can be as small as 1/2” or as much as 2” depending on how far down the spine of the book you want the stone to sit.
6. Shape a frame for the stone you are using. The bottom of the frame should peek below the bottom of the stone, and the upper part of the frame should be a good rest for the back of the stone.
7. Hammer the stone frame. This step both hardens the wire to provide rigidity and flattens the round wire to allow easier wrapping later.
8. Use the 6” length of 20ga half round to bind the frame together. Remember which side is “up” that the stone will sit on. If I were making this particular design again, I would probably use a 12” length of half-round and leave a long tail on the top of the frame to use later in step 15.


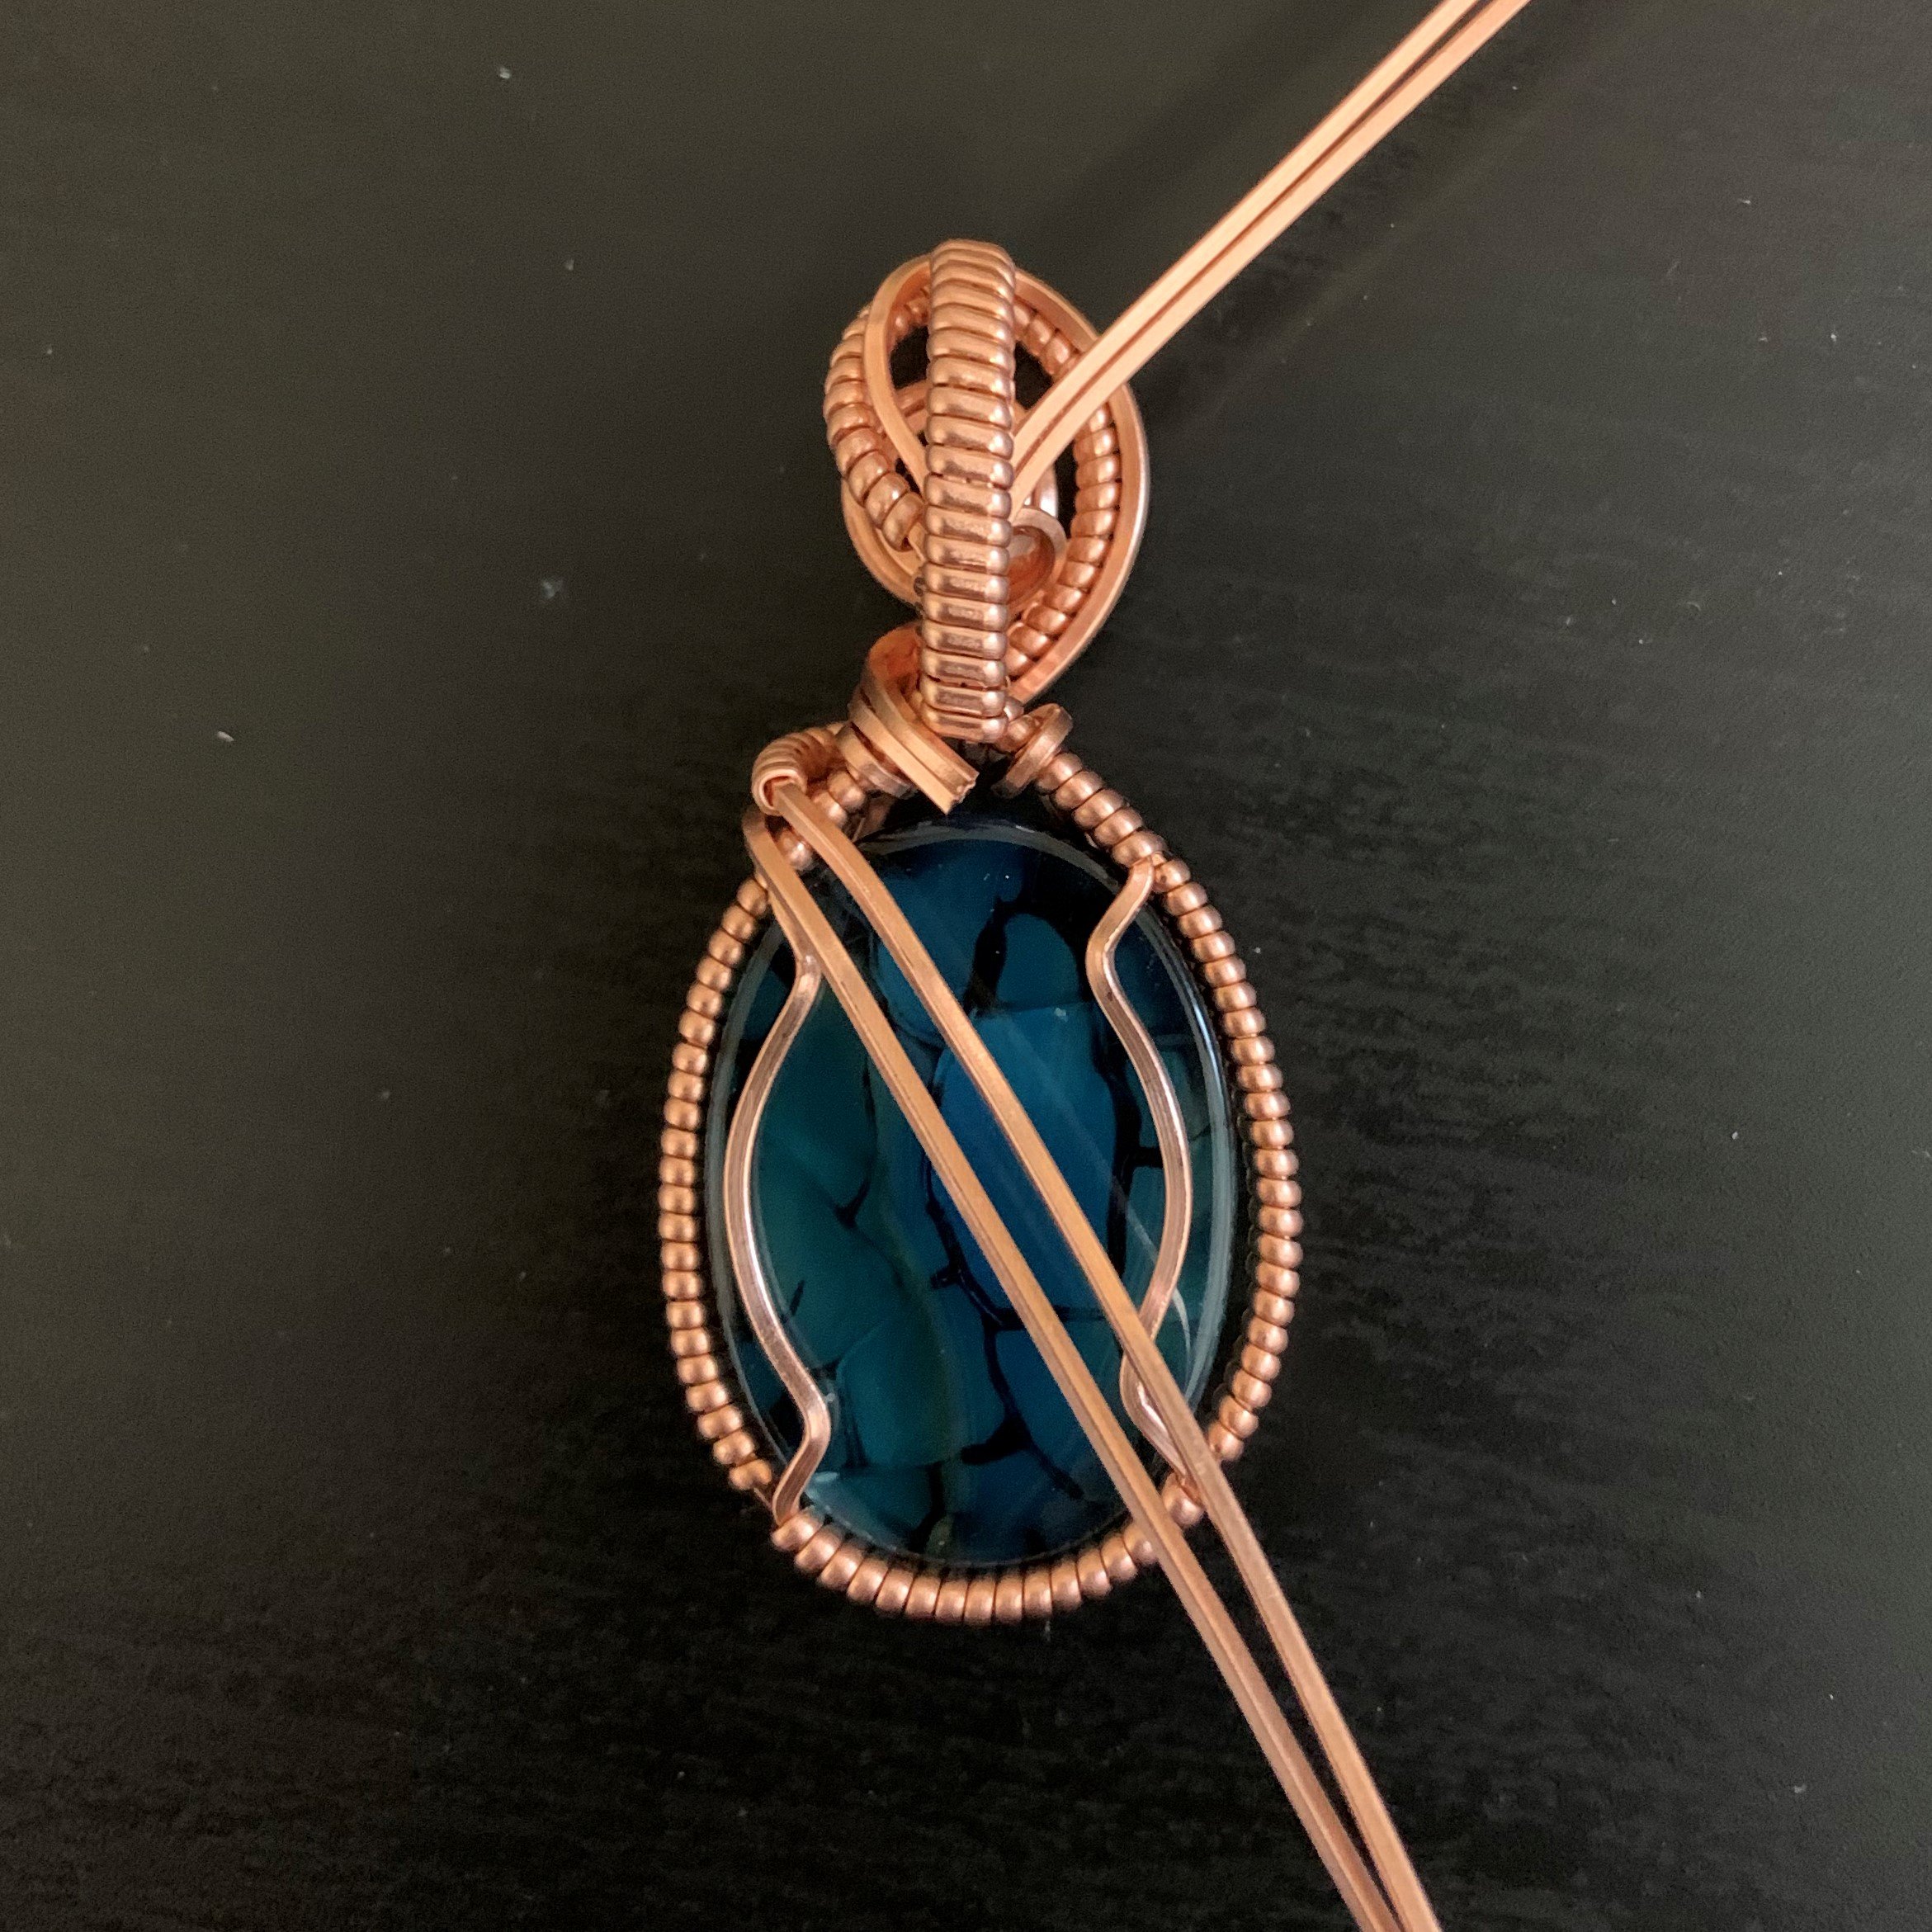
Next, you will create the setting for the stone.
9. Use the 3 lengths of 20 ga square wire and bind them tightly with the 12” piece of half-round 20 ga wire. Wind between 4-8 times around. More loops will be added in a later step, so don’t go too far. For now, both ends of the half-round wire should be pointing down.
10. Shape the setting in a U shape around the stone.
11. Place the shaped setting onto the bottom of the frame, then continue wrapping the half-round wires around both the frame and the setting, securing the bottom of the U shape into place.
12. Wrap an equal number of times around each side, flatten the wraps with pliers, and end with both half-round wire ends pointing upward. If you want to trim these ends, you will only need 3-4” to finish the wrap later.


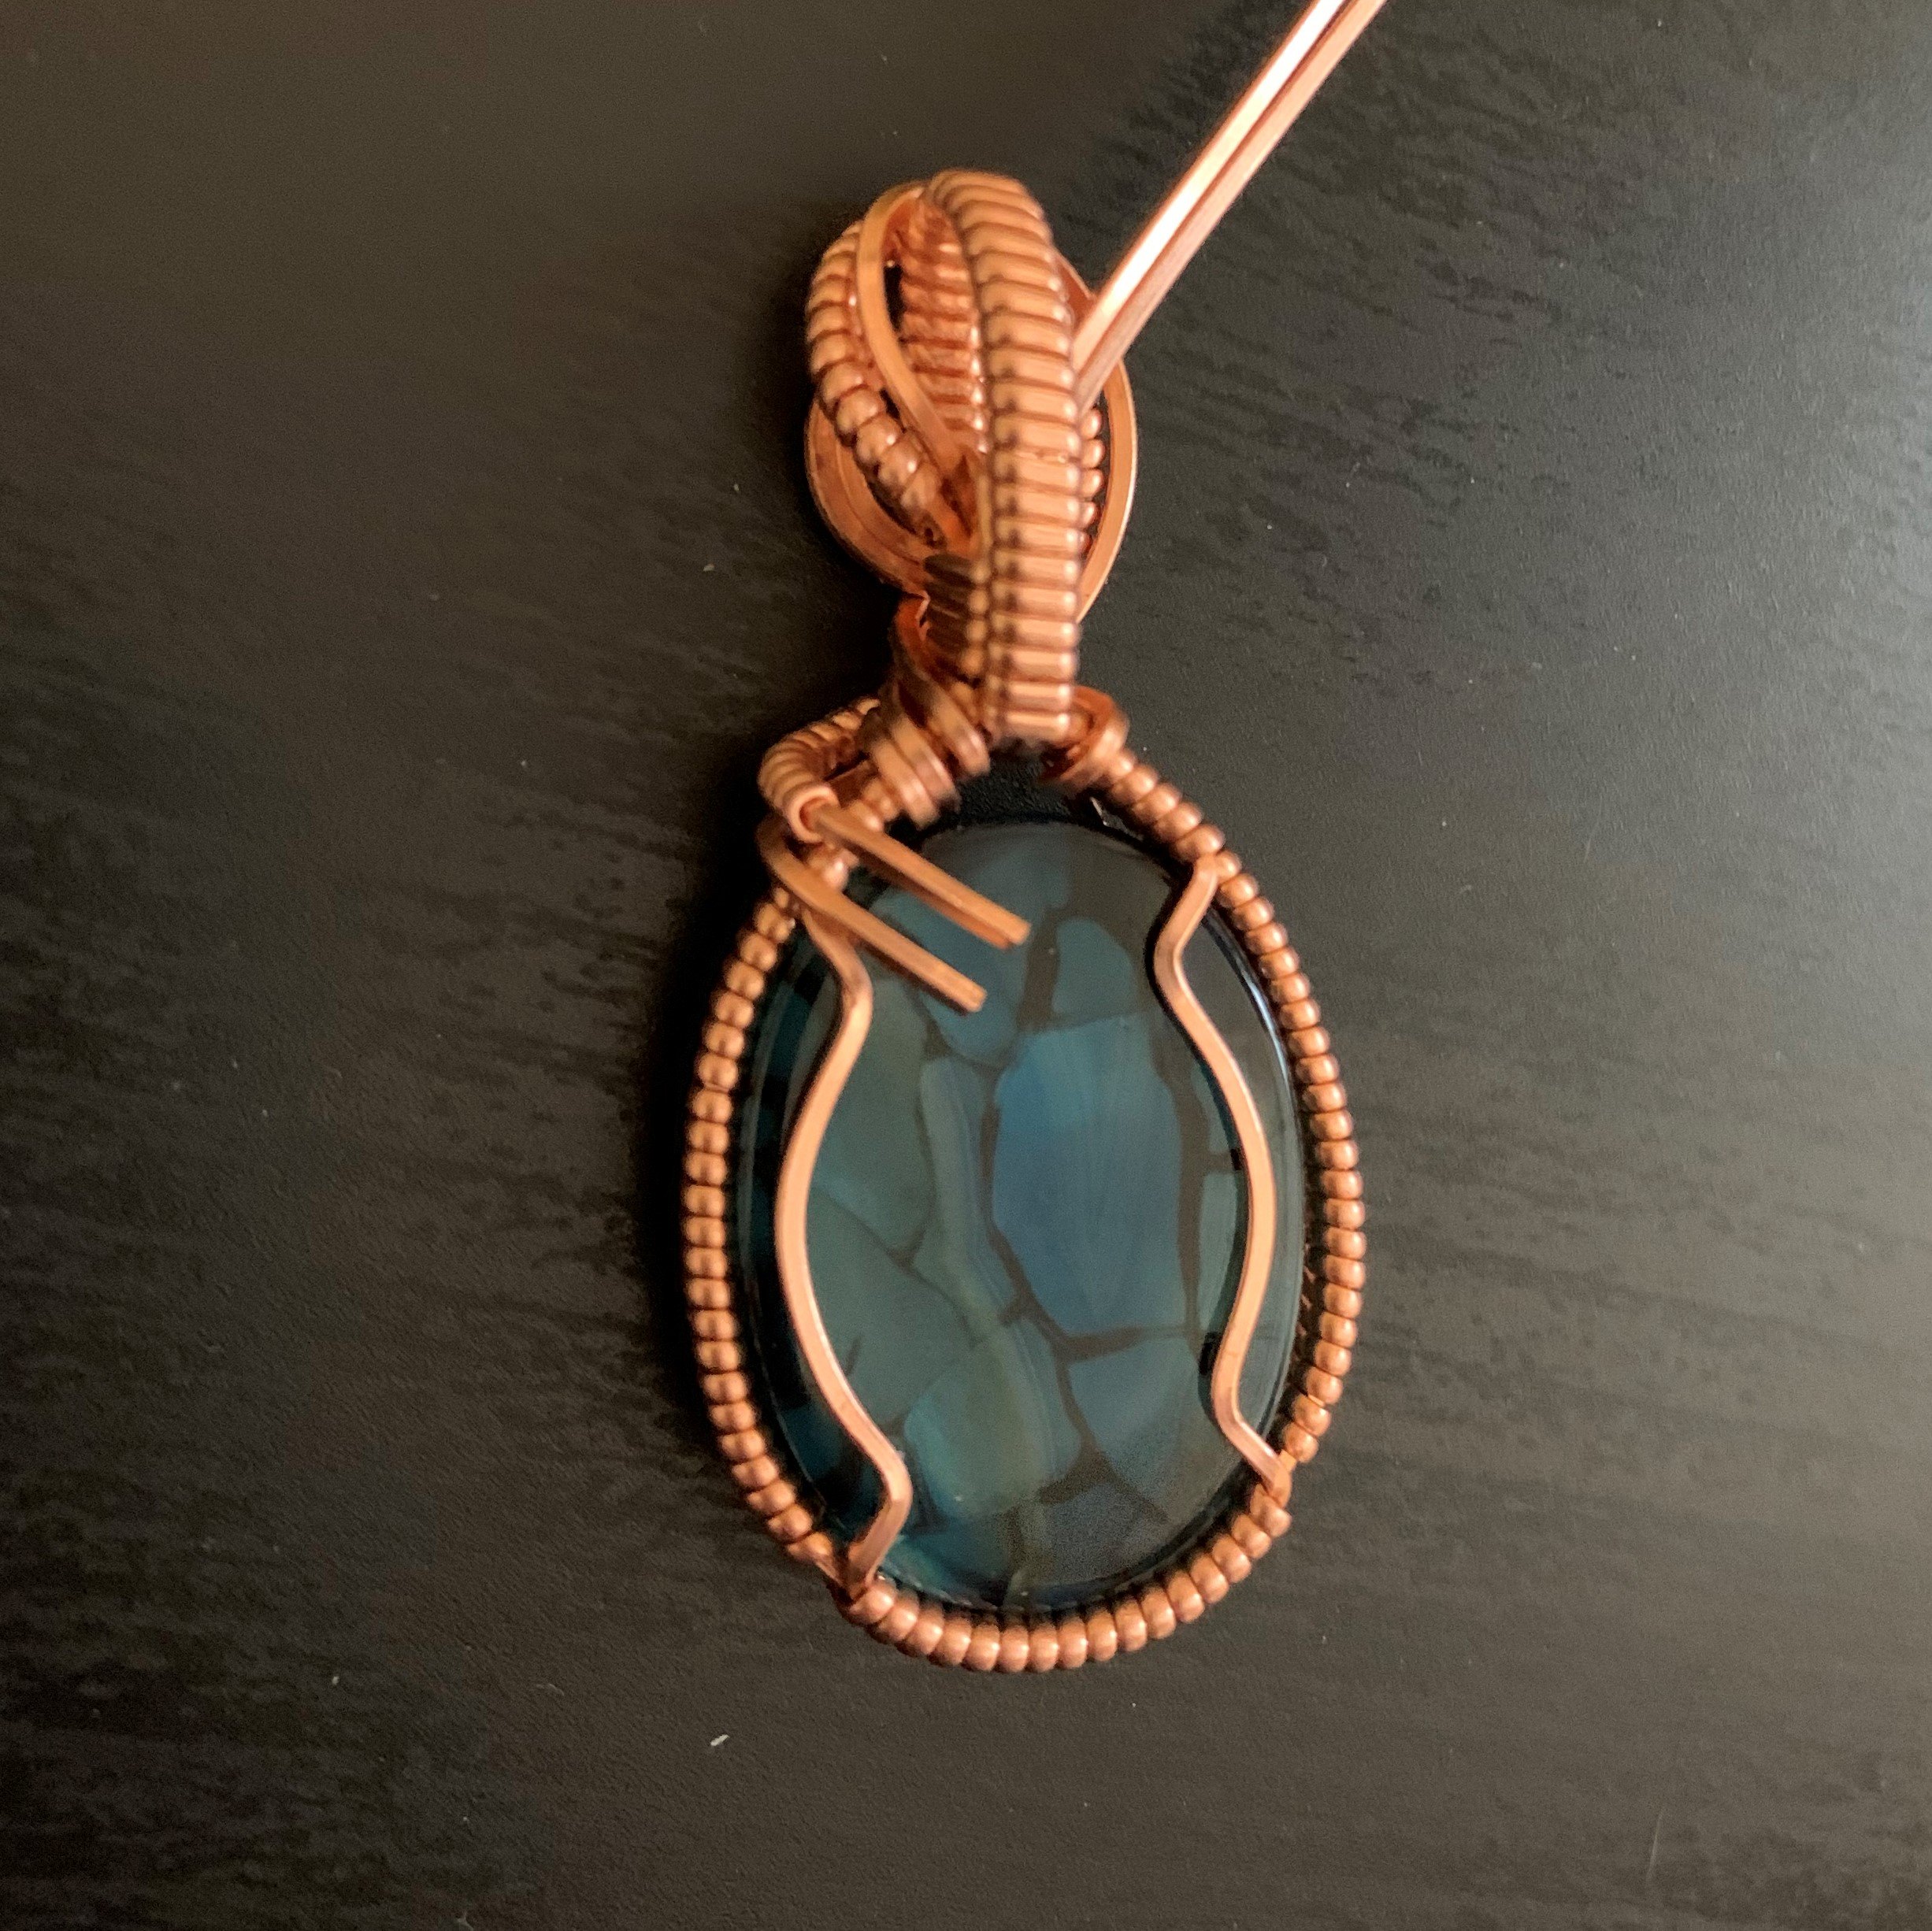
Time to set the stone!
13. Place the stone in the U shape of the setting, which is now secured to the frame.
14. Bend the three setting wires around the stone so they meet at the top.
15. Use the 9” length of 20ga half-round wire to bind the six setting wires together with the frame wire. I typically wrap a couple of times around just the frame wire to anchor the wrapping wire before wrapping around all seven frame and setting wires. If you thought ahead during the design phase or step 8, you might have a wire already attached to the frame that you can use. During this step, you will want to keep the six setting wires organized and straight. Use pliers to flatten and tighten the wrapping wire as needed.
16. After a few wraps around all seven wires, pull the six setting wires forward and out of the way, then continue wrapping up the frame wire at least 3-4 times around or all the way up to the first Sharpie mark.


Arrange the wires in preparation for creating the decorative swirls.
17. Separate the three setting wires on the sides of the stone, pulling the top wire up over the curve of the stone to secure it in place.
18. Separate the tops of the six setting wires: front two to the right, middle two to the left, back two to the right. You can do this the opposite direction, of course, but the idea is to alternate.


Time to twirl!
19. Bend the front two wires down, across, and create a loop. Your thumbs are the best shaping tool for this step.
20. Place twirls, swirls, and loops wherever you want. Get creative! In this one, I used the third (backmost) set of wires to create more volume at the top of the stone rather than covering more of the stone-front with loops.


Secure the loops to the frame.
21. When the wires are placed how you want them, trim the ends with your flush cutters. Cut the ends of the wire at an angle to create a tapered effect. This creates nicer swirl ends than a blunt, square end would.
22. Use the tips of your round-nose wire to create very small loops. Bale-making pliers with a 2mm tip and a 3mm tip also work well for creating different sized finishing spirals.
23. Use the ends of the half-round weaving wire that was used to secure the setting to the frame to secure the finished spirals to the top wire of the setting. I typically thread the wire through to place it, then pull it tight with my flat-nose pliers. When doing this, be sure to hold the frame wire in place because it is easy to pull it out of position. Continue a few wraps up the top setting wire to secure it.
24. Do the same on both sides. You’re almost done!


Finish the bookmark.
25. Remember those two sharpie marks 1” apart? Make a 90 degree bend at each one, creating the bookmark shape.
26. Hammer any unhammered portions of the anchor wire that goes inside the book.
27. Adjust the shape as needed to straighten the anchor wire and top portion of the bookmark.
28. Finish and polish the bookmark as desired. I use liver of sulfur, a brass brush, and a sunshine cloth to polish.
29. Pick up a good book and start reading!


